


Making of Project 8143: From Rust to Resonance
This is the story of how old car brake discs, a leaky plumbing pipe with a bit of engineering turned into a pair of elegant, sleek & sturdy pedestals for my speakers.
"I am quite picky about the sound quality and acoustics.
Most of the time, I watch movies only if they have good sound.
You will probably never see an iPhone in my hand but
the sound in my house will be never of cheap quality."
Part 1/2
It all began with…
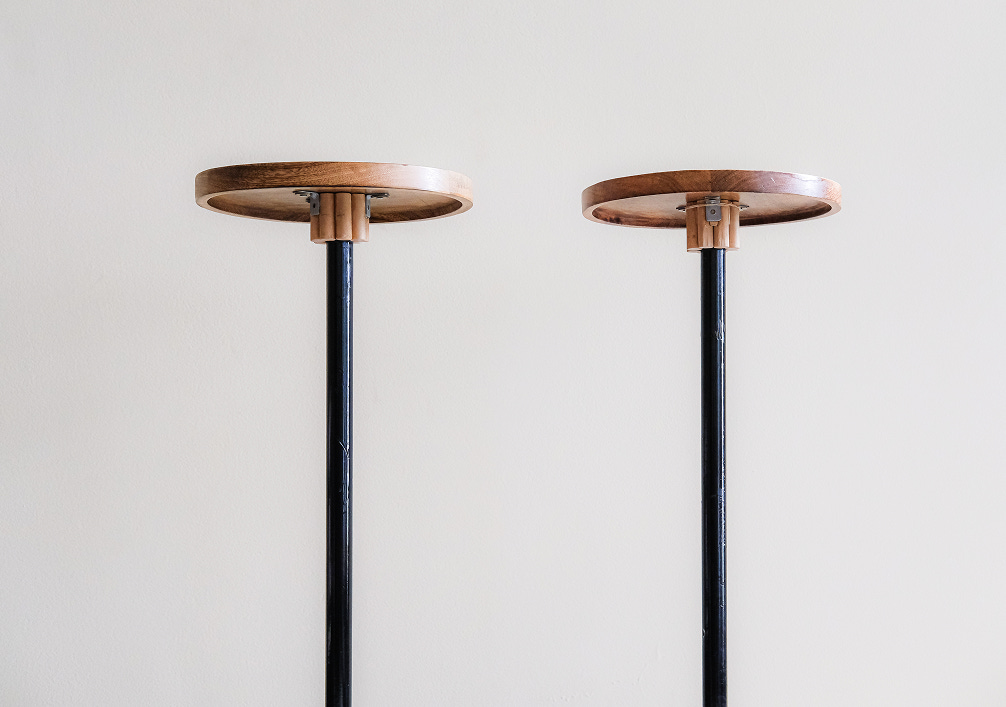
…a nagging feeling that my 10-year old Q Acoustics speakers weren’t positioned for right convergence. Either perched awkwardly on a table or shoved next to the tv, they lacked the right placement to deliver that full, rich sound. I needed a proper stand—a pedestal, is sturdy yet slim enough not to overwhelm the room. Buying one off the market wasn’t even an option; the quality-versus-cost compromise just didn’t sit right with me. So, I decided to build my own.
The Spark
One Sunday morning, my wife and I were sipping tea. I noticed her Ikea desk which we had assembled a while ago and it hit me: you can buy those legs separately. Then I noticed a circular wooden tray on our center table. A light bulb flared to life above my head. What if I paired these two together, and figured something out for the base, a faint spark of possibility got me hooked!
I started sketching this idea. Here’s the initial sketch—
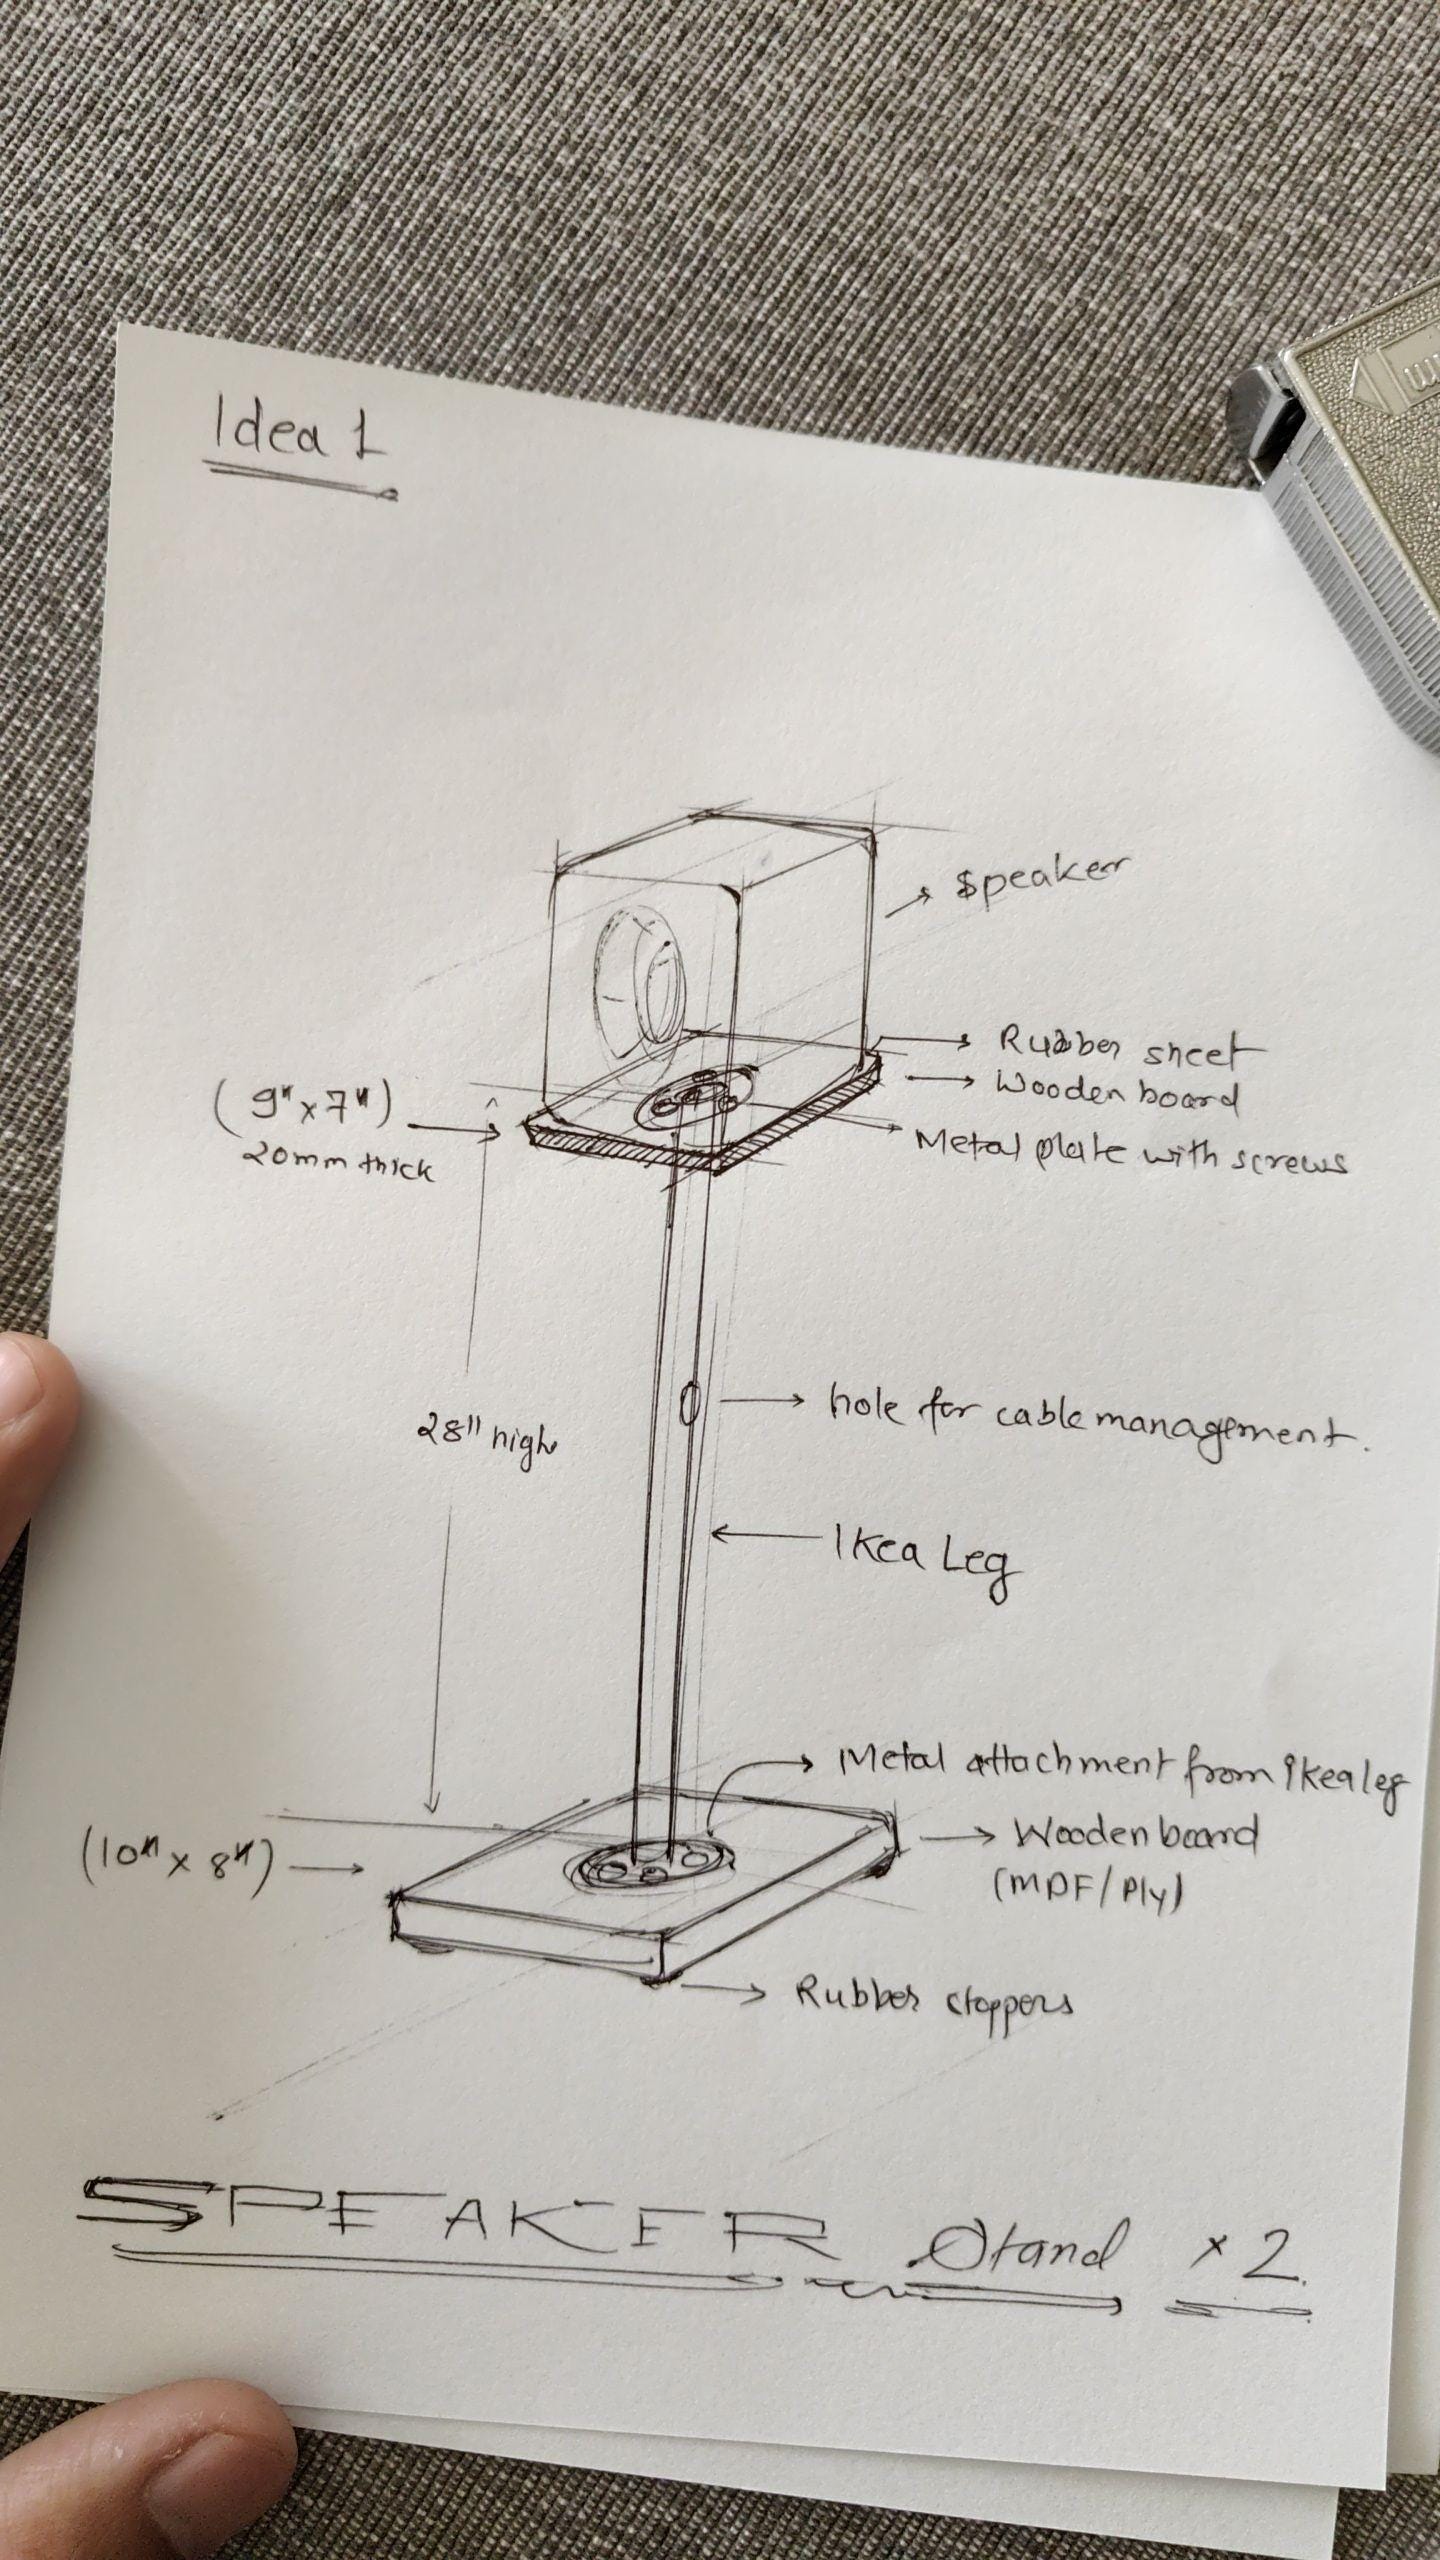
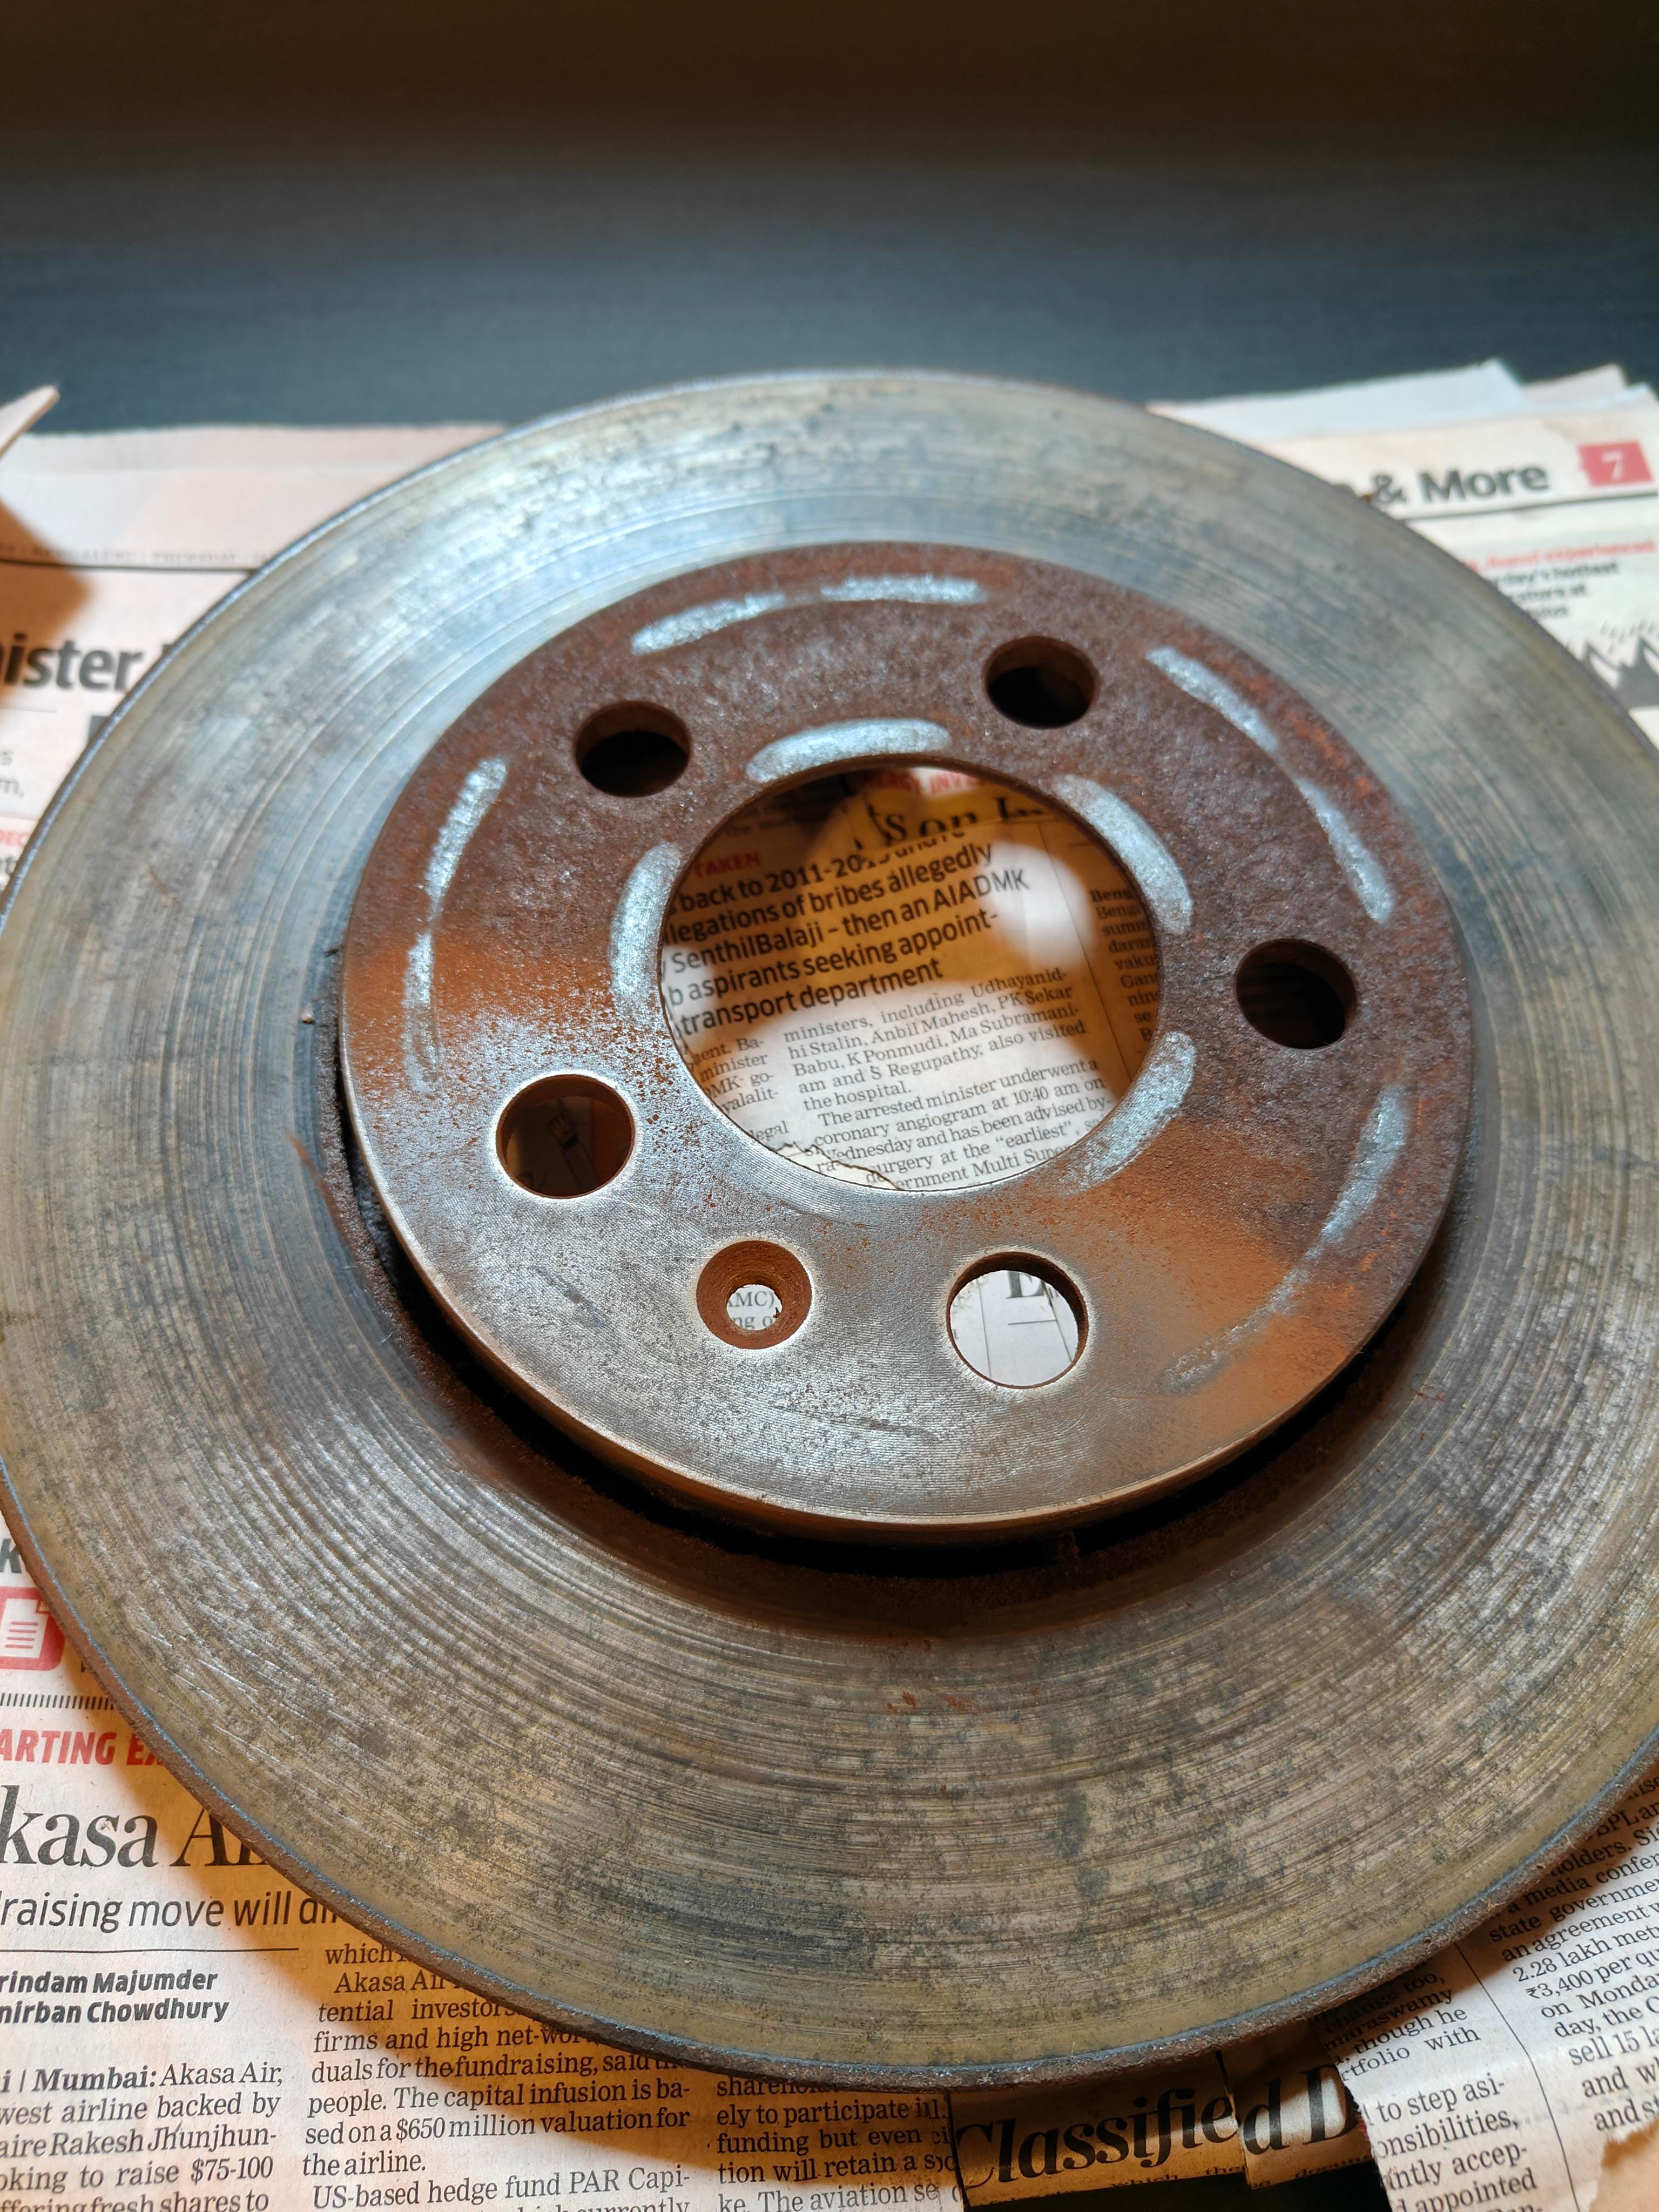
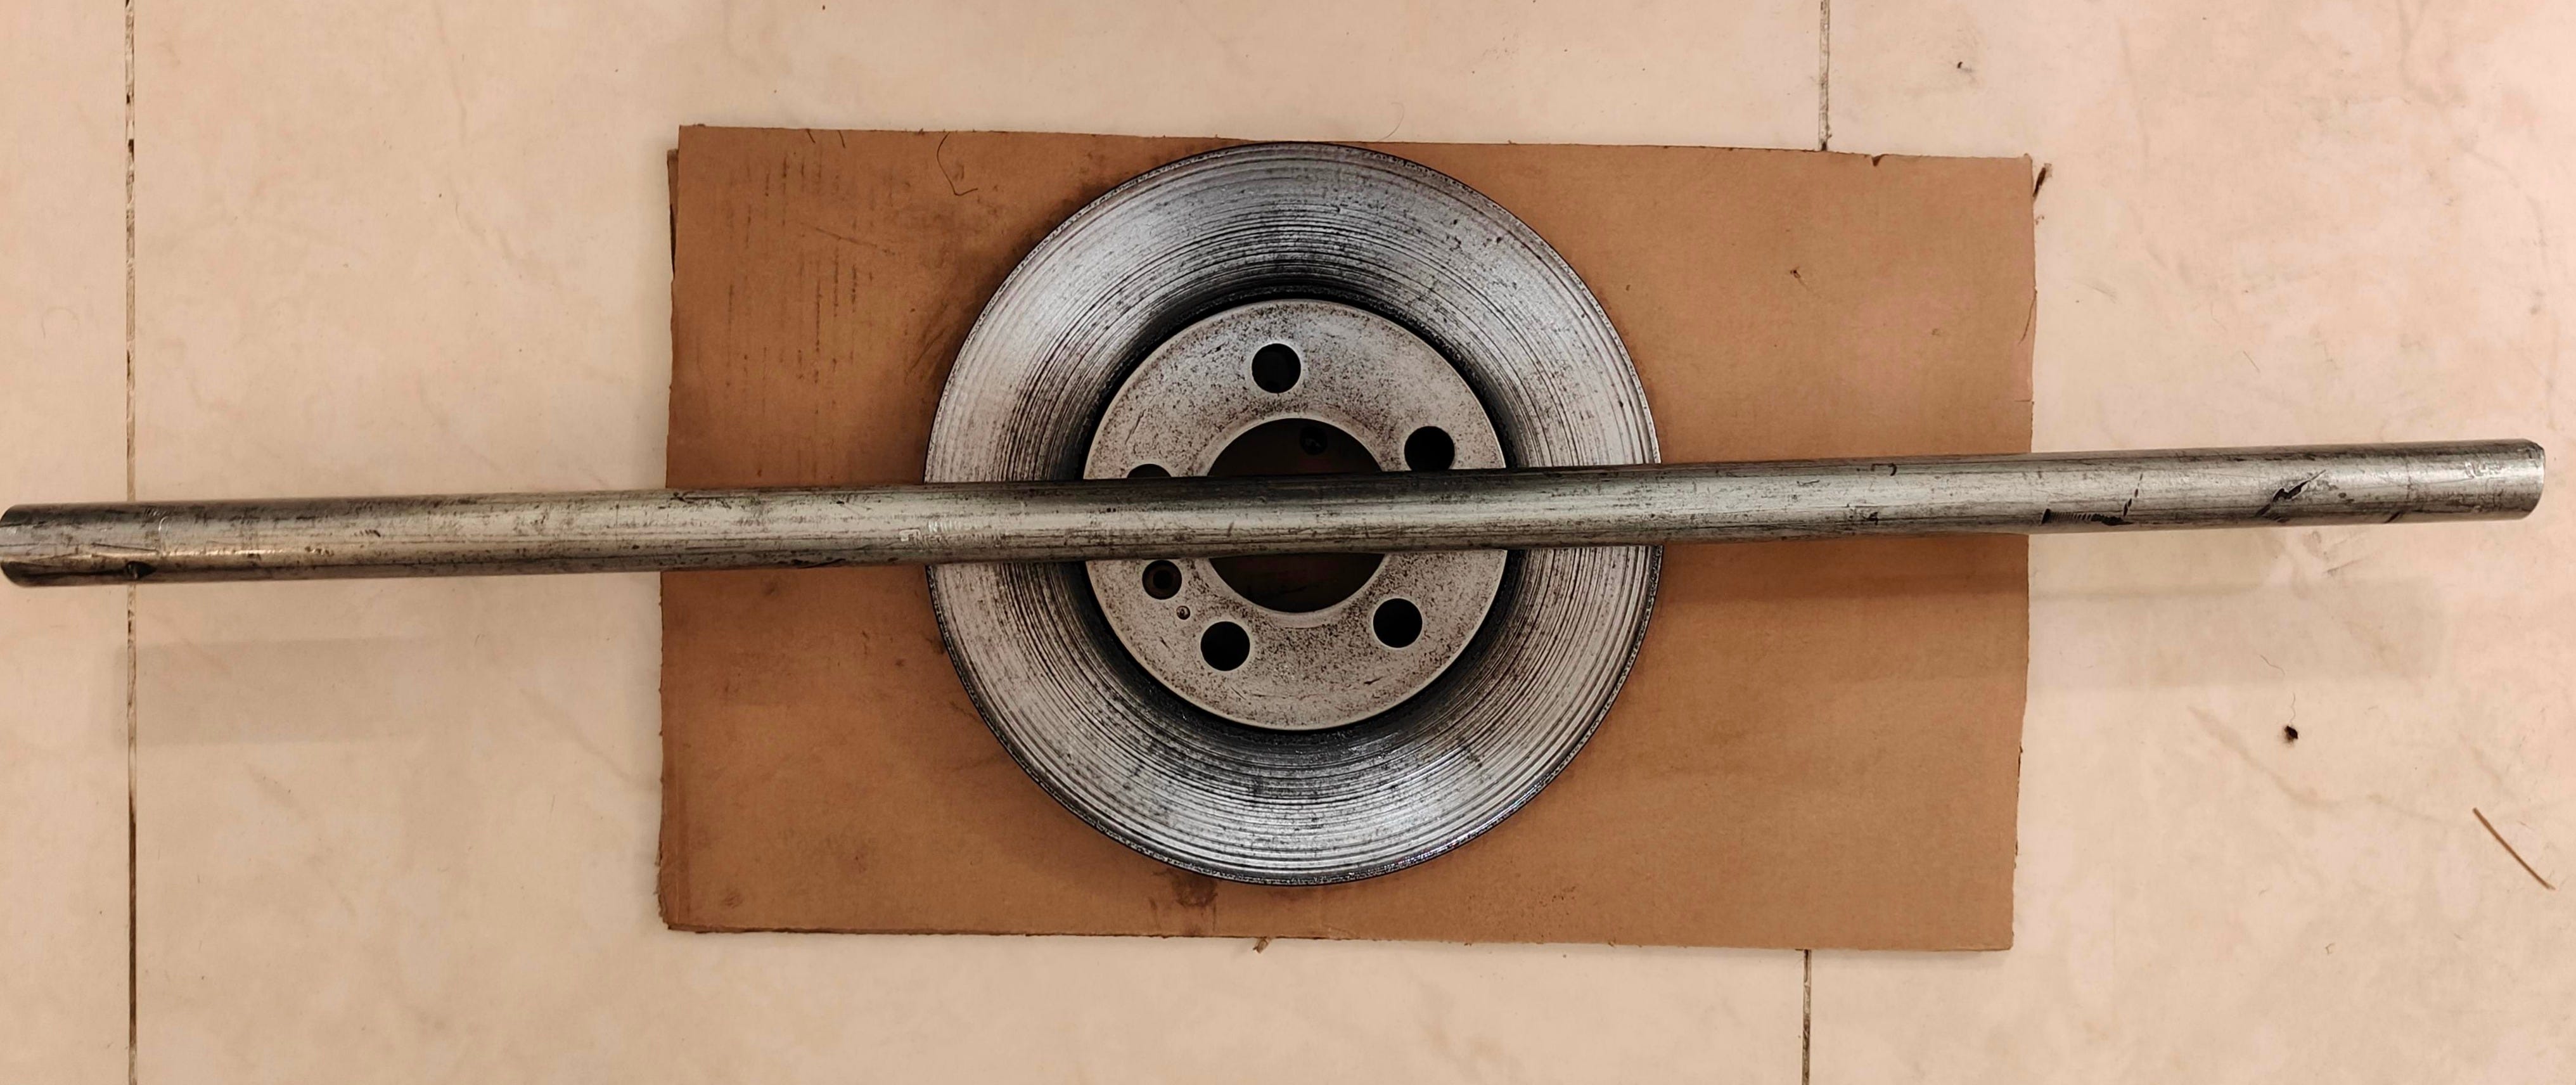
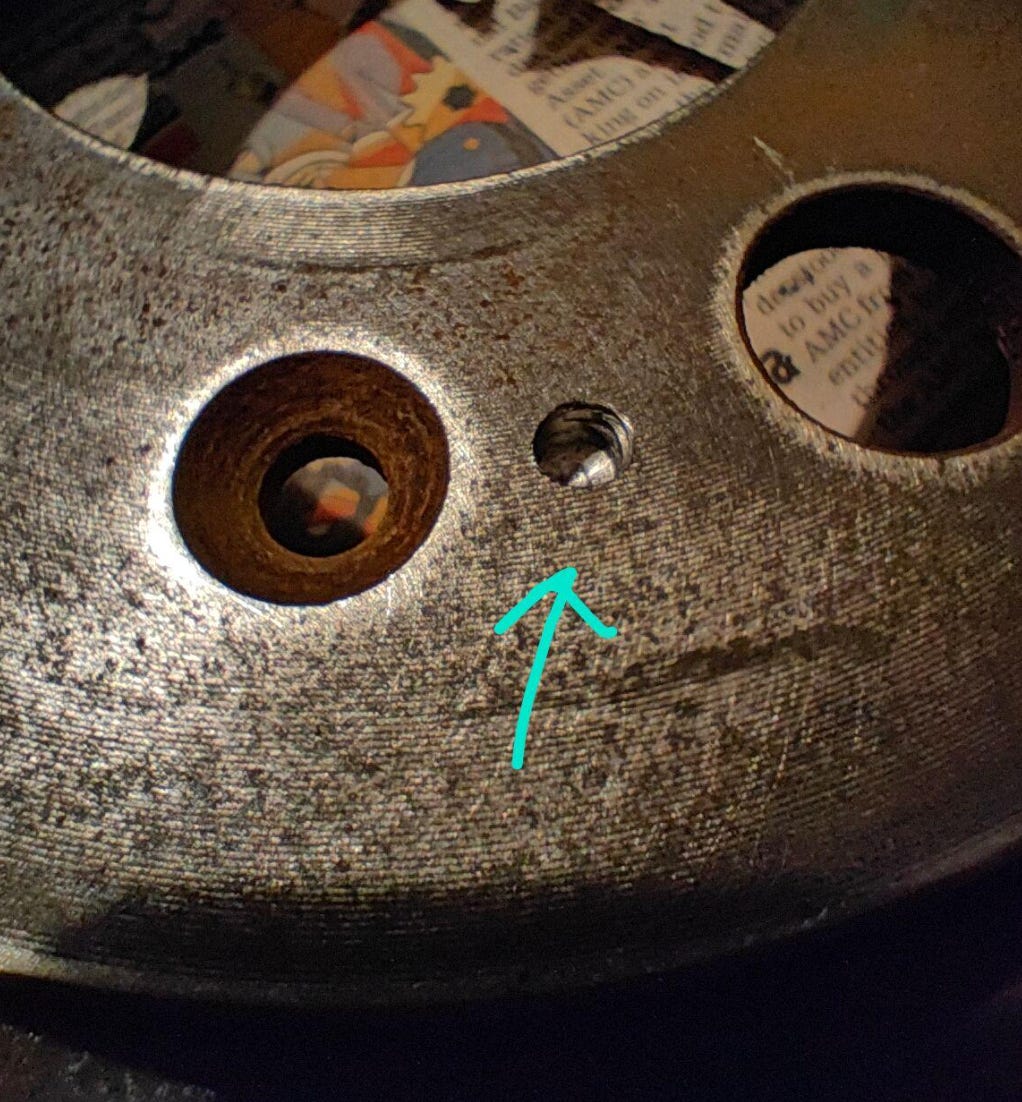
While I was idly mulling over the material for the base, my car went for a service and came back with a set of spare brake discs. These things were heavy, circular, rusted metal discs—each with a decent-sized hole smack in the center. It didn’t take even a fraction of second to realise that this is the base component and I got two of them for “free”.
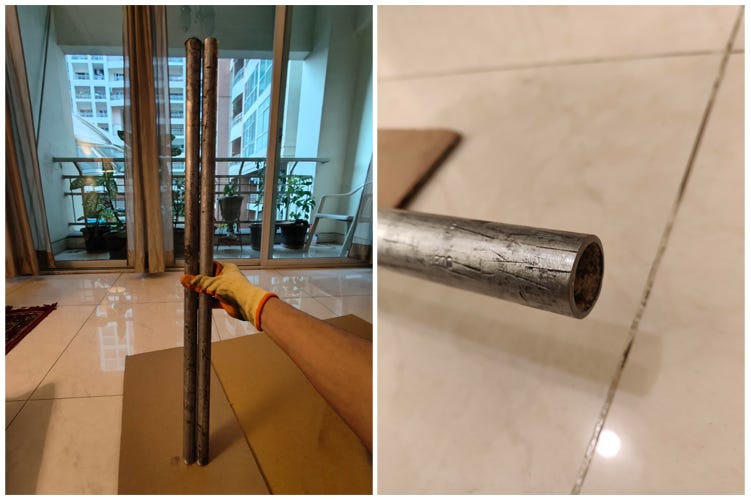
I’d nearly hit '“order” on that Ikea leg(x2) when another stroke of luck— A hot water pipe at home sprung a leak, and after replacing it, I ended up with a 6-foot-long galvanised iron pipe (GI pipe)—25 years old, a bit rusted, dented here and there. It was 25% slimmer than the Ikea table leg but stronger. I had all my pieces: the brake discs to anchor the base, the GI pipe as the spine, and the wooden tray to cradle the speaker. I couldn’t wait—I dove straight into the prototype.
Design Considerations
My living room is already full with historical furniture and the last thing I needed was another clunky piece hogging space.
Thin, sleek, modern yet mechanical/raw, high quality, were some of the initial keywords in my mind but I like sense of floating— a hovering effect, I wanted that feeling somehow.
Also, unlike new age companies with their sealed up design, I wanted it to be able to disassemble for easy shifting, or maintenance. No unibody, no welding, no permanent joints! Nah!
Using these keywords, I began. It meant if this concept doesn’t work structurally, it will be discarded.
Preparing the Waste
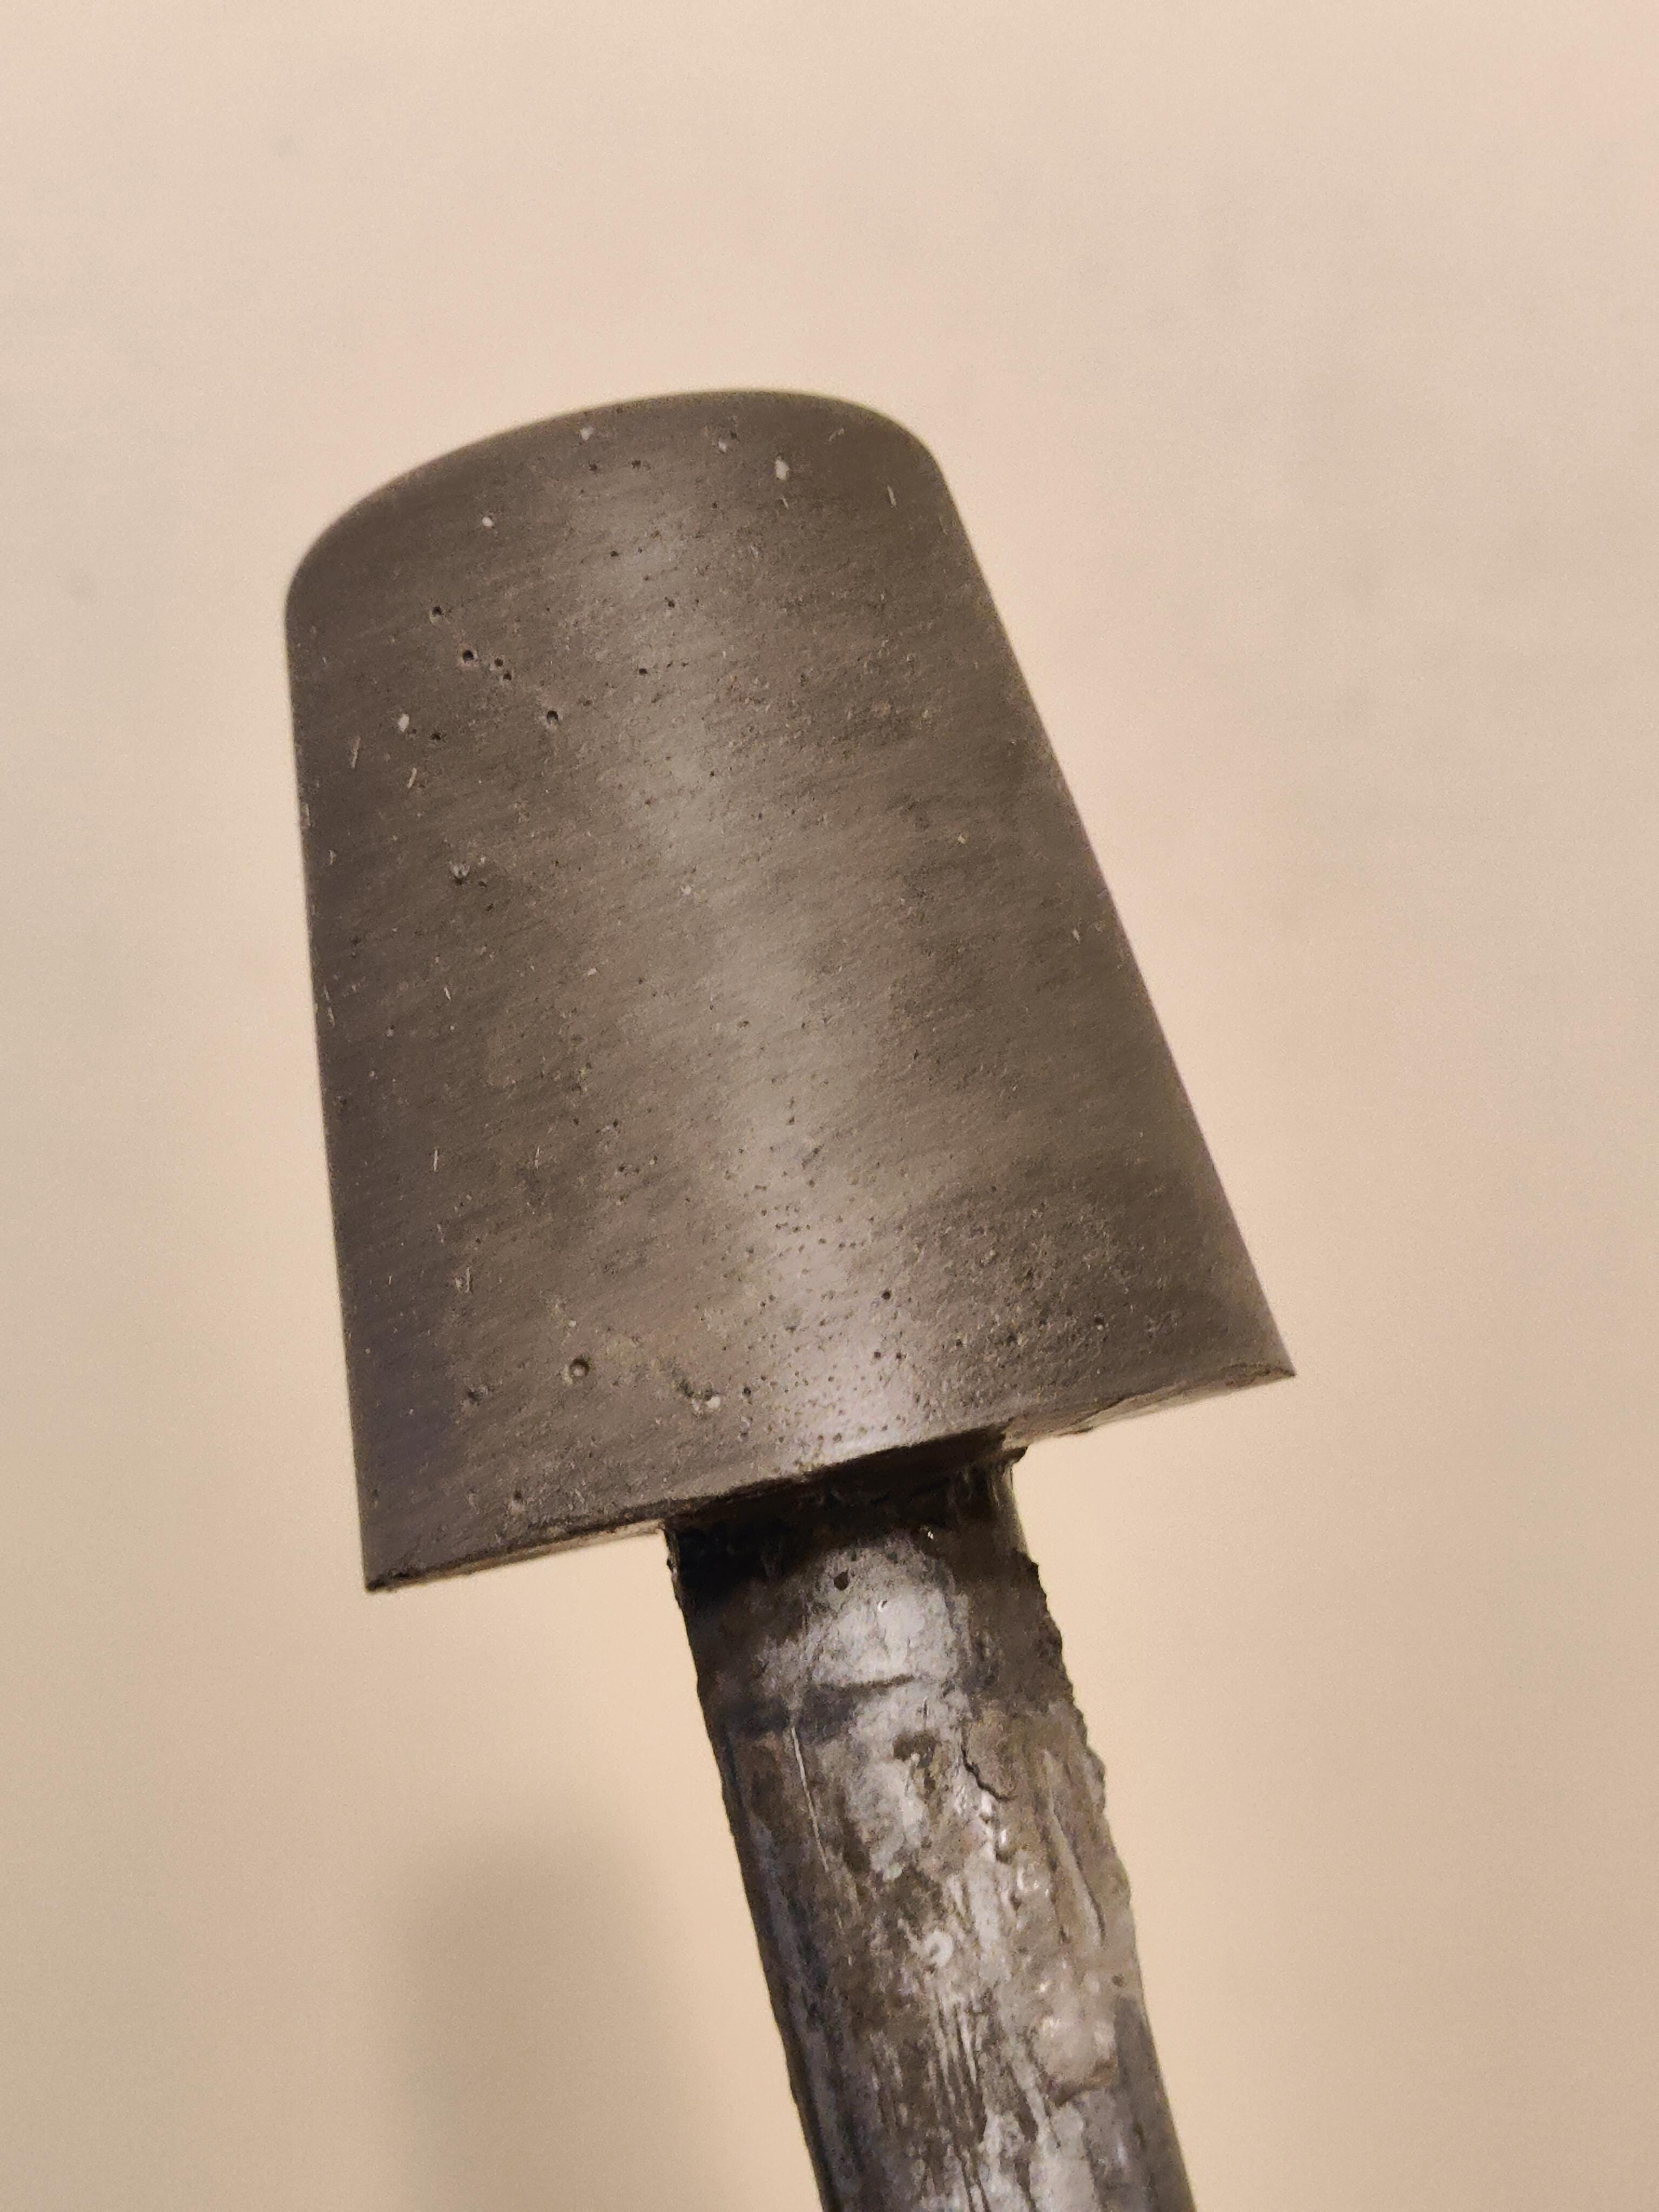
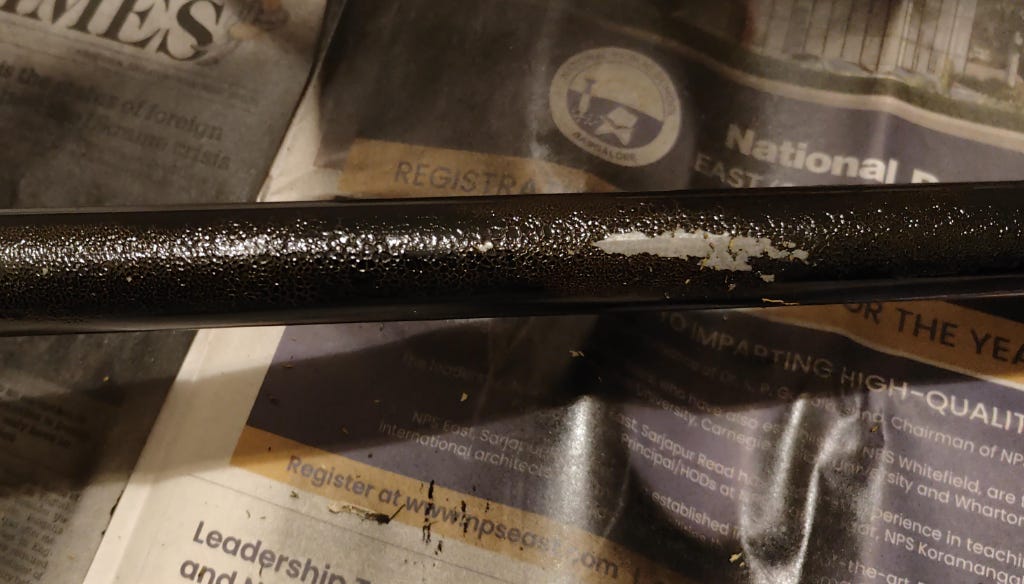
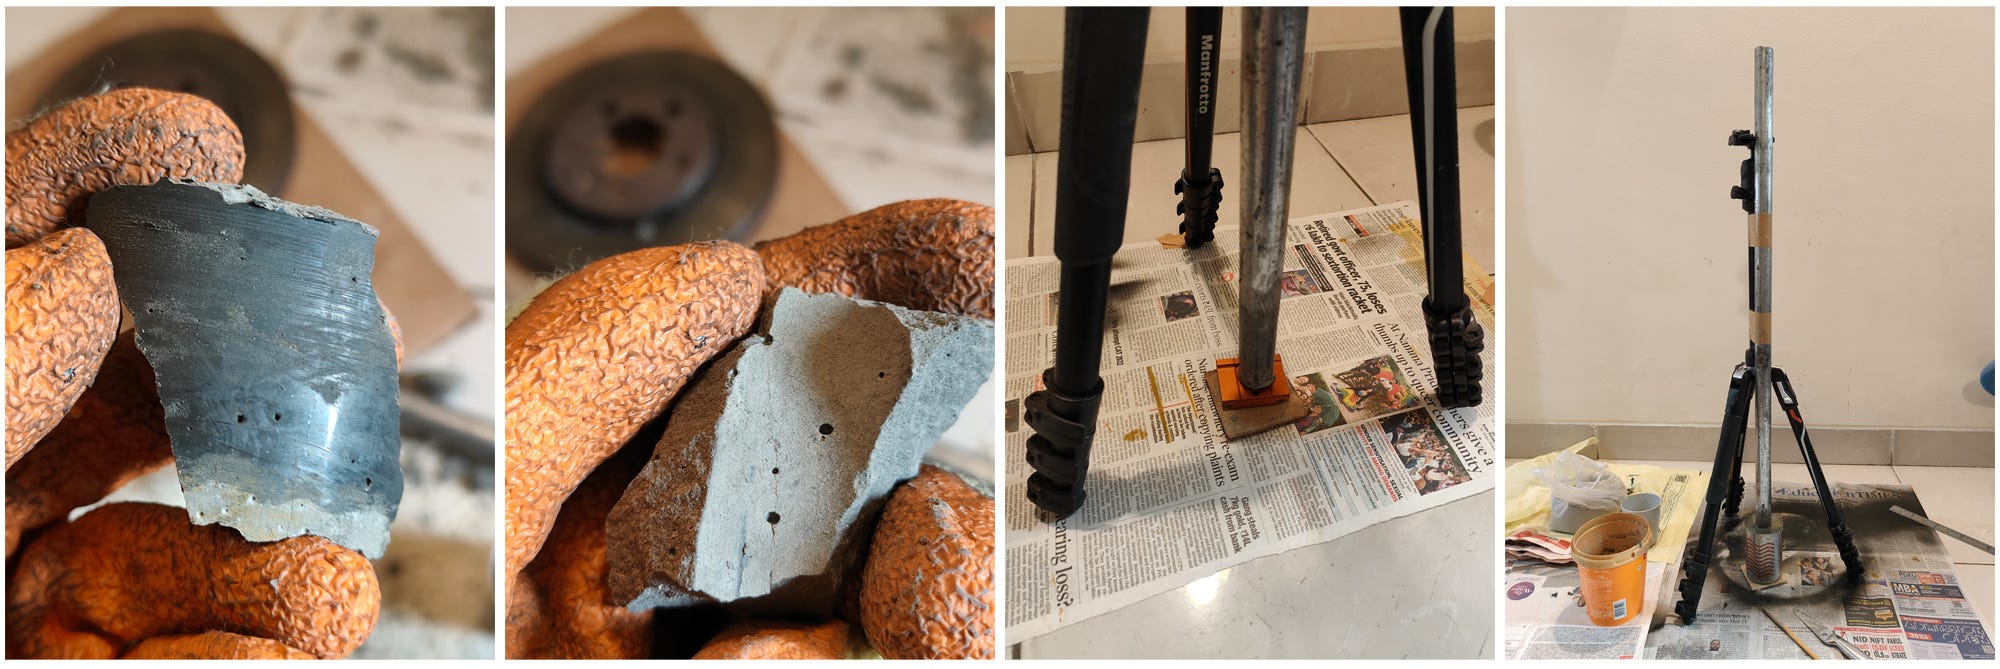
13 years old brakes, and 25 years old pipe were fully rusted. I ran to near by store, got some sand paper, masked up, and began the second messiest part of the process: rust removal. It wasn’t quick— days of scrubbing, sanding, hand gloves ruining, my arms burning, to finally make them shine again.
GI Pipes were strong and it took some serious sweat to precisely cut into two pieces with my basic tool kit.
Engineering the Base: Triumphs and Tribulations
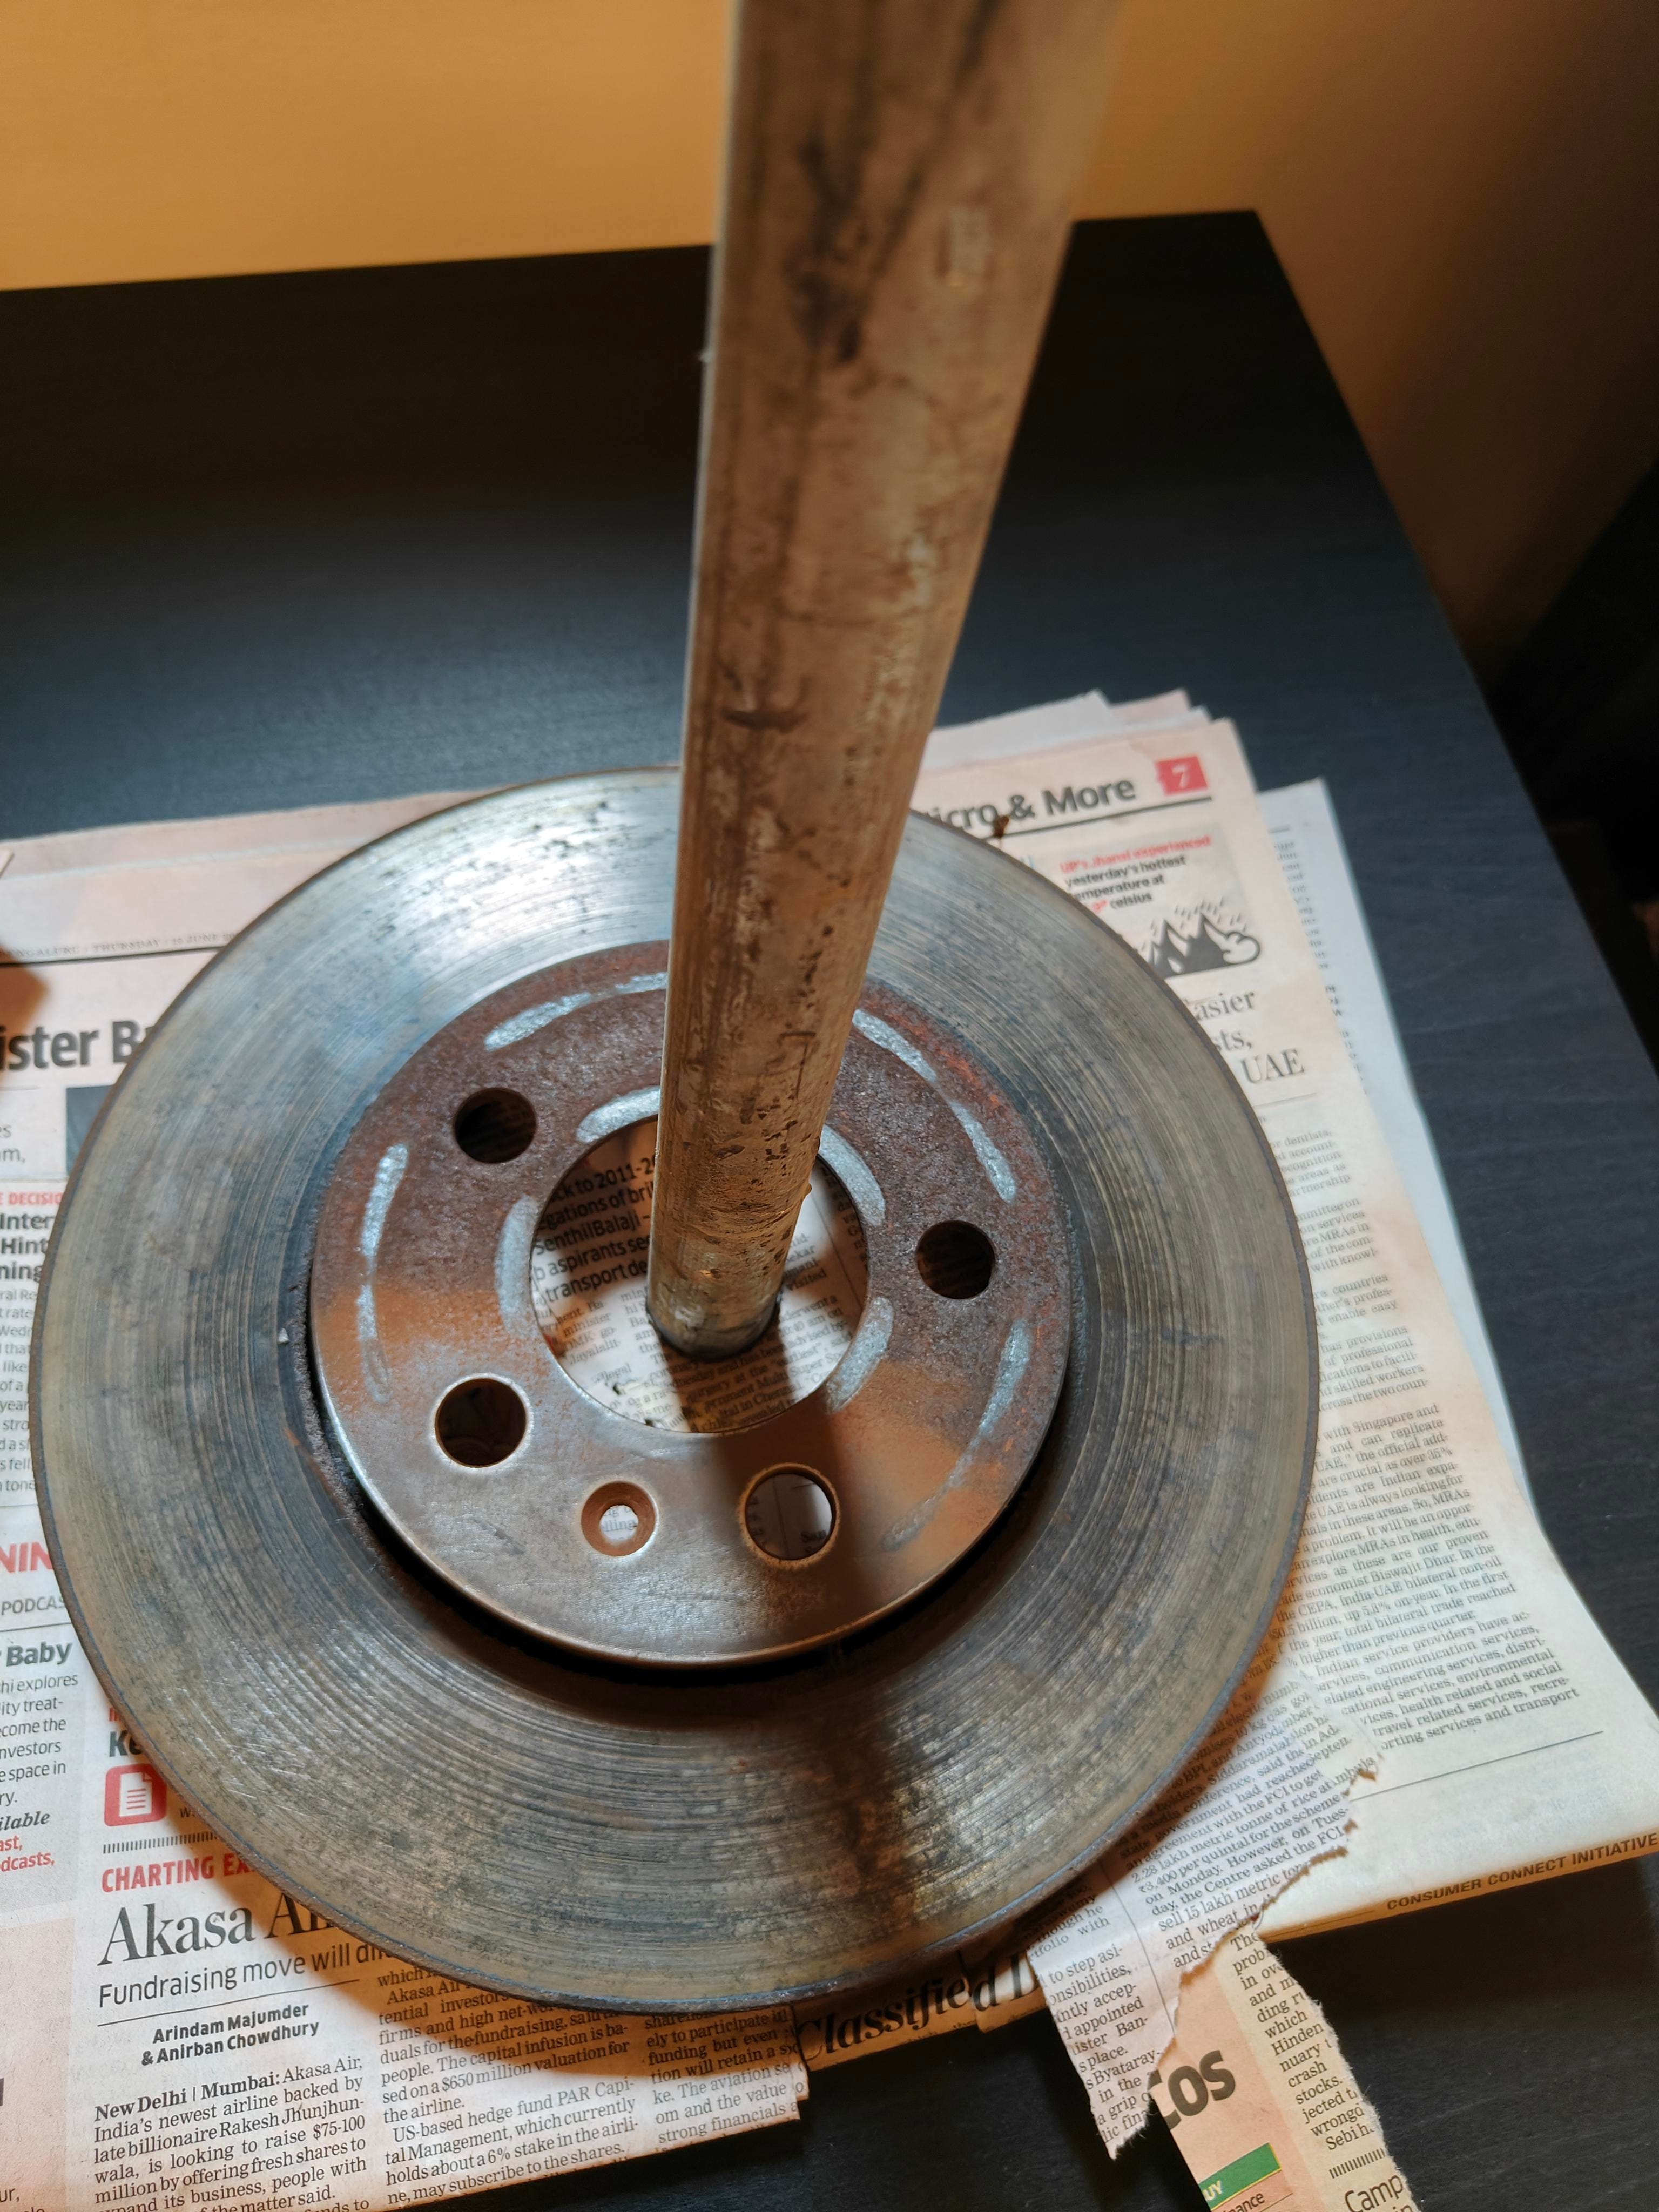
While these two things were being prepped, I was thinking about the next and the most difficult part of the whole build. How do I put these two together? This gap that you see between the pipe and the disc circle, the next few weeks were spent filling it.
The Challenge & Constraints
It had to be straight, sturdy, and strong enough to hold a speaker without tilting—especially if I grabbed the pipe to move it around.
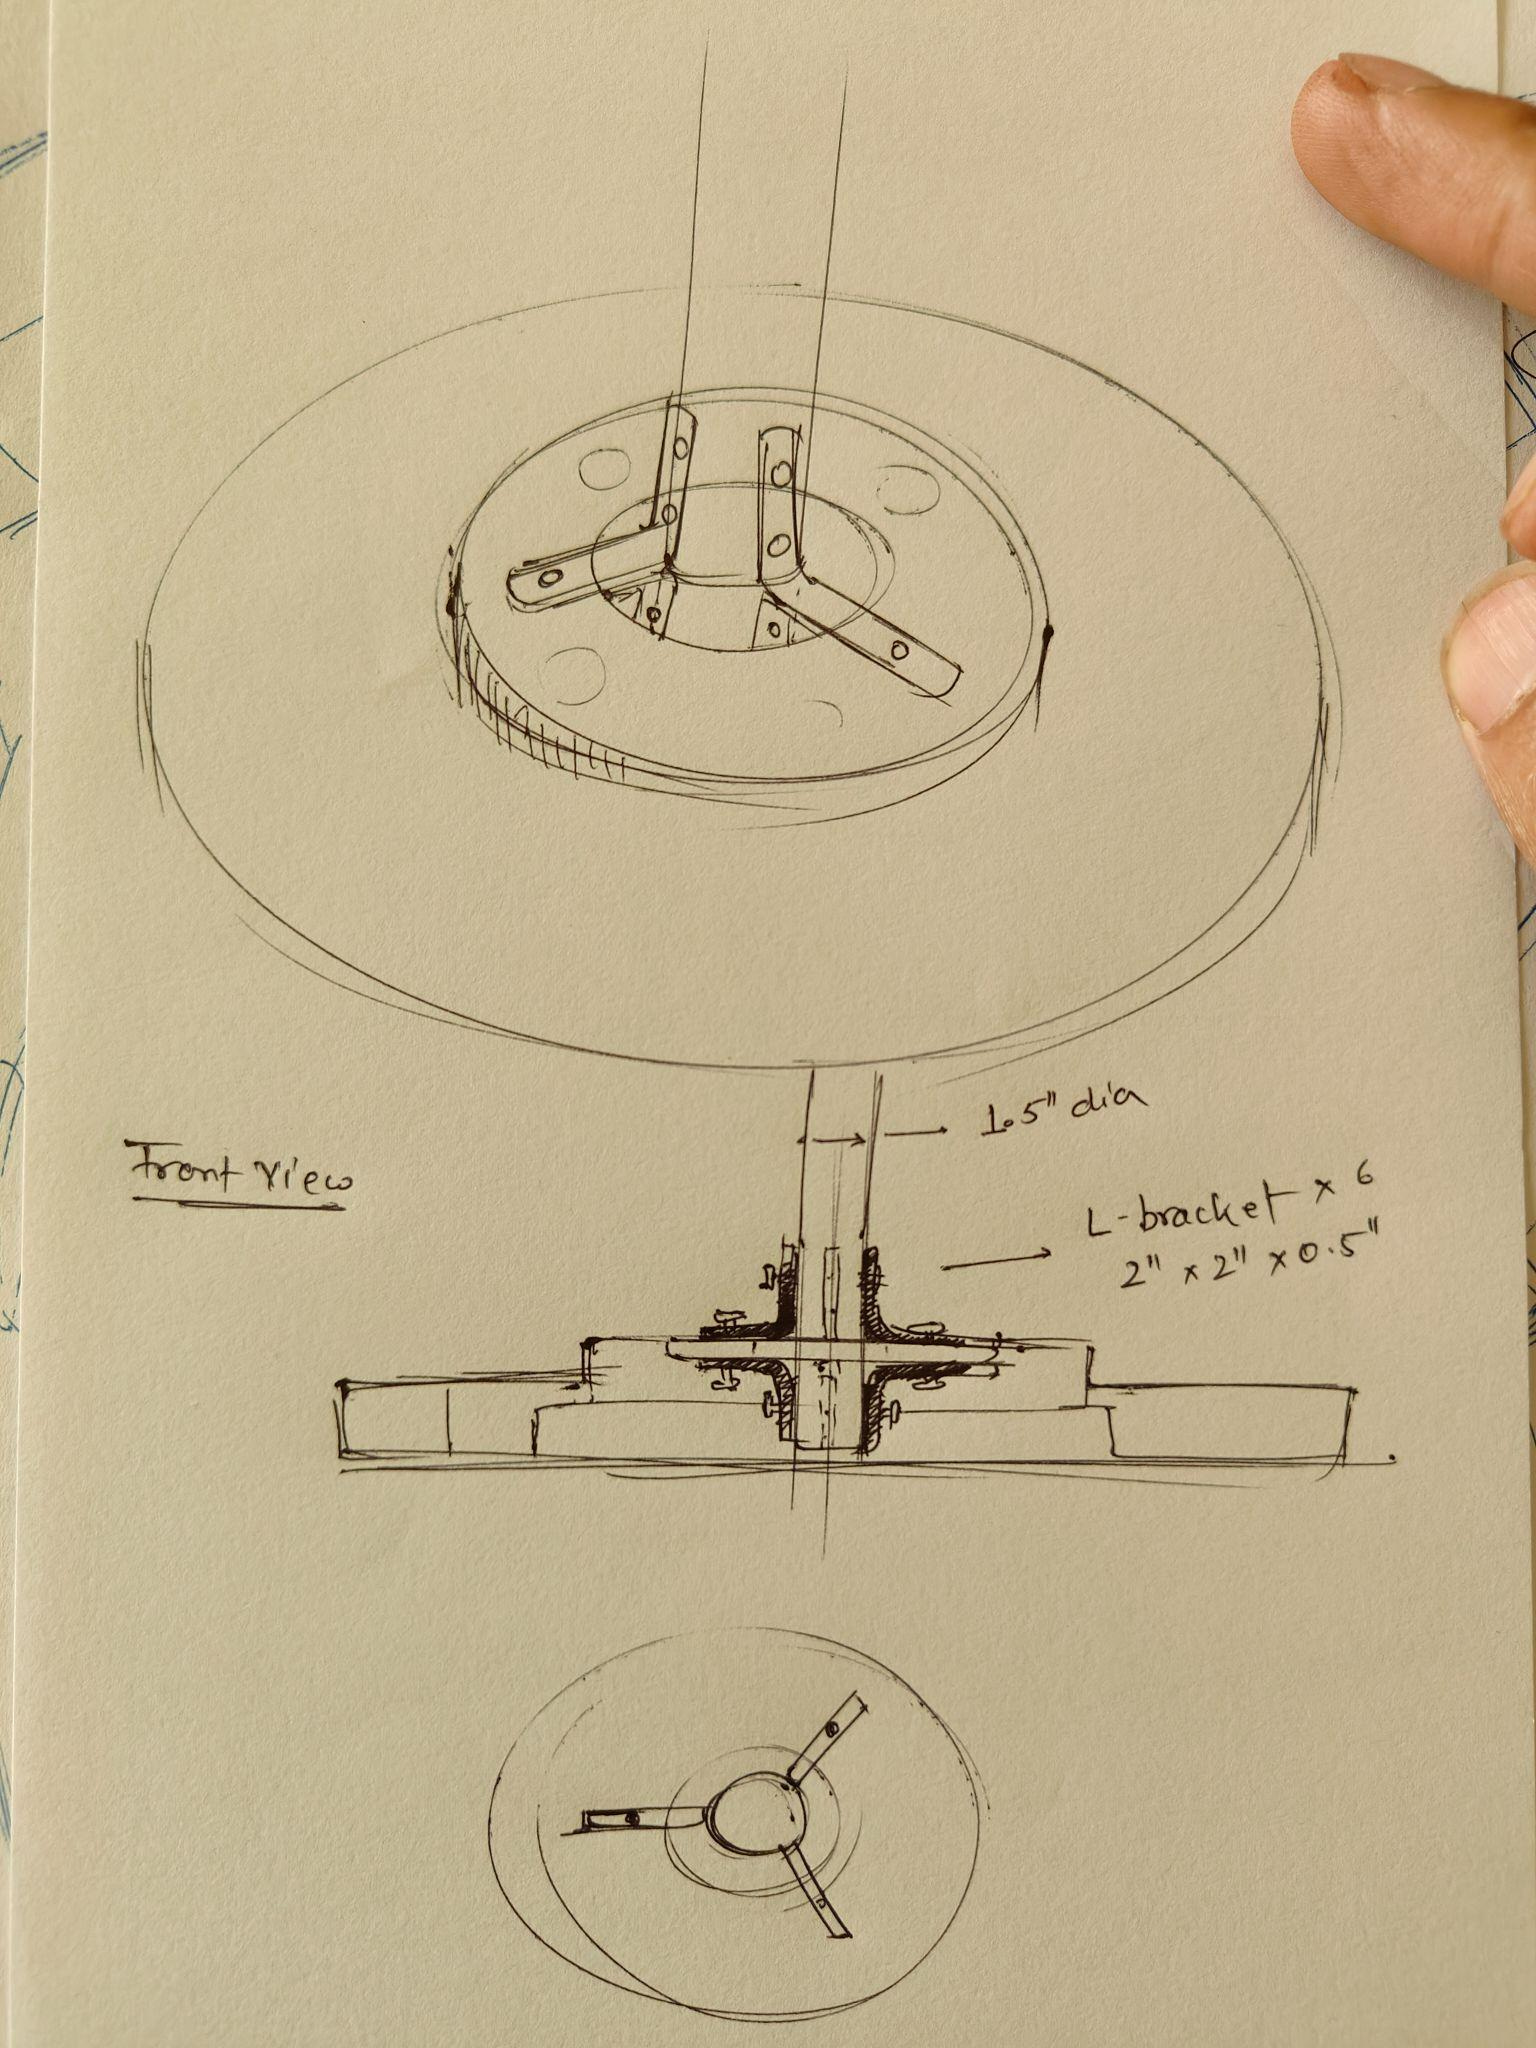
Again, I went back to sketches. My initial idea was to use something like L bracket— maybe three, clamping the pipe to the disc. But it didn’t feel right as there were many flaws with that idea. Precision, durability and finesse couldn’t be guaranteed.
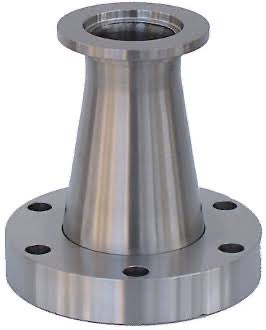
I even looked at getting one of these reducer or a flange in the right size, but I couldn’t find it.
I reached out to my friends at Ather Energy—the sharpest engineering minds I knew who can sort this is in seconds. Their idea was so simple that it blew my mind. Just create a simple cement plug to hold the pipe in and screw it to the base plate using L bracket.
Up until then, I had not worked with cement and had no idea about its properties. I went to YouTube, digging into the basics: it sets in 2 days, cures in at least 7-9 days and water is extremely important for its strength. Theoretically armed, I went to a near by hardware store and got plenty of cement just for ₹30, some screws, washers and tiny L brackets.
Now, the materials were sorted, but one snag hit me: the setting time is longer, and it led to the question—
How do you keep the pipe straight while the cement sets?
Sometimes I laugh at how my brain works, because my idea of keep the pipe straight was to wedge it between two sofa chairs and pray it won’t budge even a milimeter. What a crappy idea it was until my friend Ashwin swooped in with, “Tripod is your answer”. Of course! the freaking tripod was the answer! What else stays steady and straight, a tripod! I taped the pipe to my camera tripod.
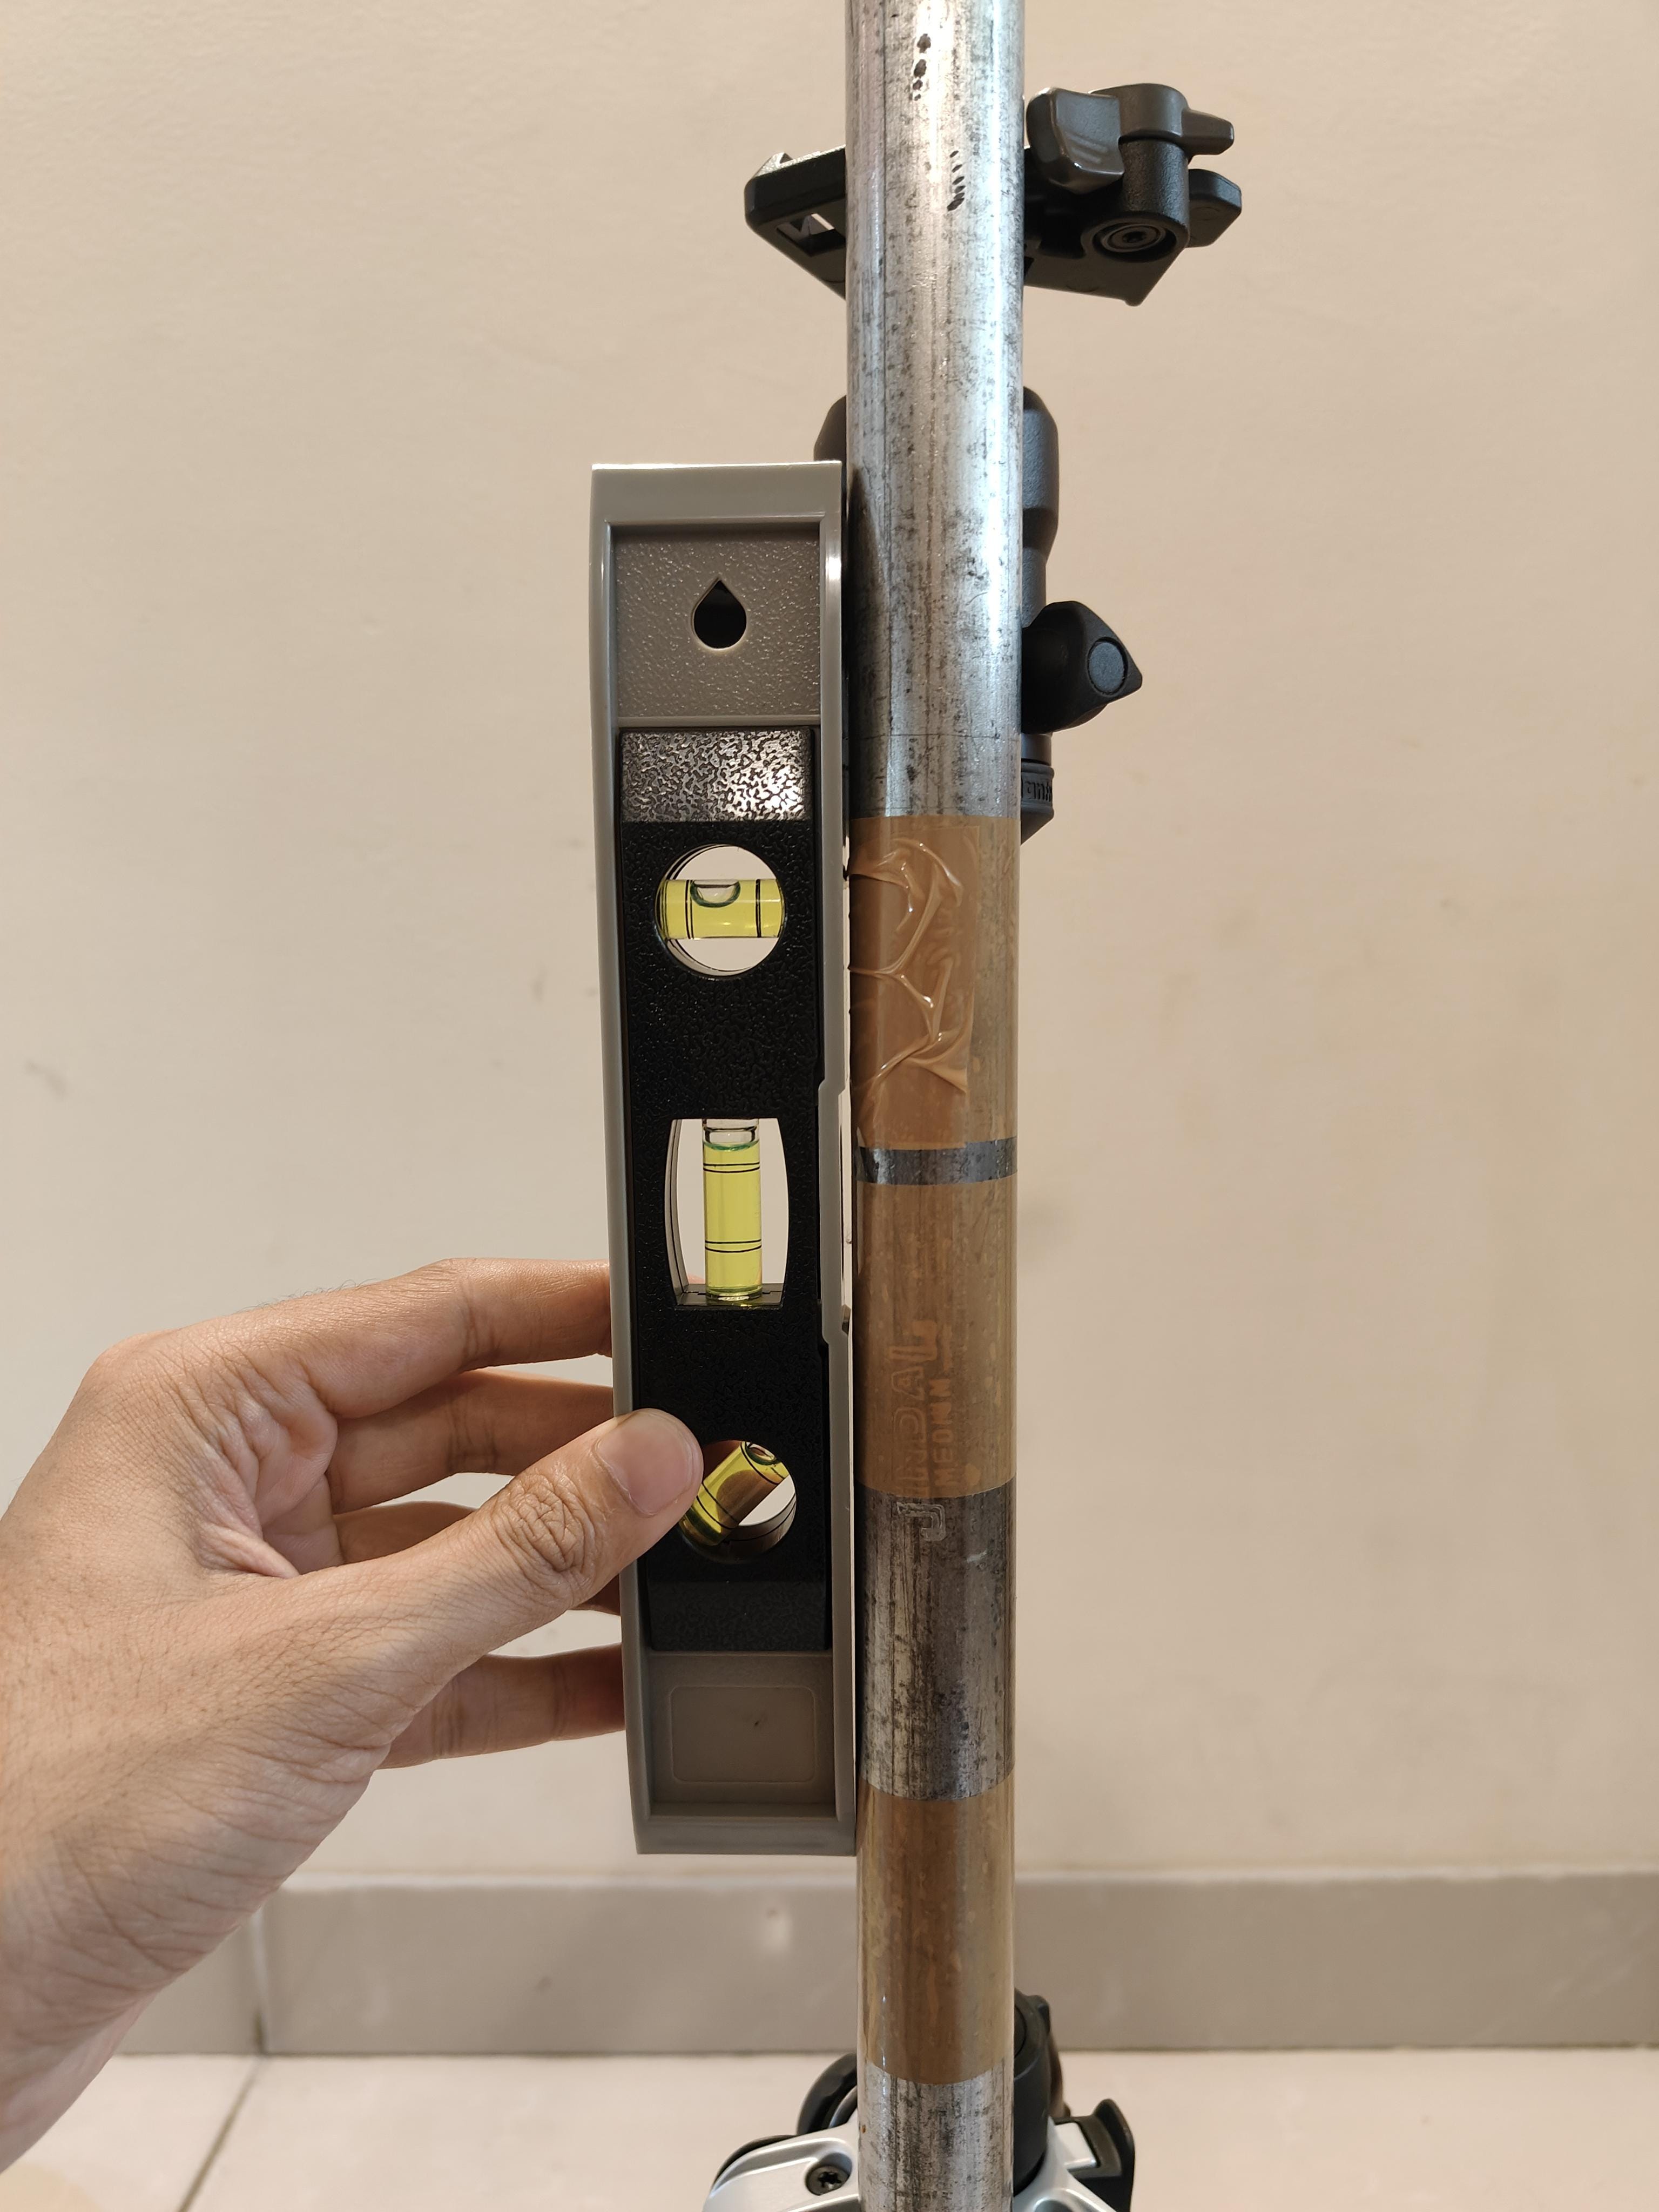
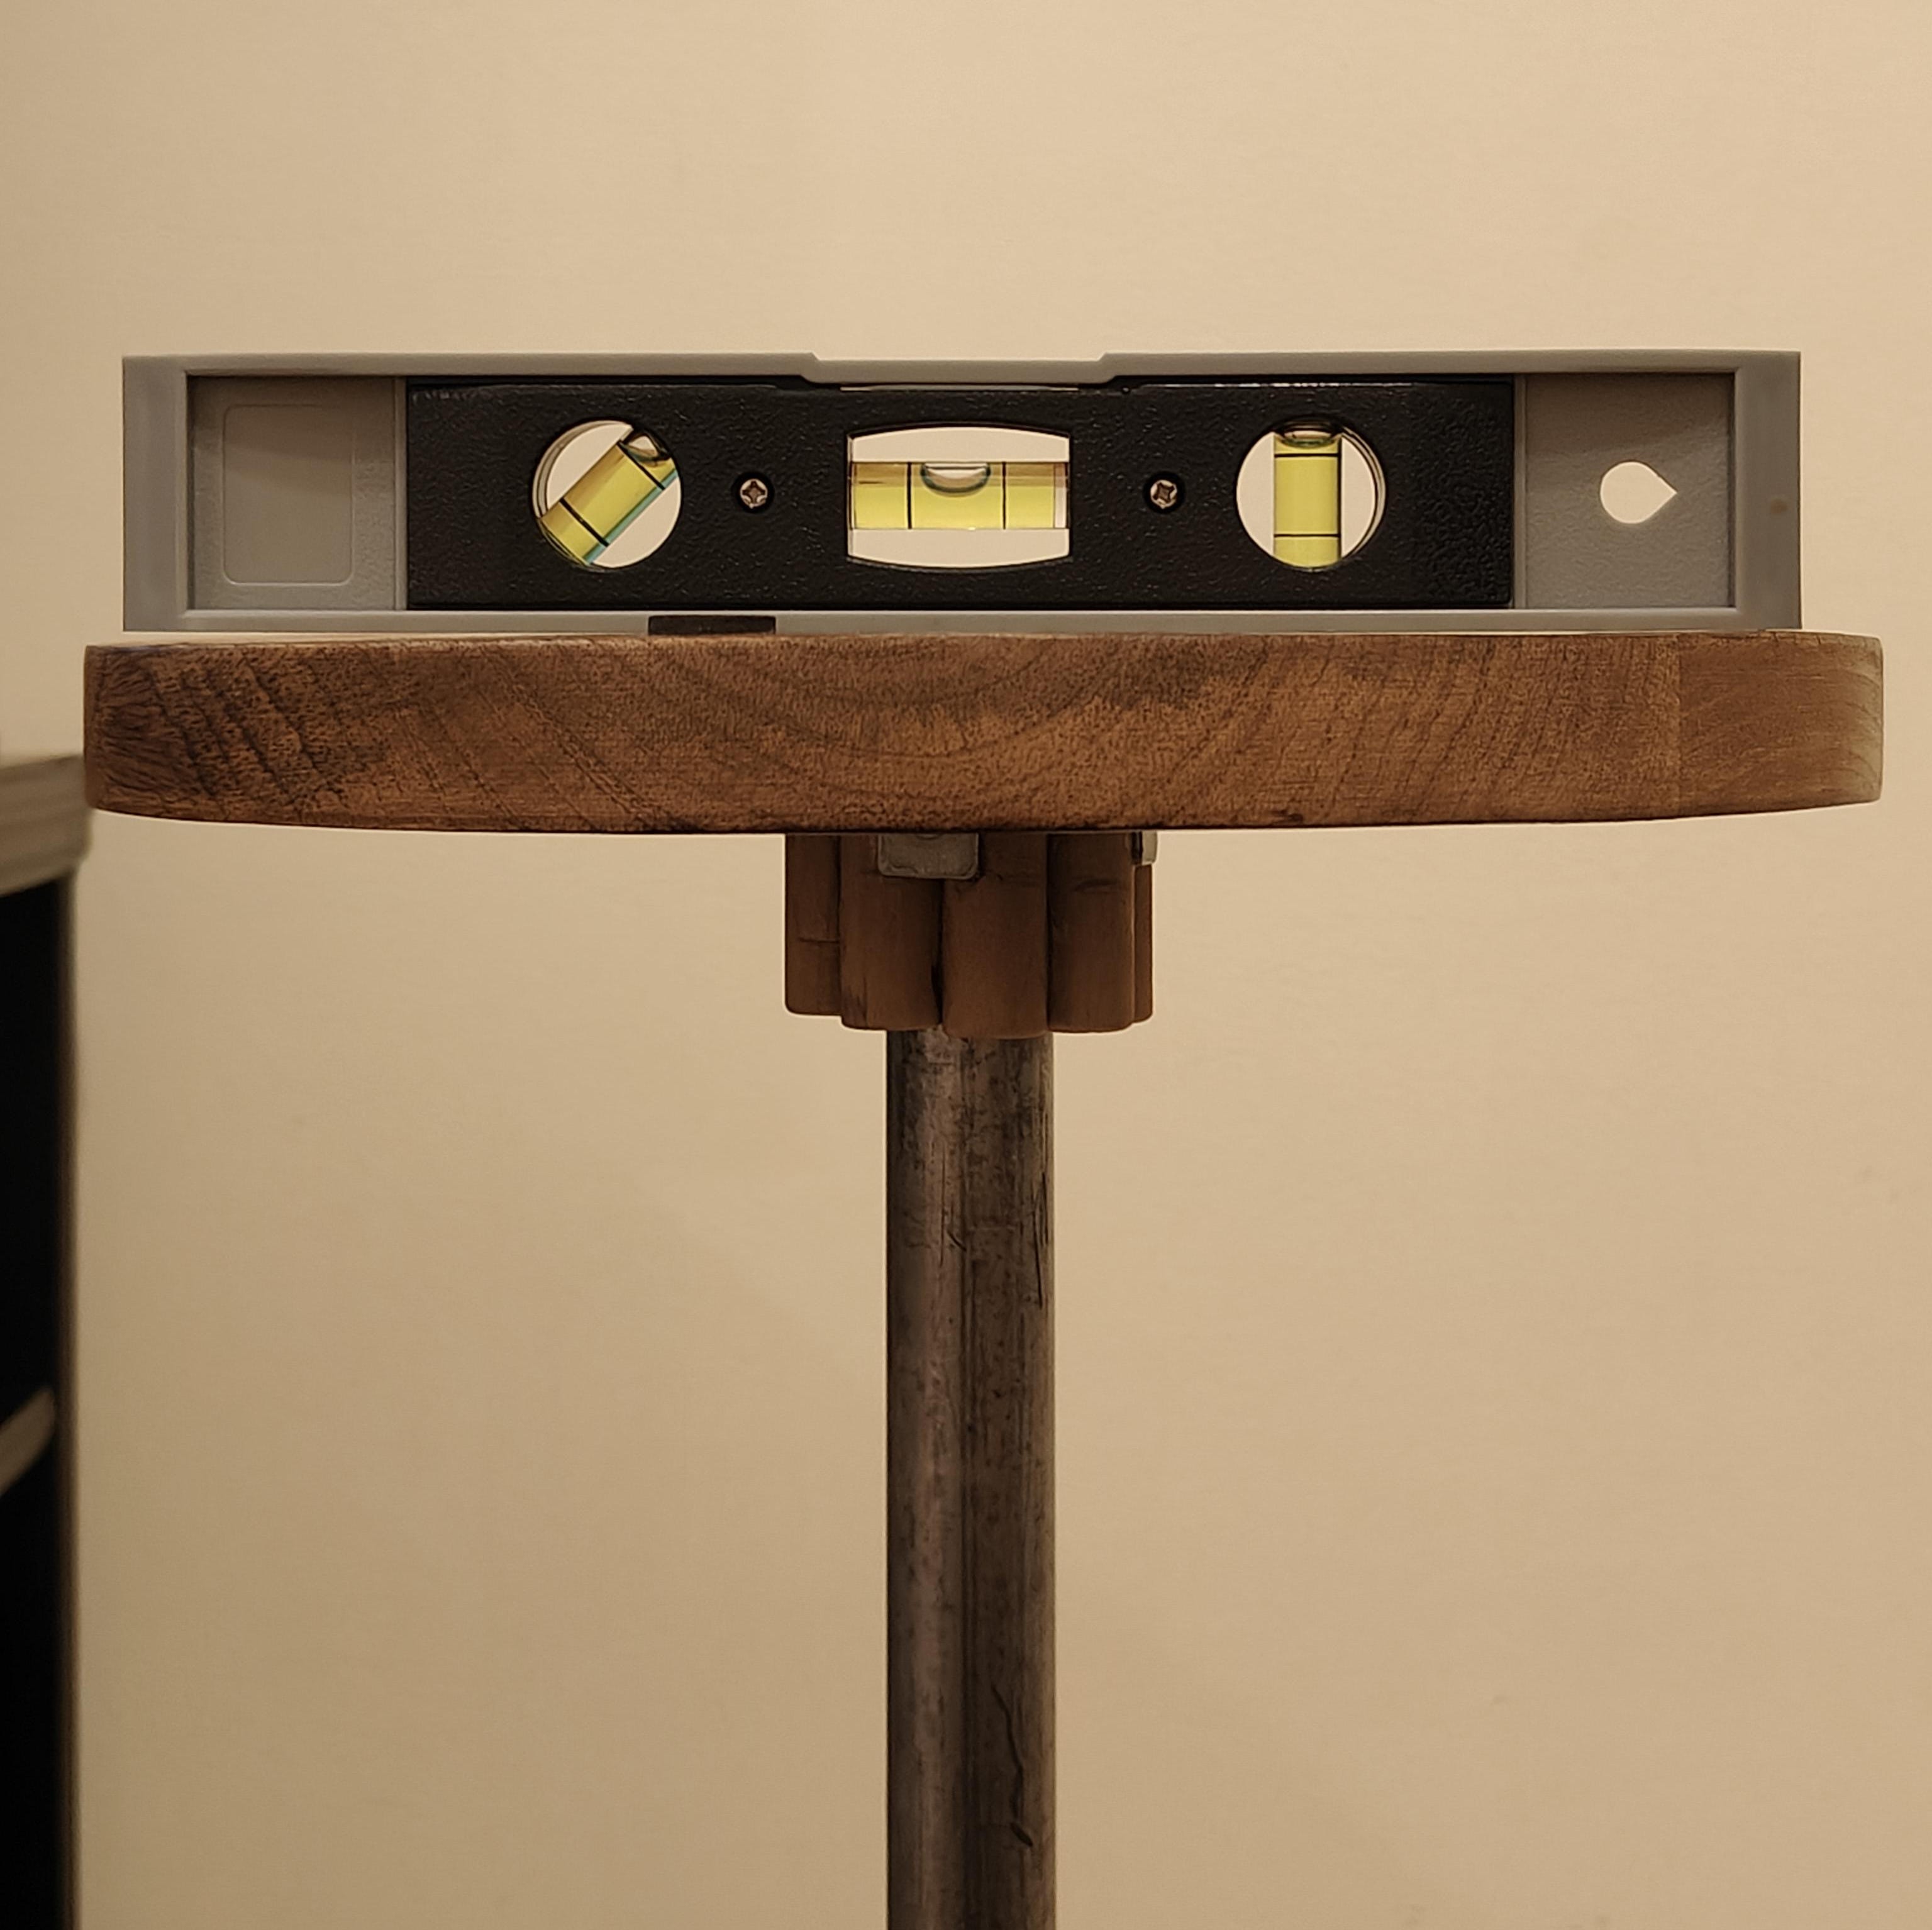
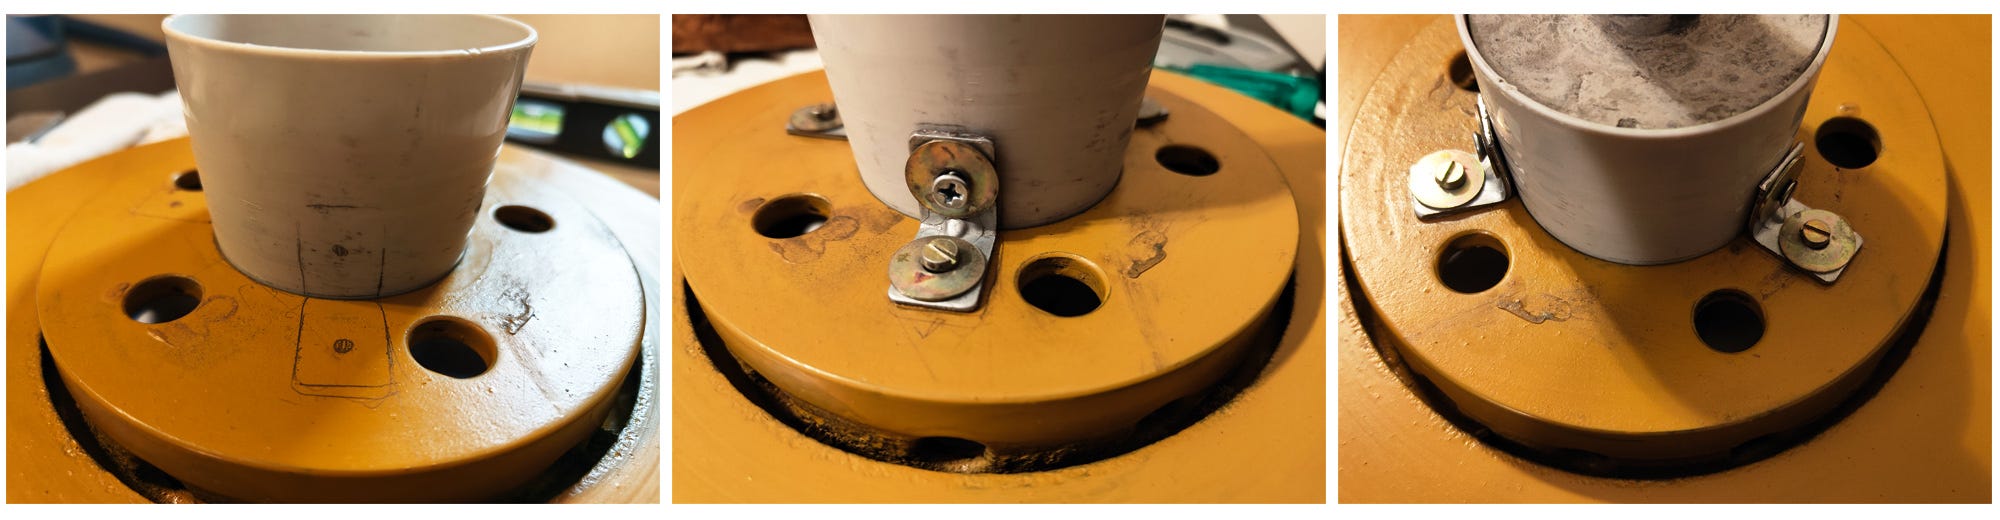
Super pumped with all these new experiments, I tried the first iteration of cement plug as shown below. I checked it with a water level from every angle, and stuffed wet cement into the steel glass, leaving a 2-inch gap at the bottom. It was messy, wet, and oddly thrilling.
24 hours later, a disaster…
The cement bonded to the steel glass like superglue. Ah! Damn.😭

I hammered, heated, twisted with all my might—nothing! It just would not let go of the glass (which I’d promised my wife I’d return— spoiler: I couldn’t). I resorted to drilling as the last option and gave on saving that cement piece. It took more than 3 hours of drilling to get rid of the cement and free the glass. I had to do it as quite as possible to not annoy my neighbours. What a failure and waste of time.
Lesson learned: use plastic or a lining inside, because oiling the steel glass didn’t work at all.
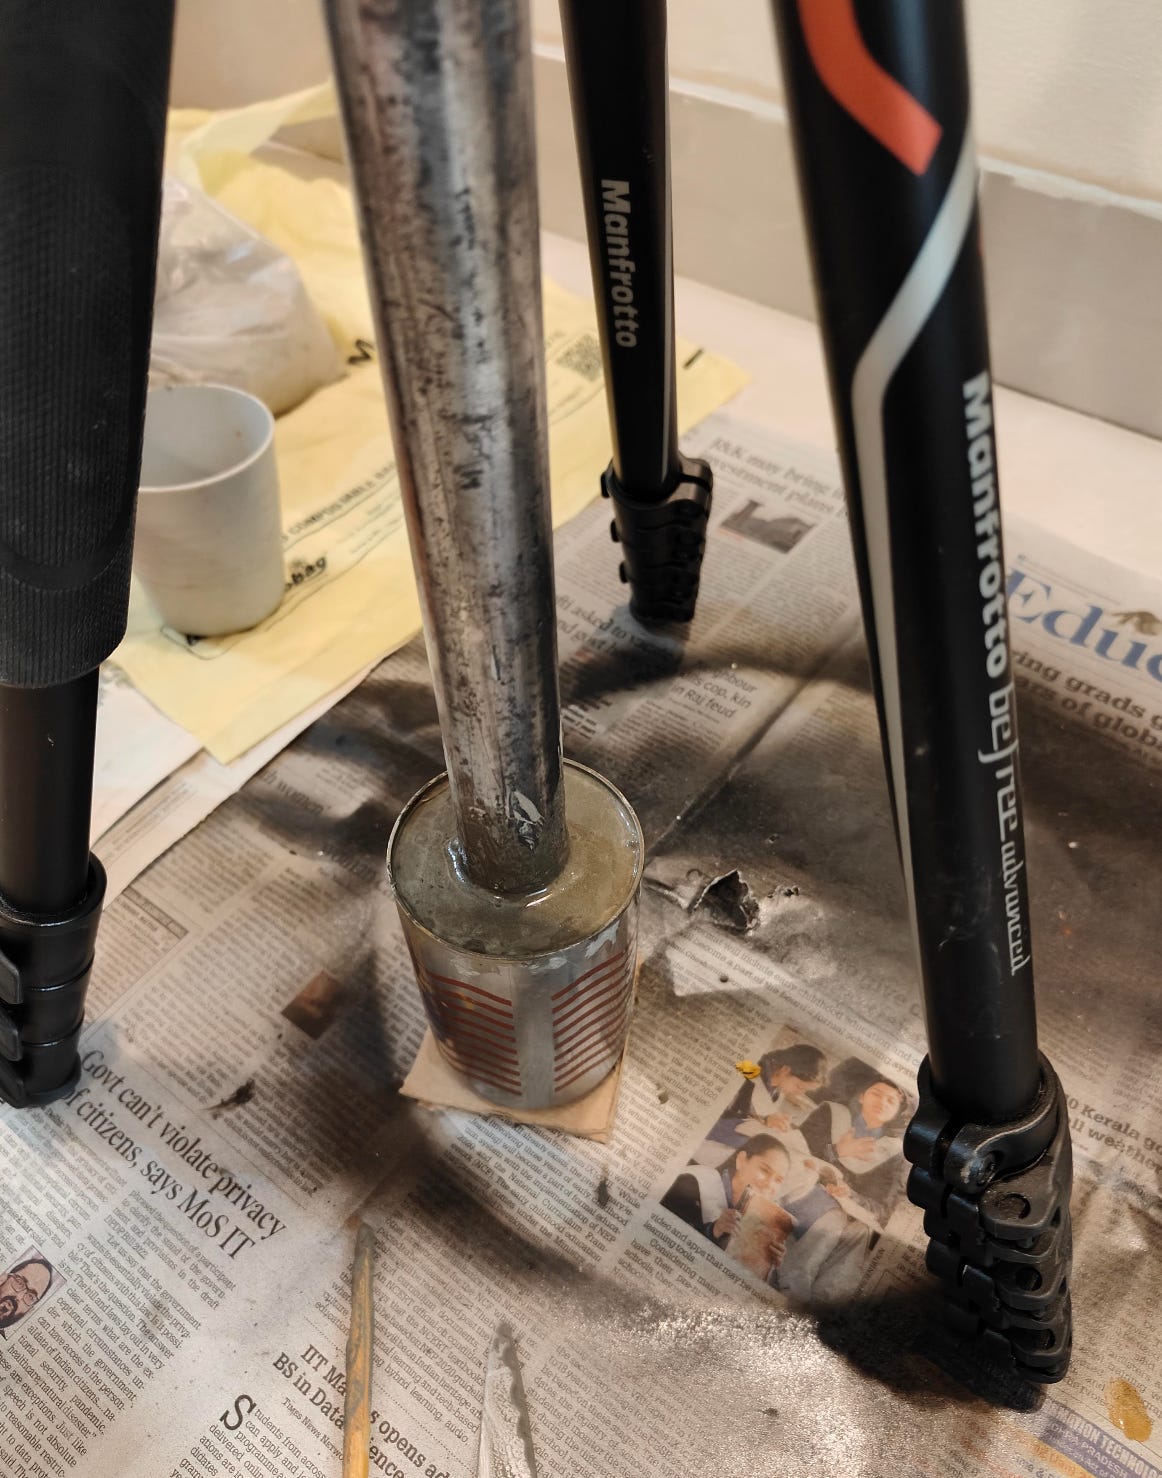
Round two: I slathered the plastic glass with coconut oil first. 24 hours later, it slid out smooth as butter. Relief washed over me. I submerged the base in water to cure for a week, confidence growing.
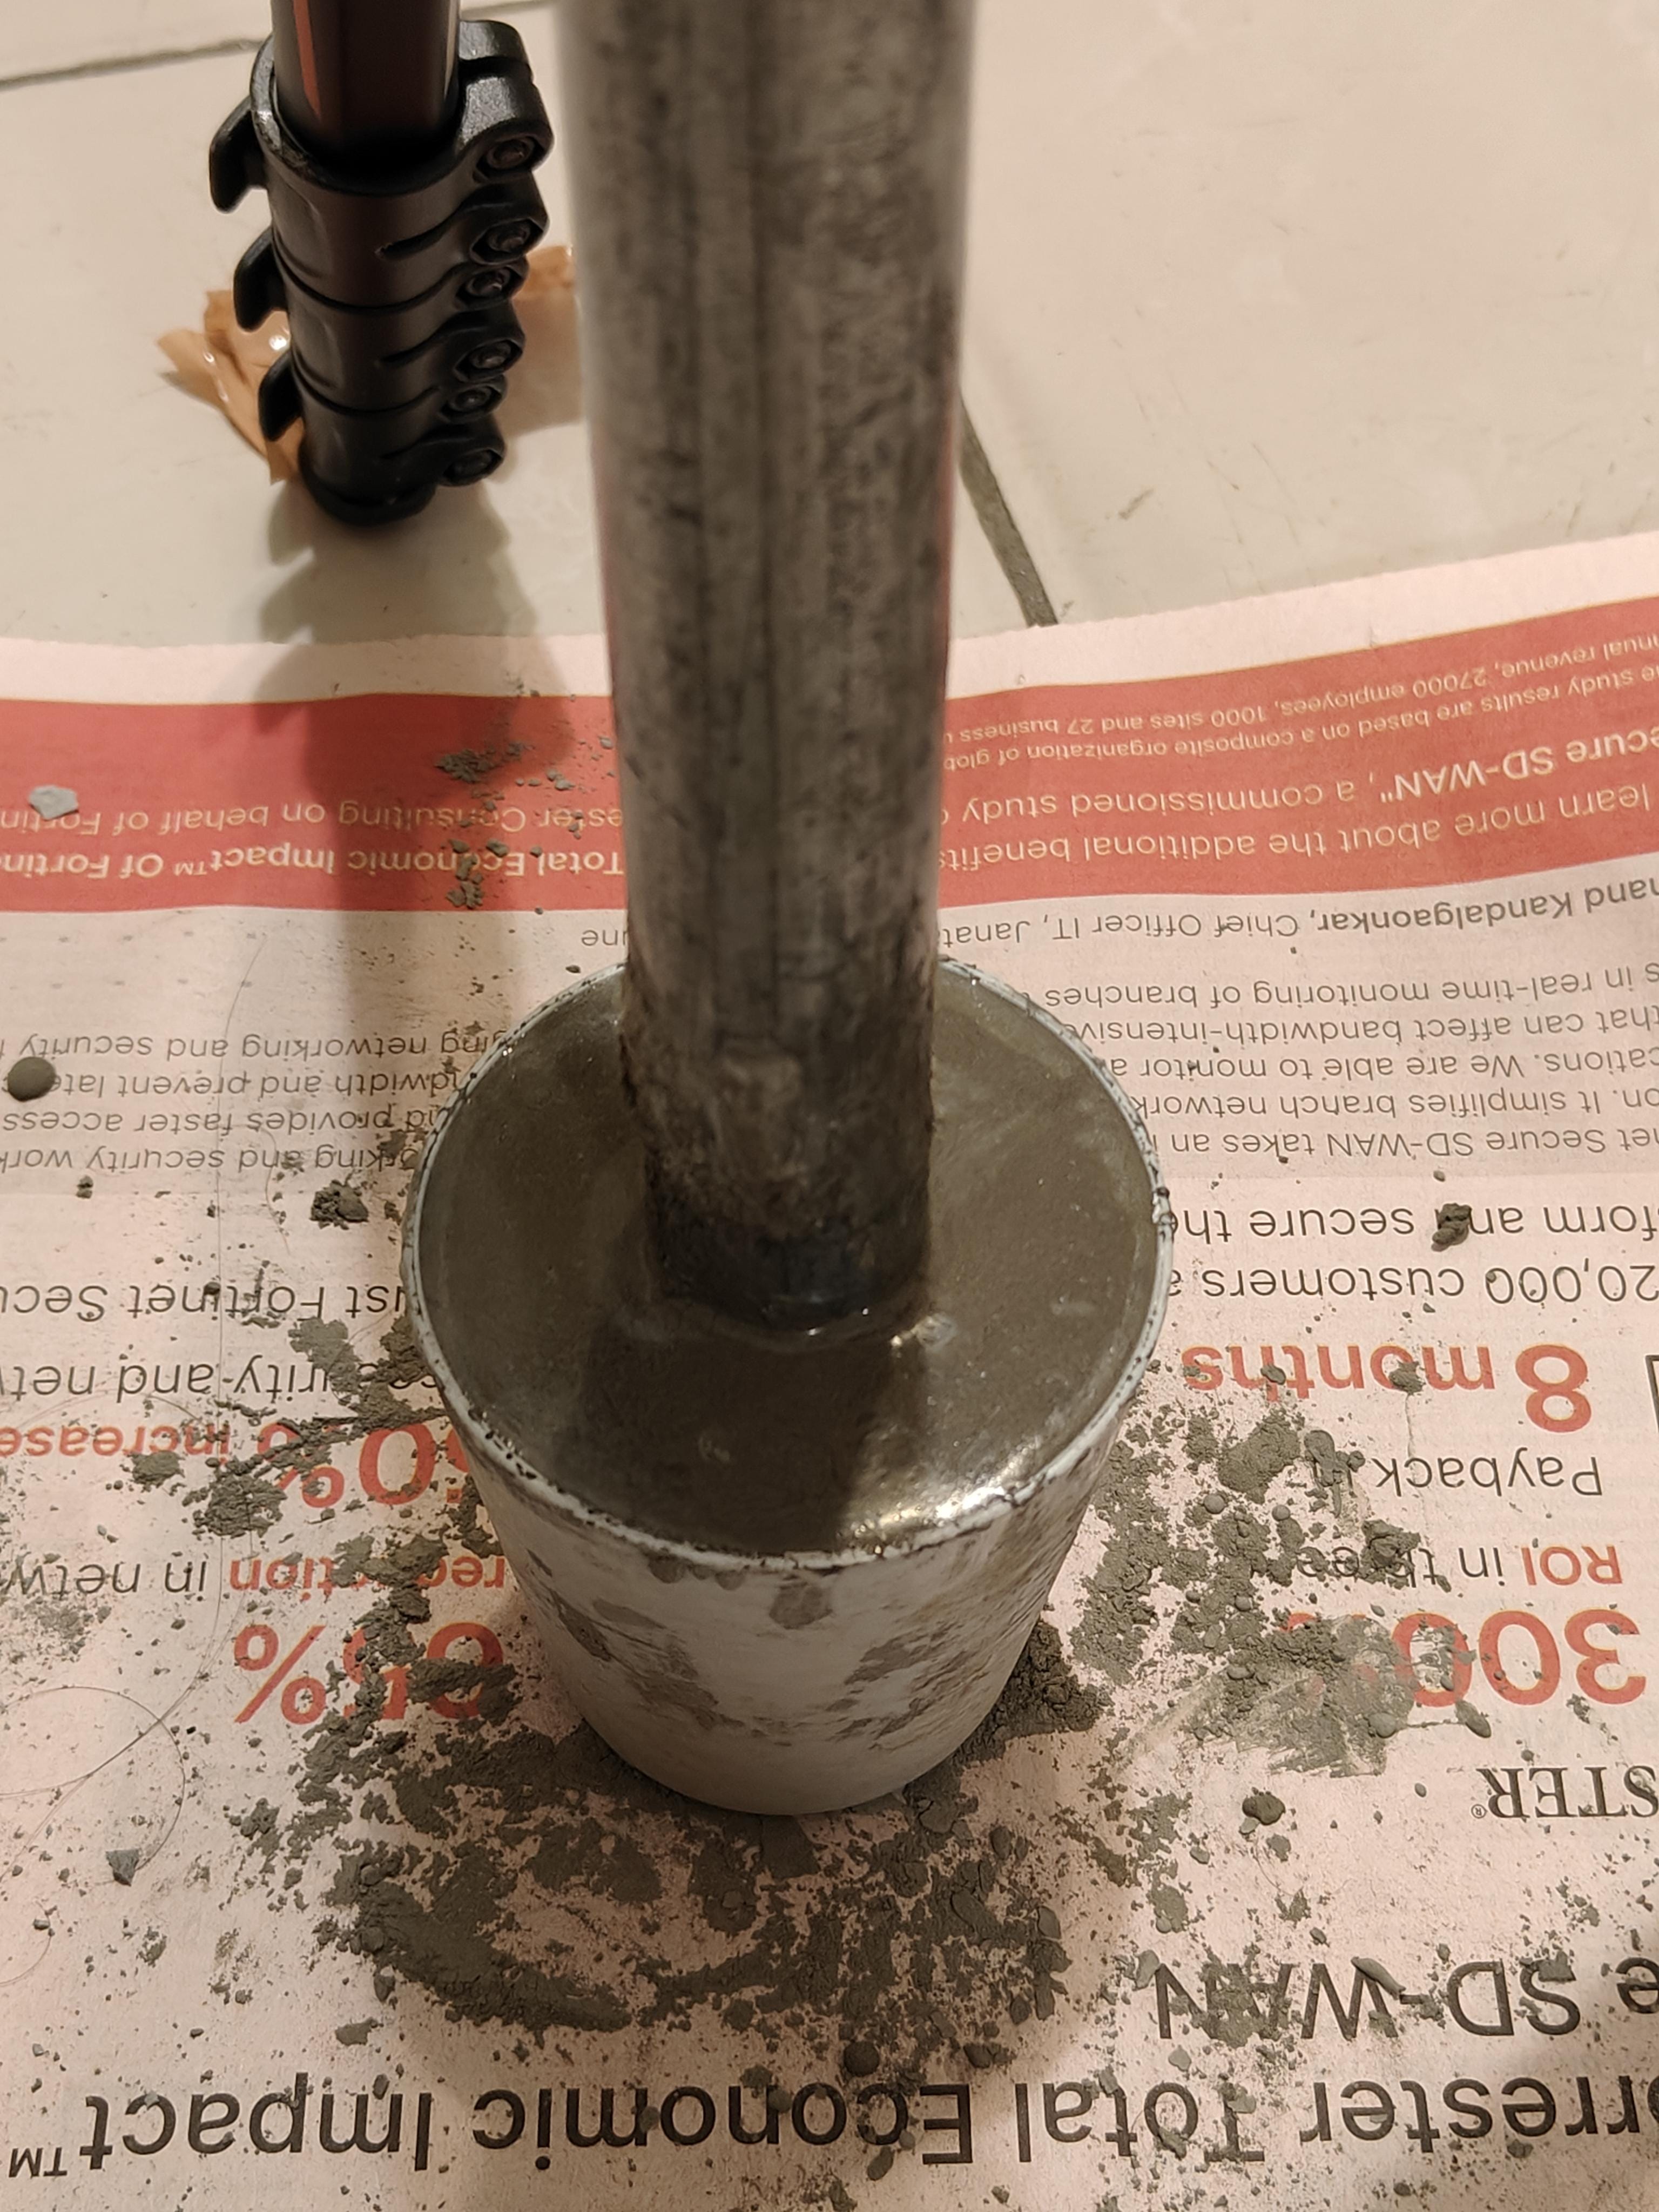
While the cement was curing, I turned to L-brackets positioning. This was risky part: if the holes in the cement block and metal plate do not align, you can’t make just another hole in this thick metal plate. Secondly, the error was not allowed in cement plug as well as it may weaken its strength.
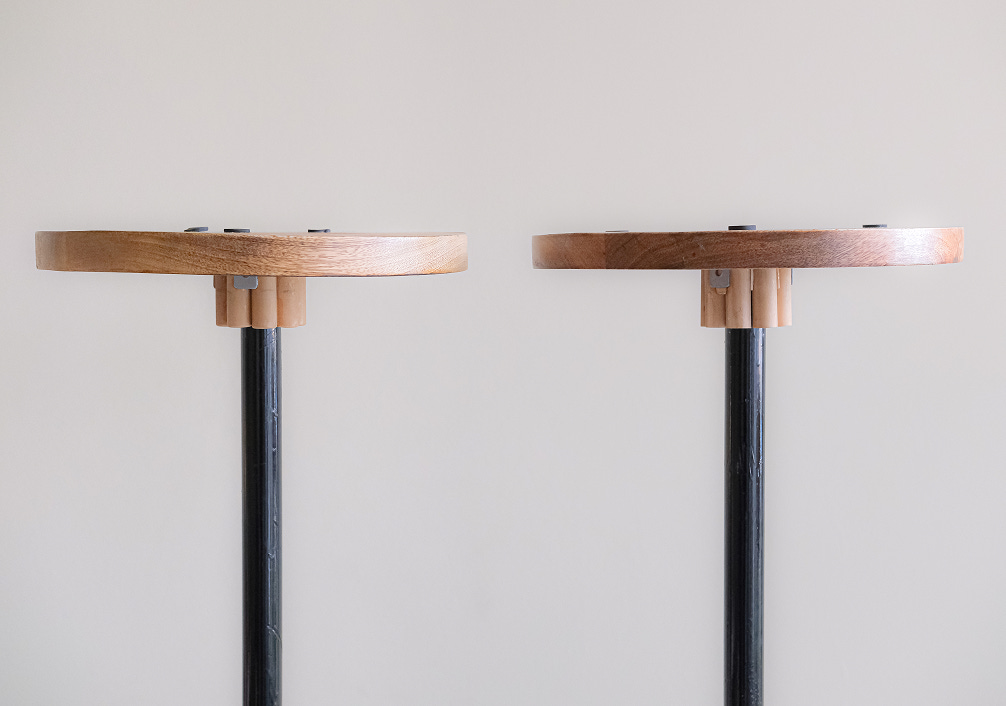
Precision was the key! I held my breath, measured twice, and drilled (quietly), patiently. It worked! 🤌🏼 (check the images towards end of the second pedestal)
End of Part 1.
Part 2/2
Building the Top: Woodworking Fun
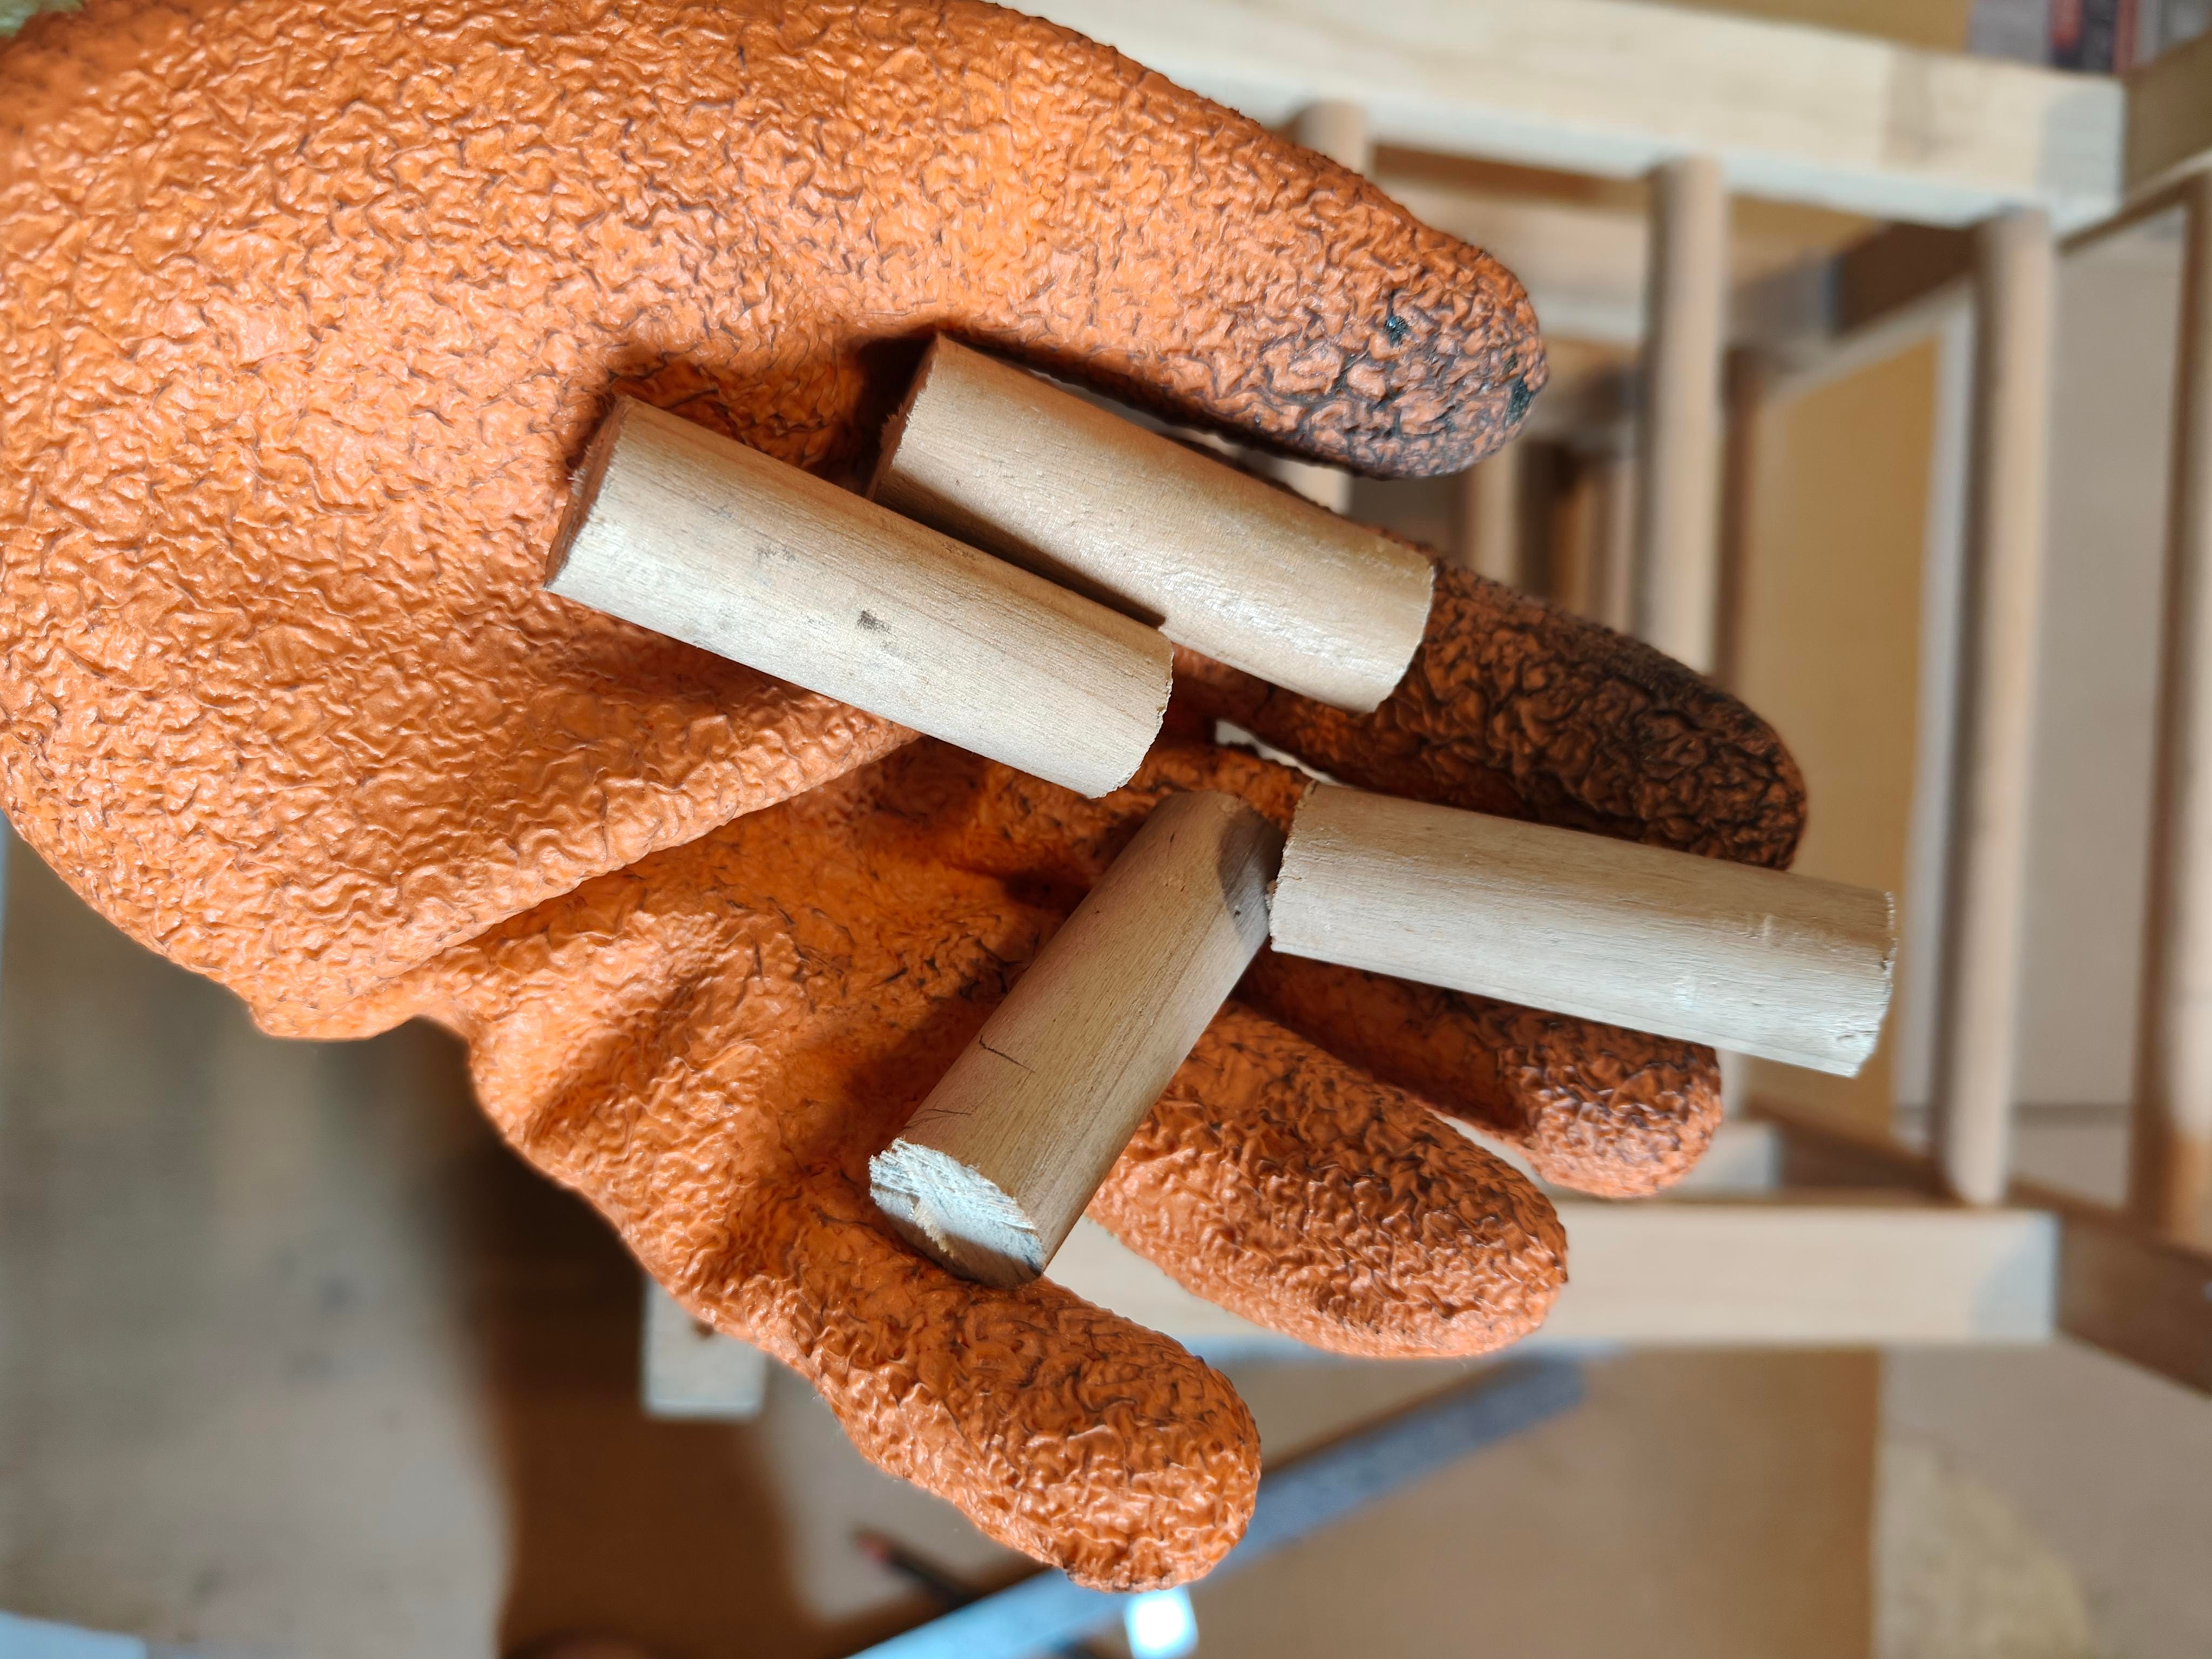
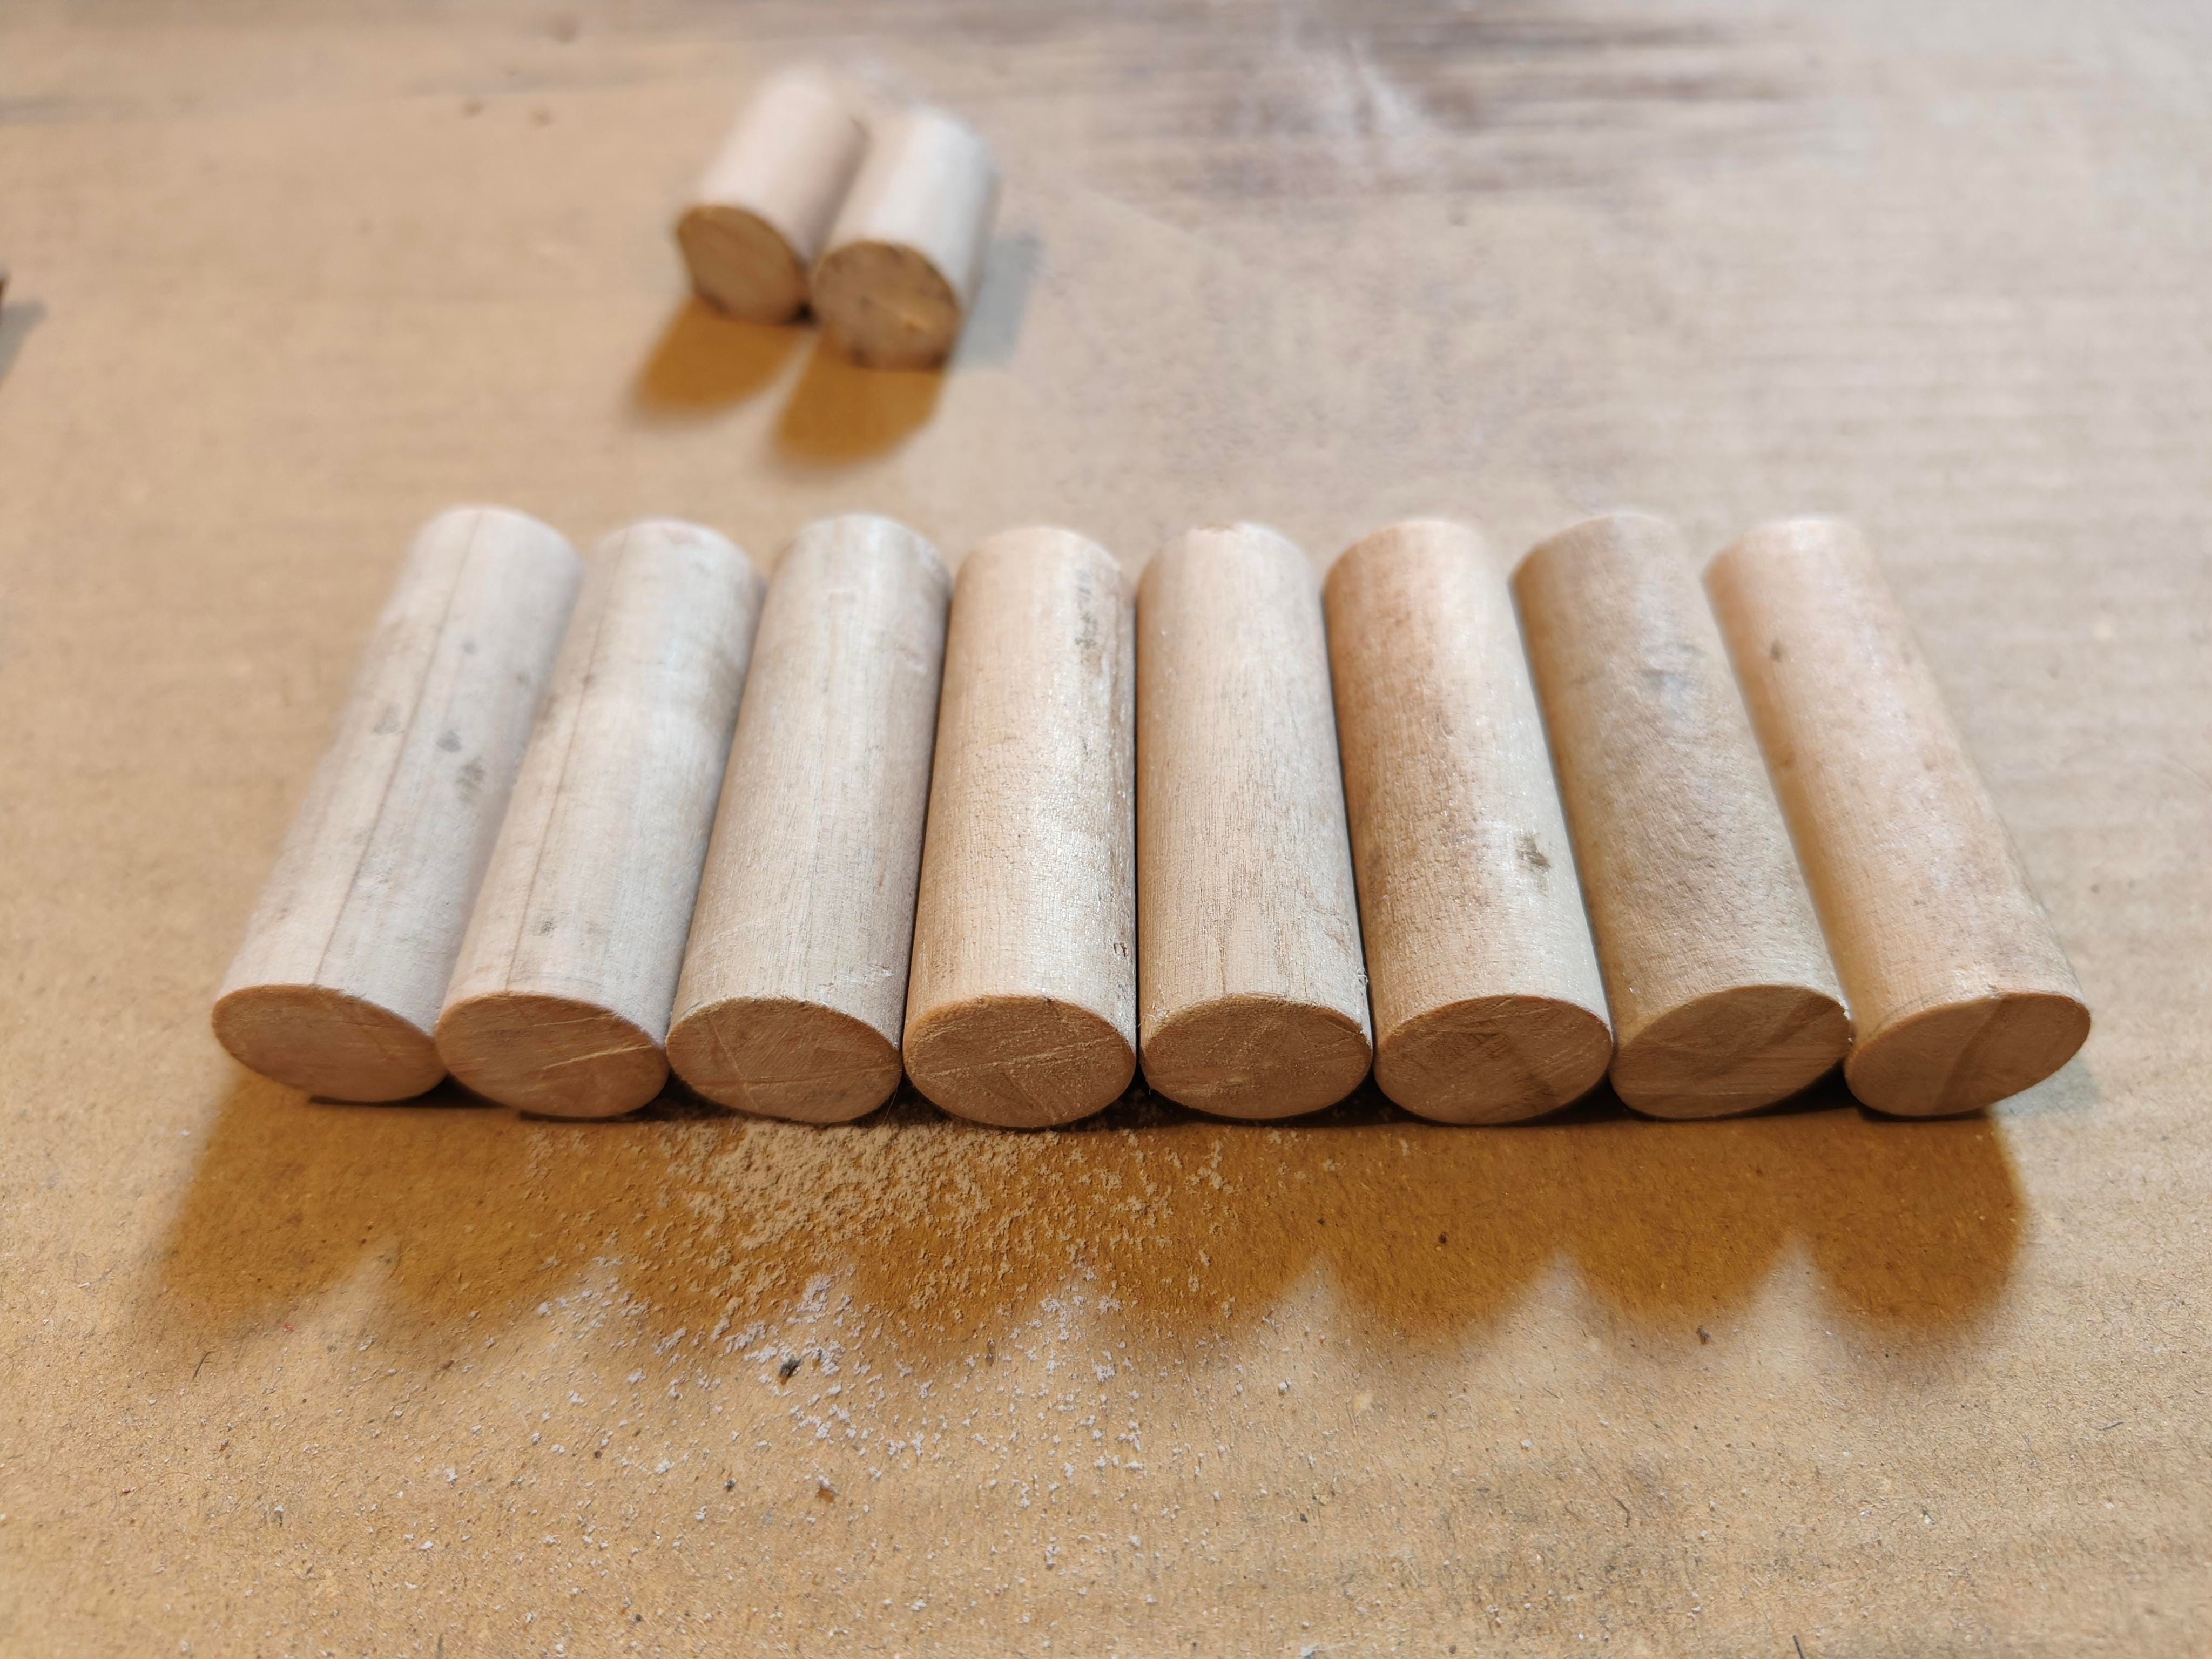
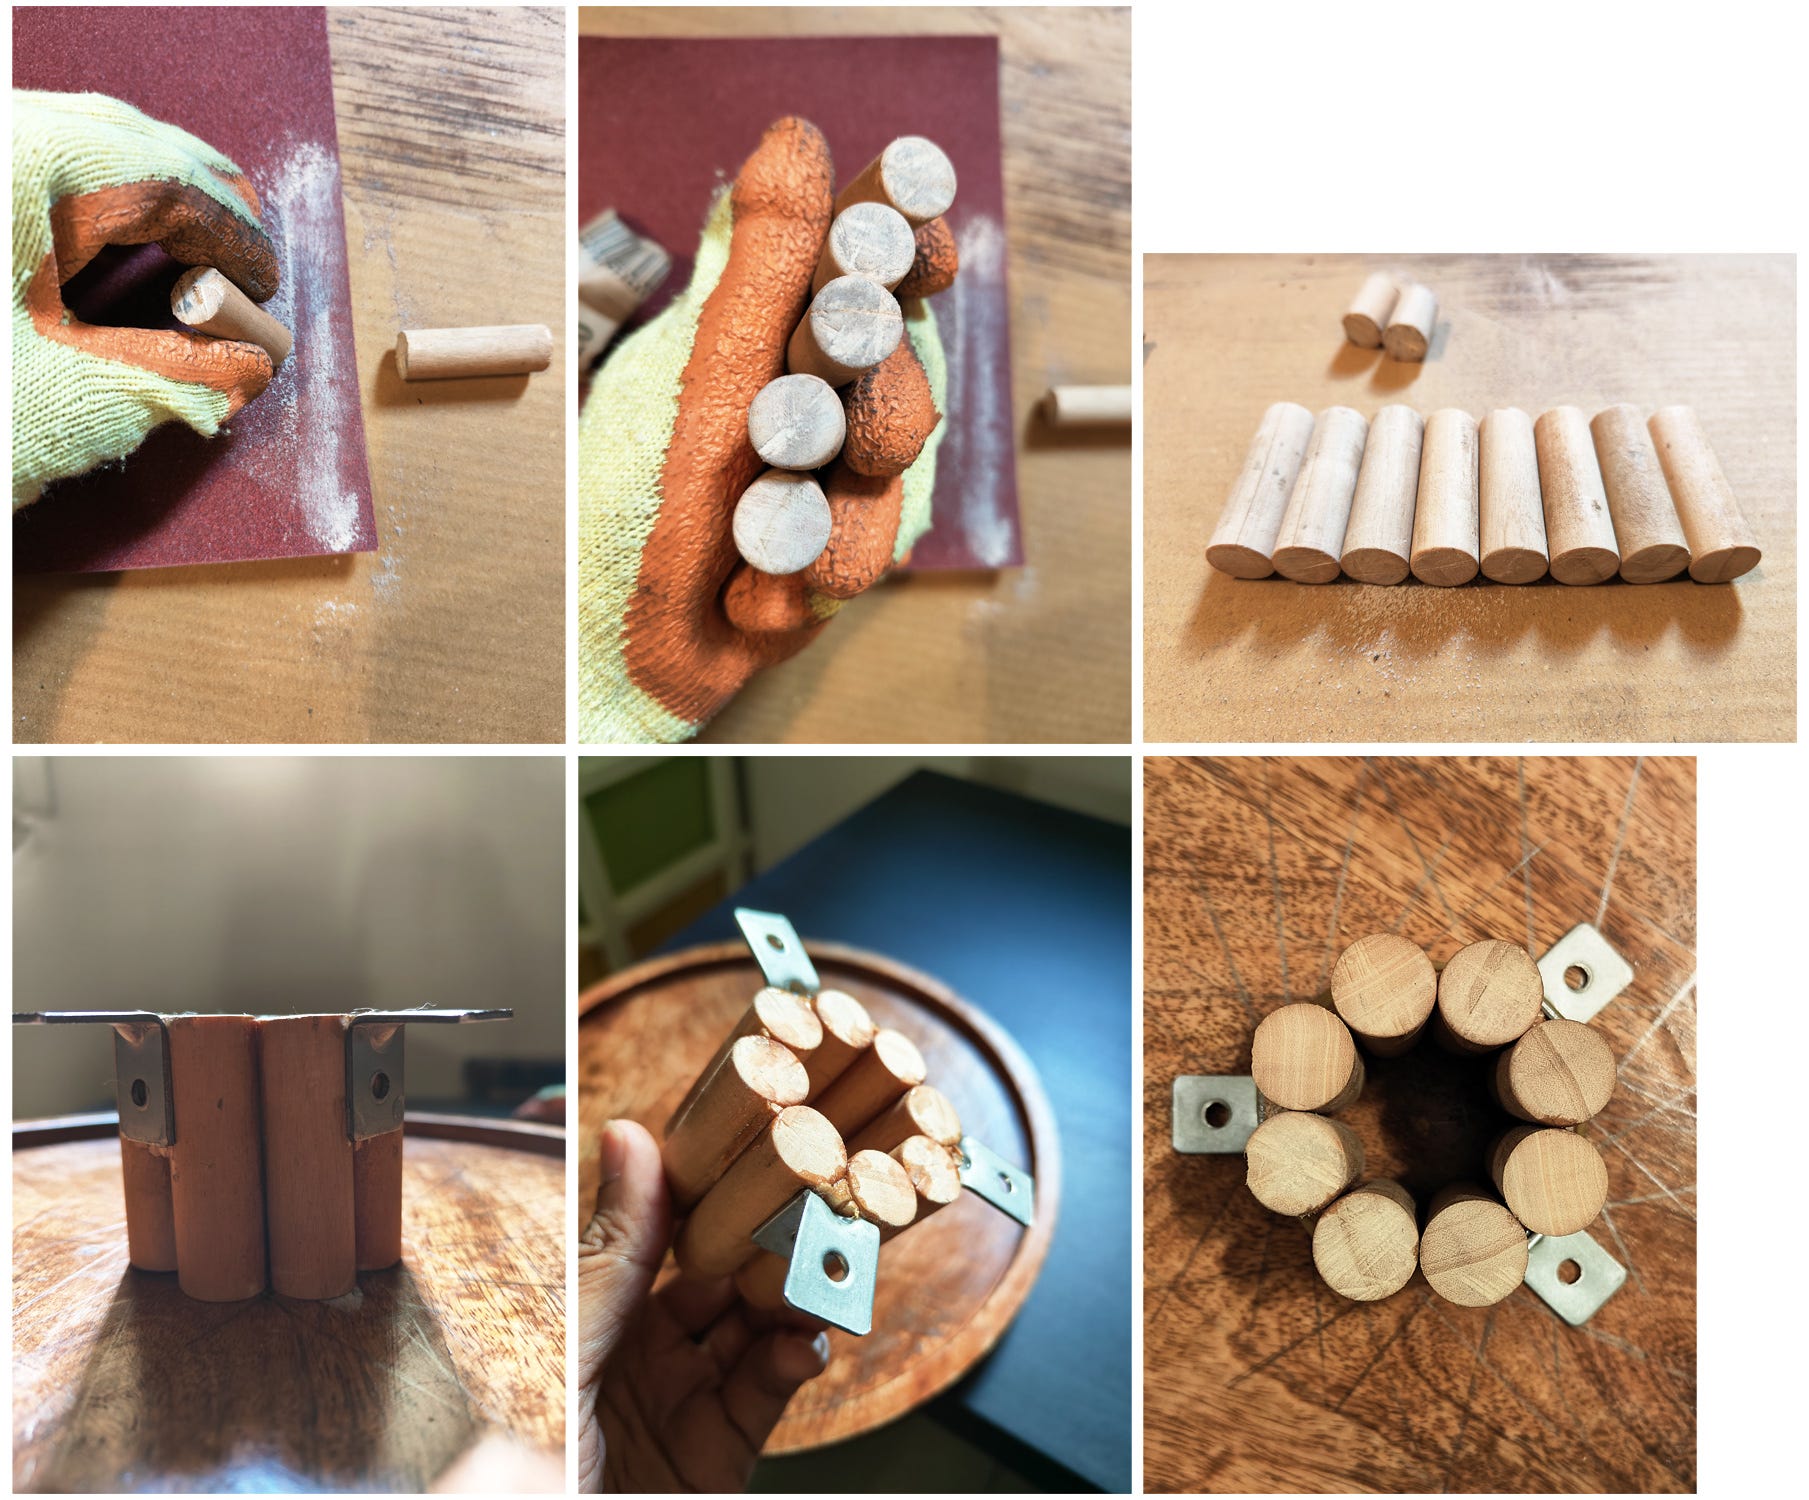
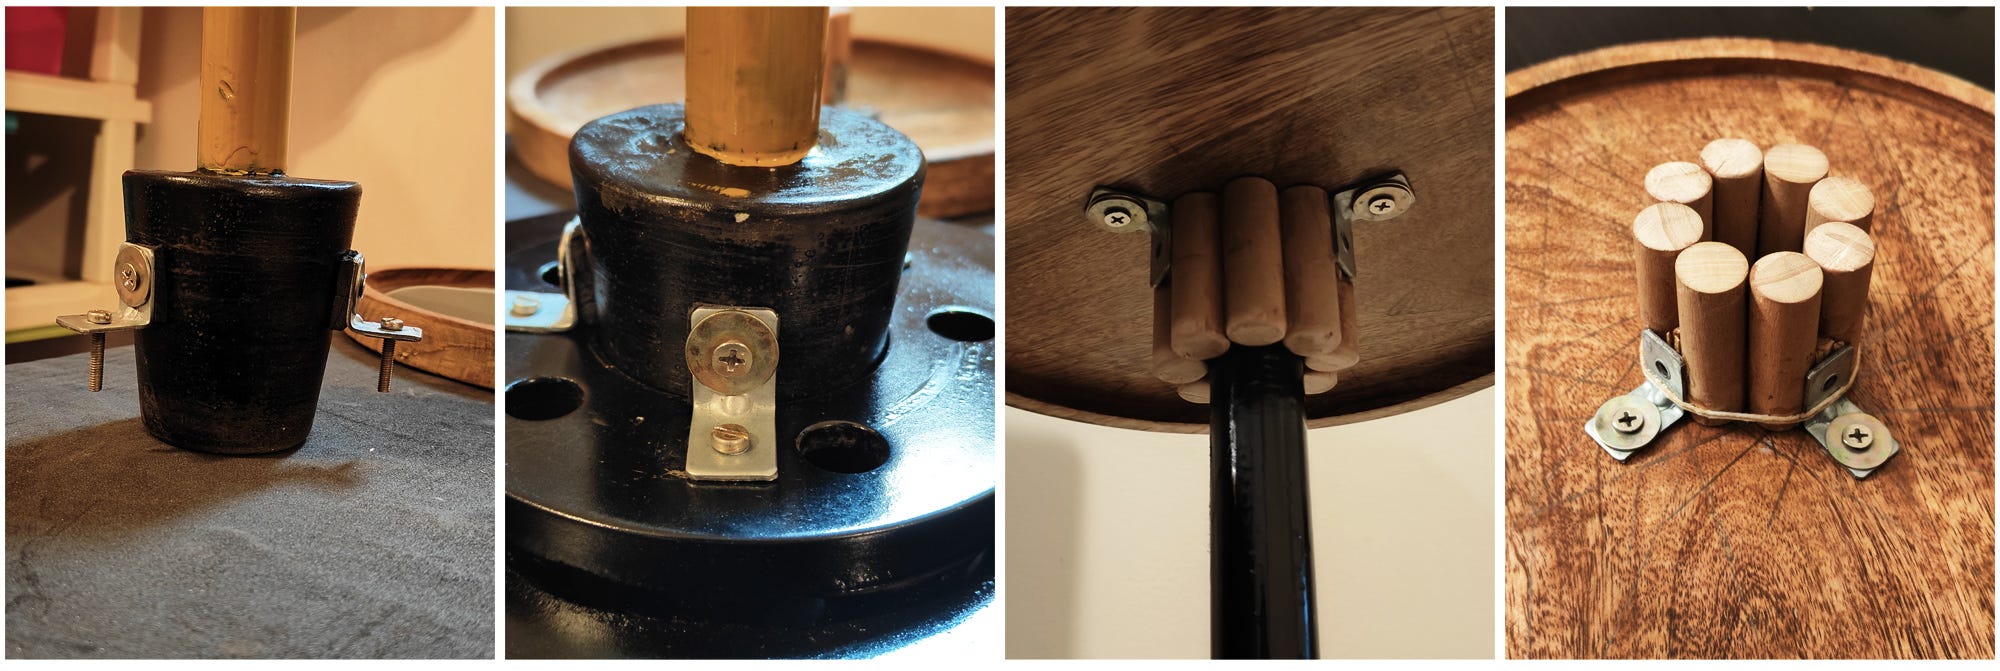
With the cement plug curing tucked away, I shifted focus to the top: the wooden tray. I didn’t want to it bolt straight to the pipe; the metal-to-wood transition would look jarring, and stability might suffer. I needed a broader transition piece— something not so obvious, functional and detailed. Scouring the house like an FBI agent, I found a salvaged wooden stand from a failed guitar stand project that has wooden dowel rods. I absolutely loved how this idea shaped eventually
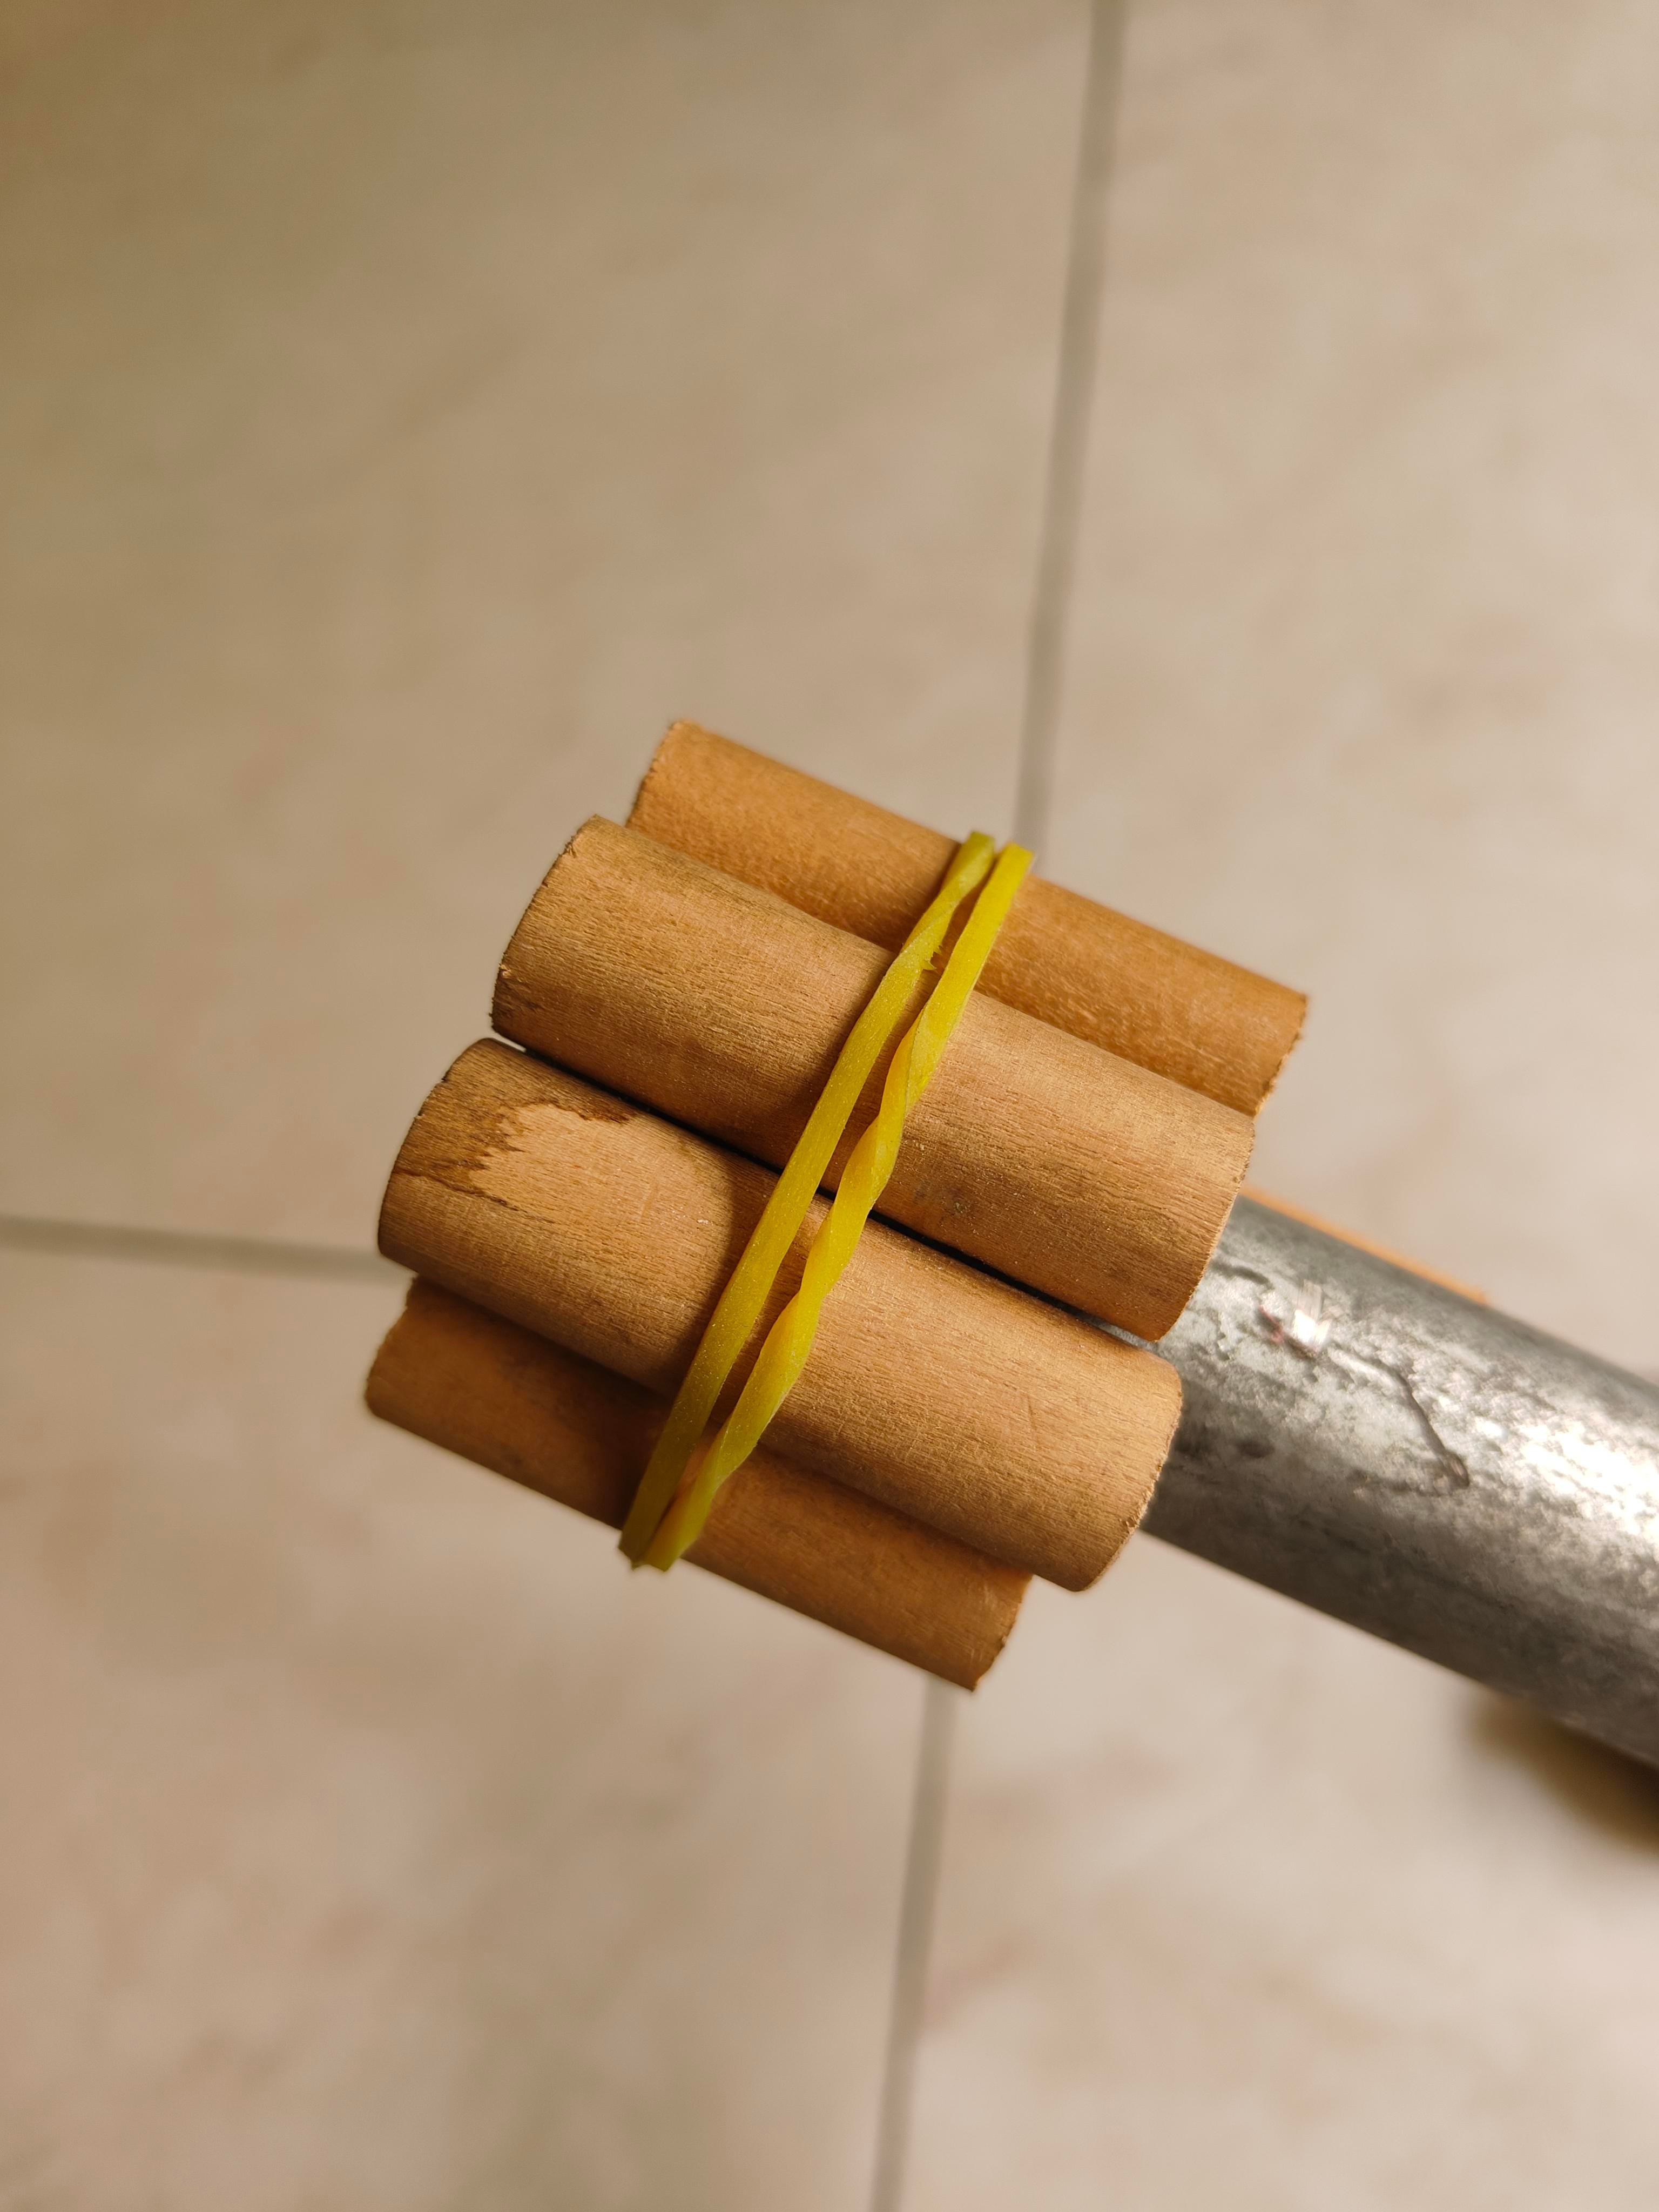
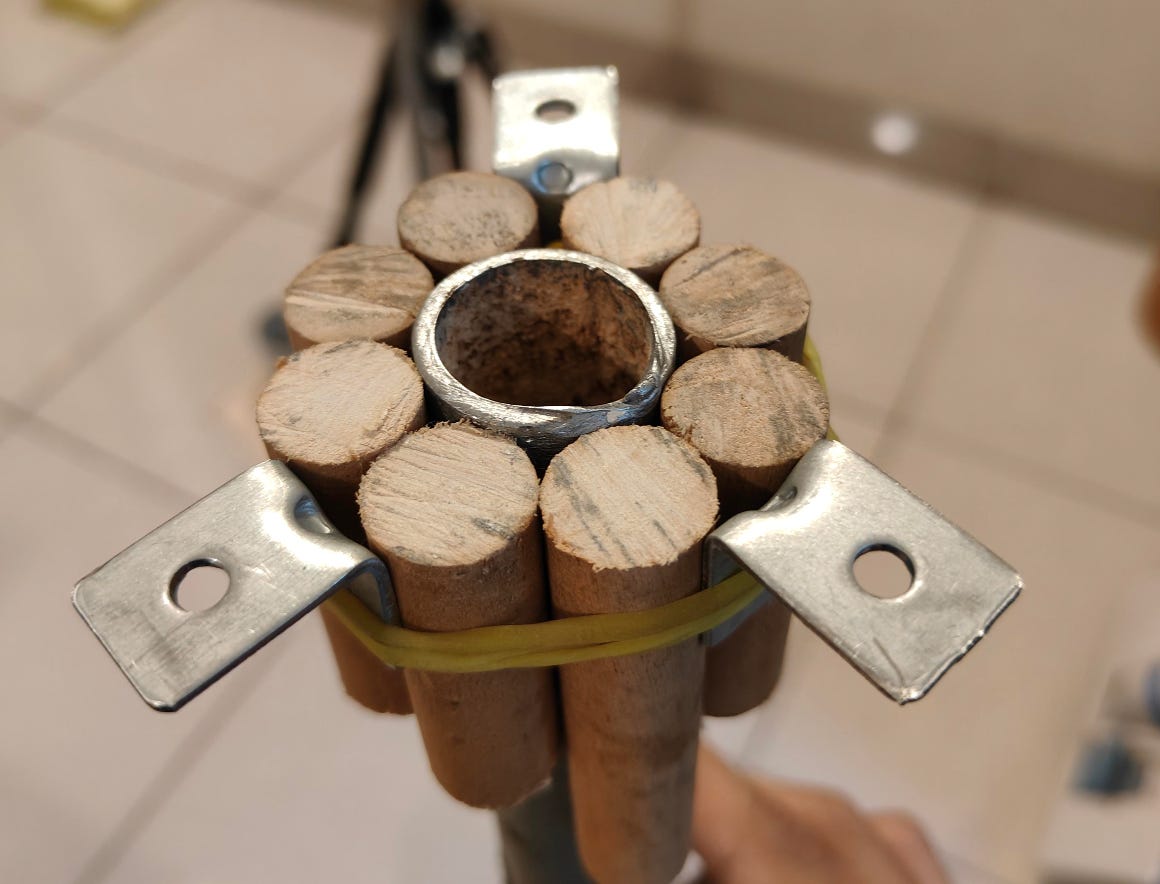
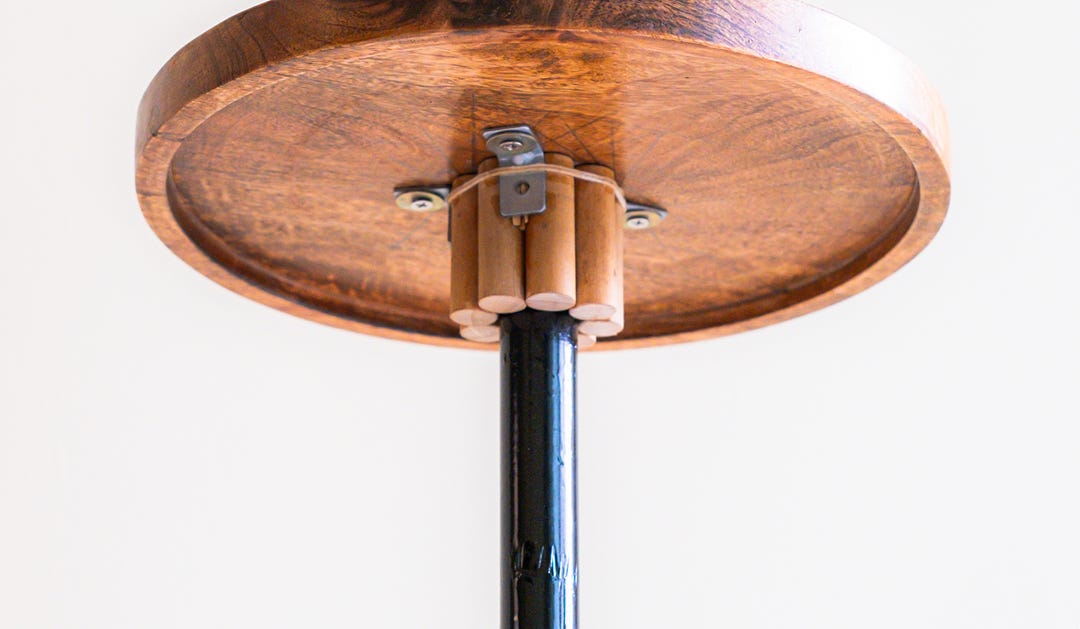
I cut one rod into smaller pieces, sanded them smooth, and sized them to snugly grip the GI pipe. Three L-brackets would screw them to the tray.
..And finally attaching the tiny brackets. I loved the idea of giving it a triangular profile than obvious square one.
A geometric issue
How do I find the center of this wooden disc? Of course, I studied it in school, chords, intersection etc etc. It should have been easy but I couldn’t find it precisely. The reason— this freaking cheap peace of wood is not a perfect circle!
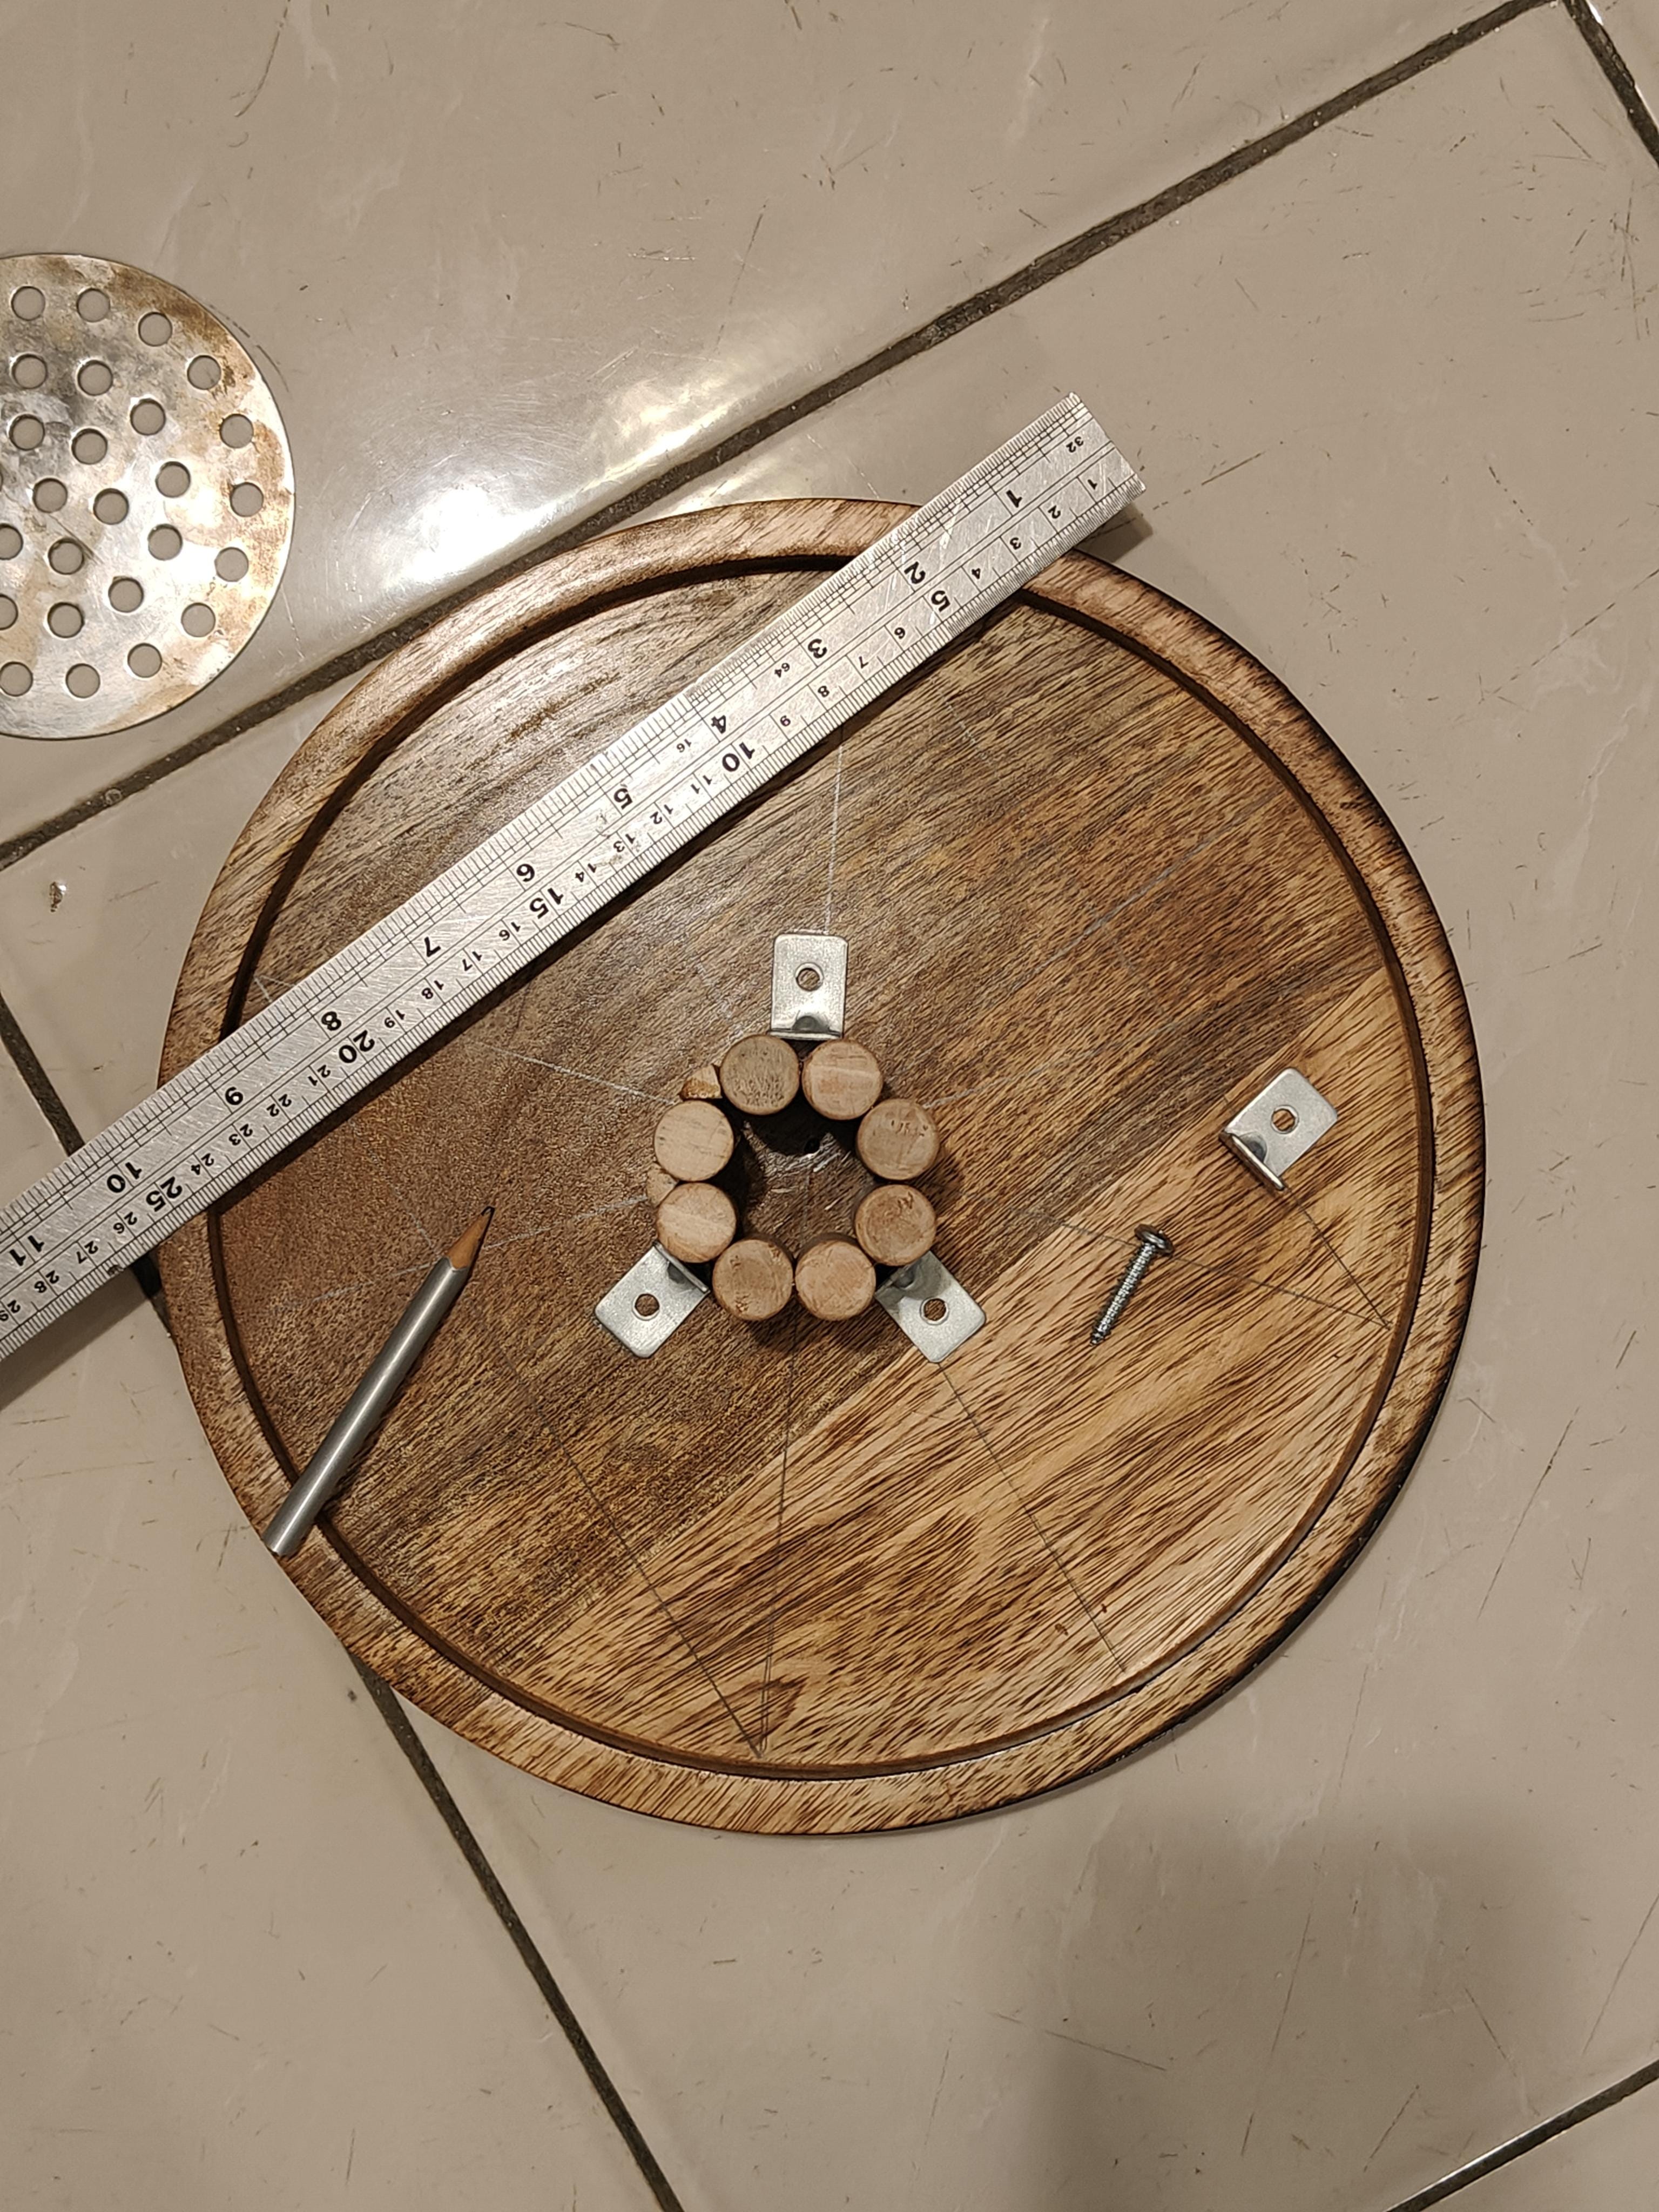
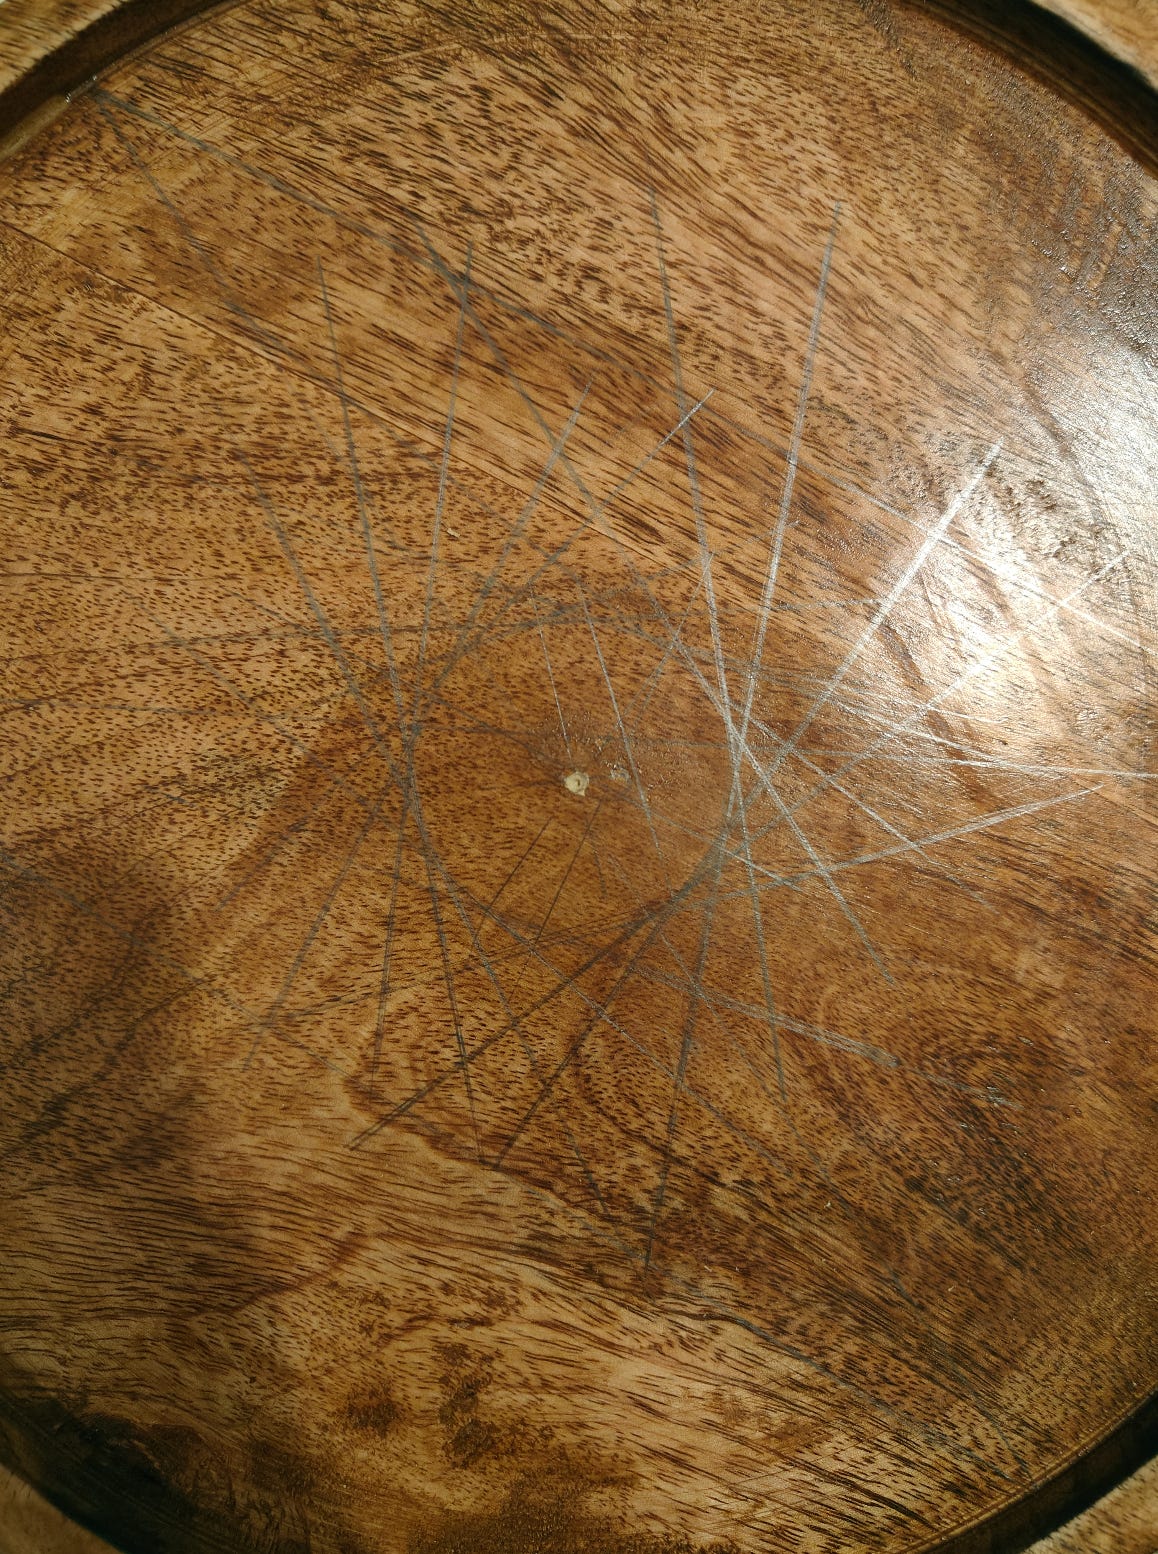
YouTube saved the day—a trick with rotation and overlapping lines formed a tiny circle whose center I could nail. Loved it!
I drove the screws in, the prototype finally came together. Yes!! this is my the most favourite part of the whole build!
First Prototype Assembly
Up until now, all the pieces were in their own world— metal, cement, wood. Now it was time to put it all together for the very first time!
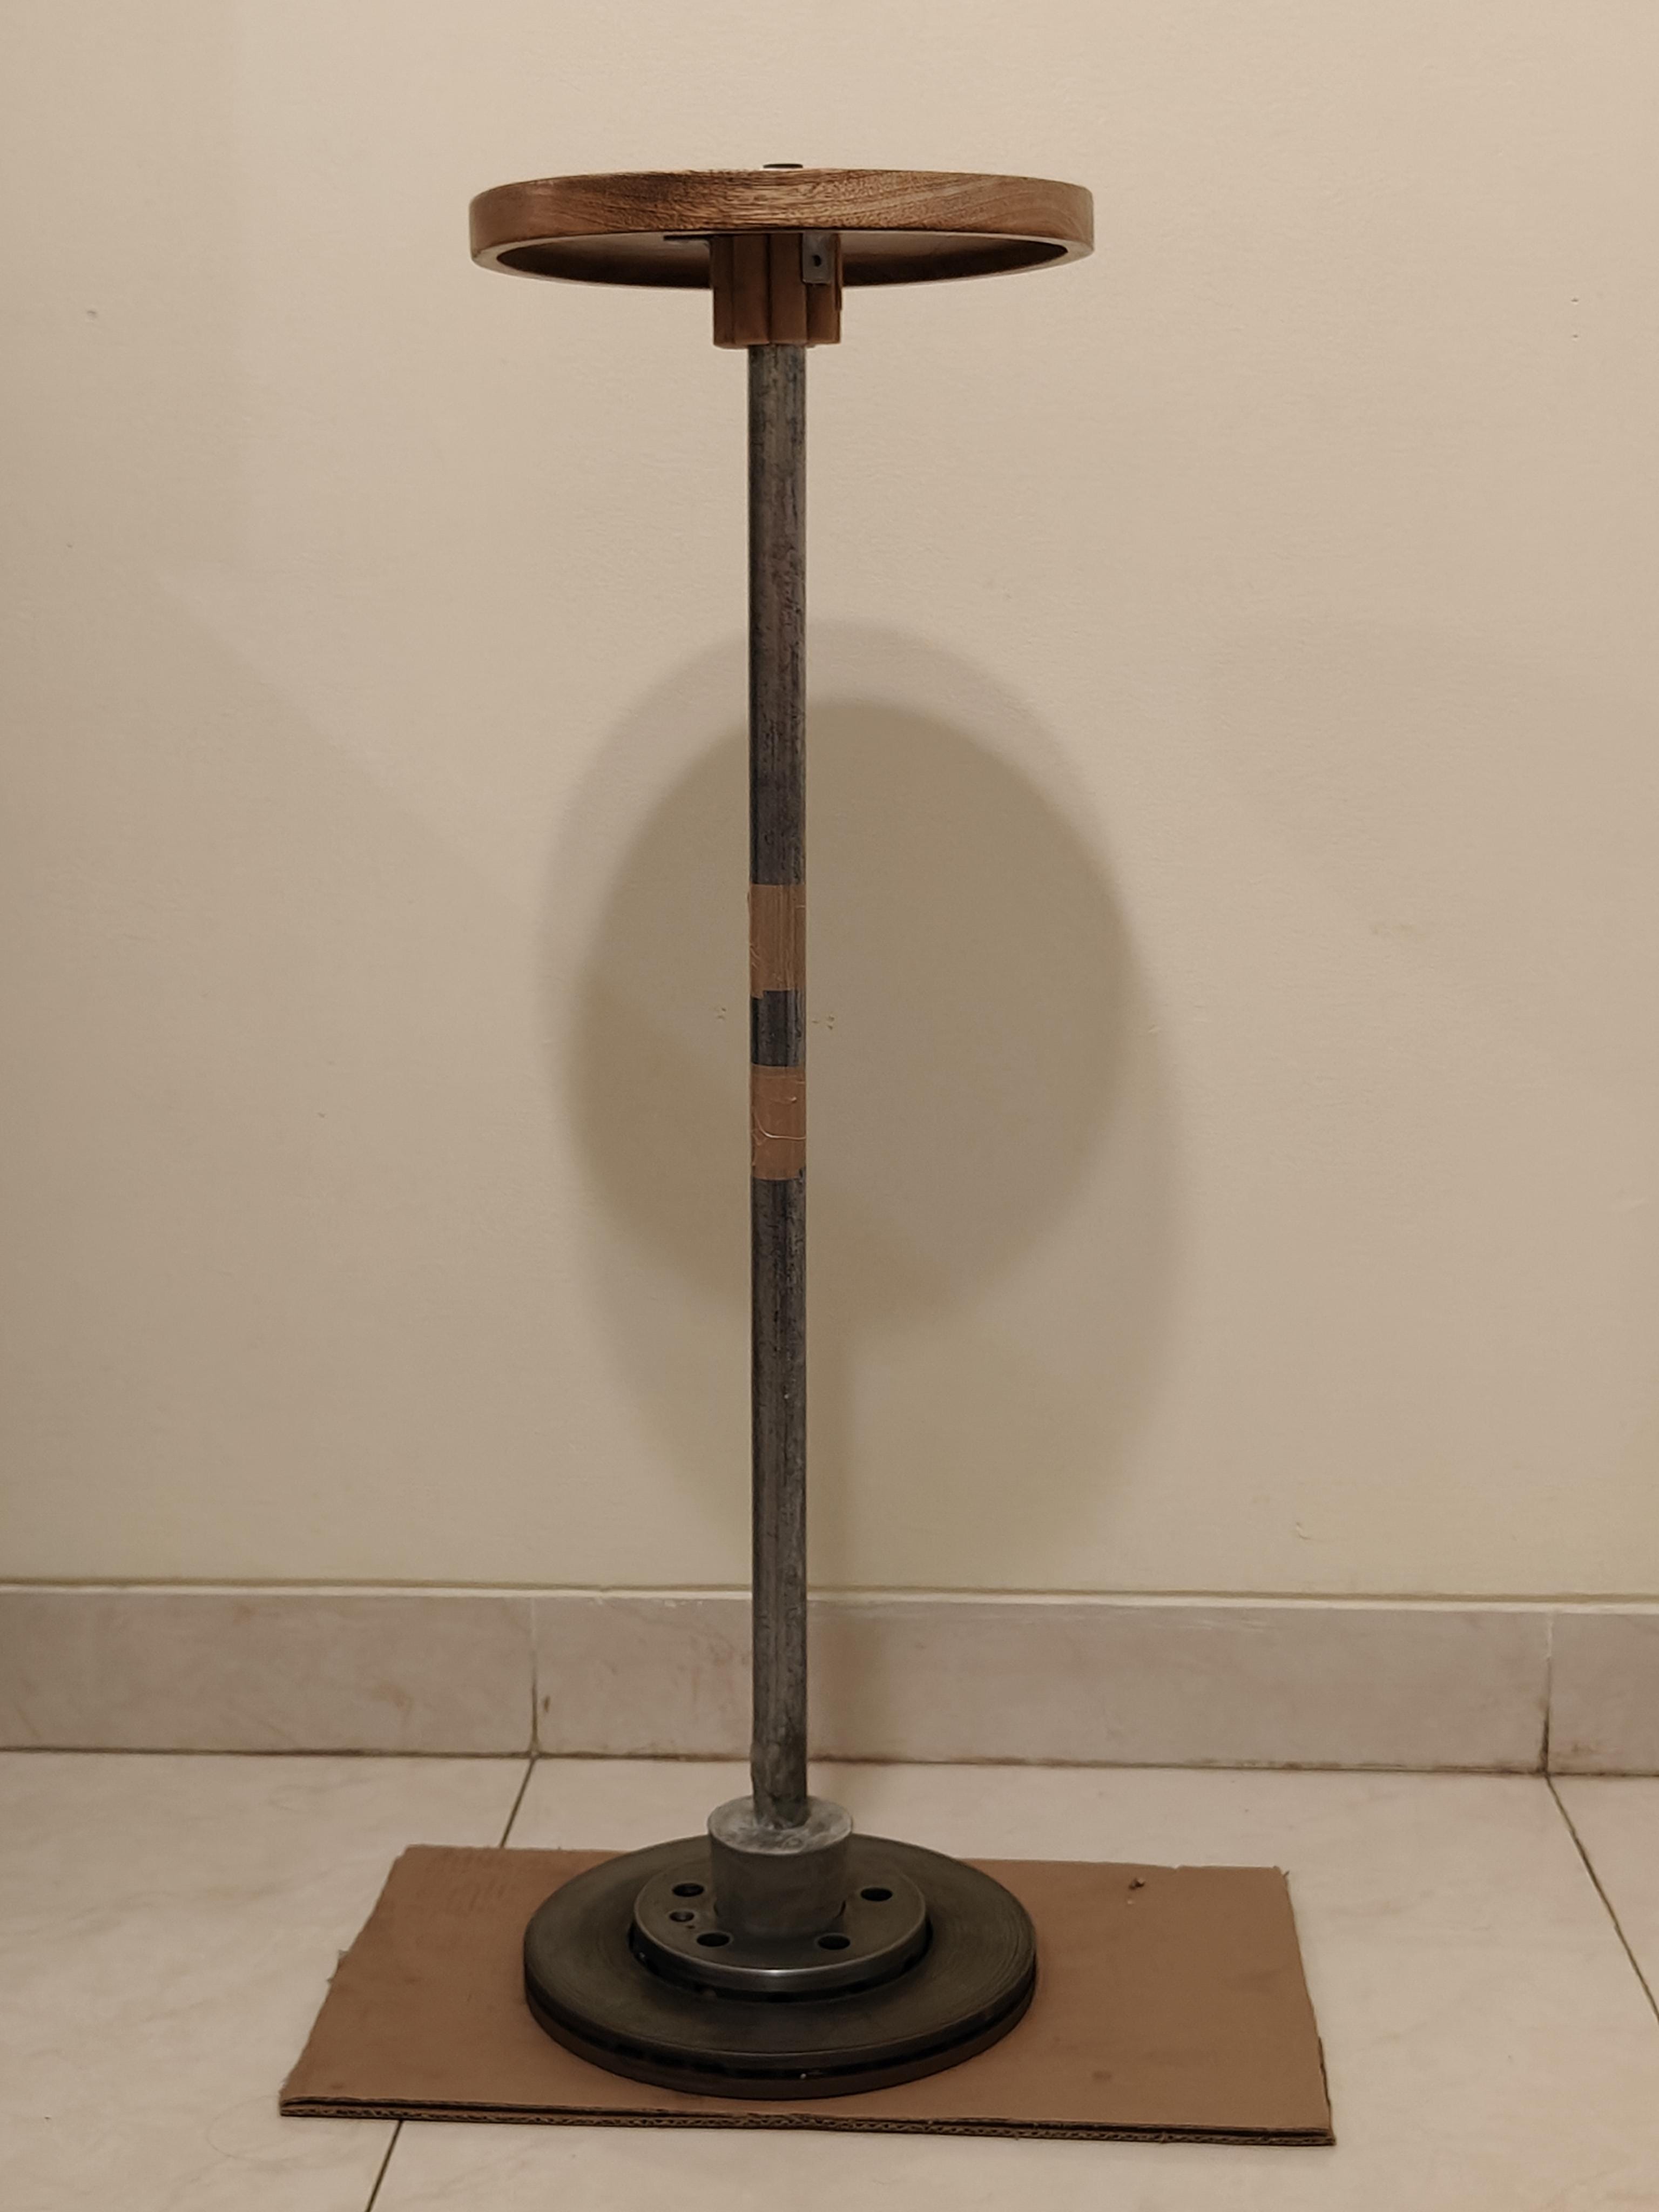
From sketch to this prototype assembly, oh! the happiness and a new surge of energy to complete the build. I began the paint job and also rubber padding to tie it all together.
The Paint Job Failure
Can things go right in first shot, at least for once? Nooo…!
I carefully painted double coat of primer on the pipe and brake disc, then after 2 days of waiting, spray painted them. Both pieces looks incredible but…it started to peel off! What now?
Then it hit me, my dumbass brain forgot to remove the oil applied on the brake discs and the pipe to prevent rusting during build process. Now I had to remove all the paint, primer and do it all over again…
I did.
From Prototype to Finalization
With the paint job finally done, rubber padding added to the base and top disc, it was time for the last step: screw it all together and start using it!
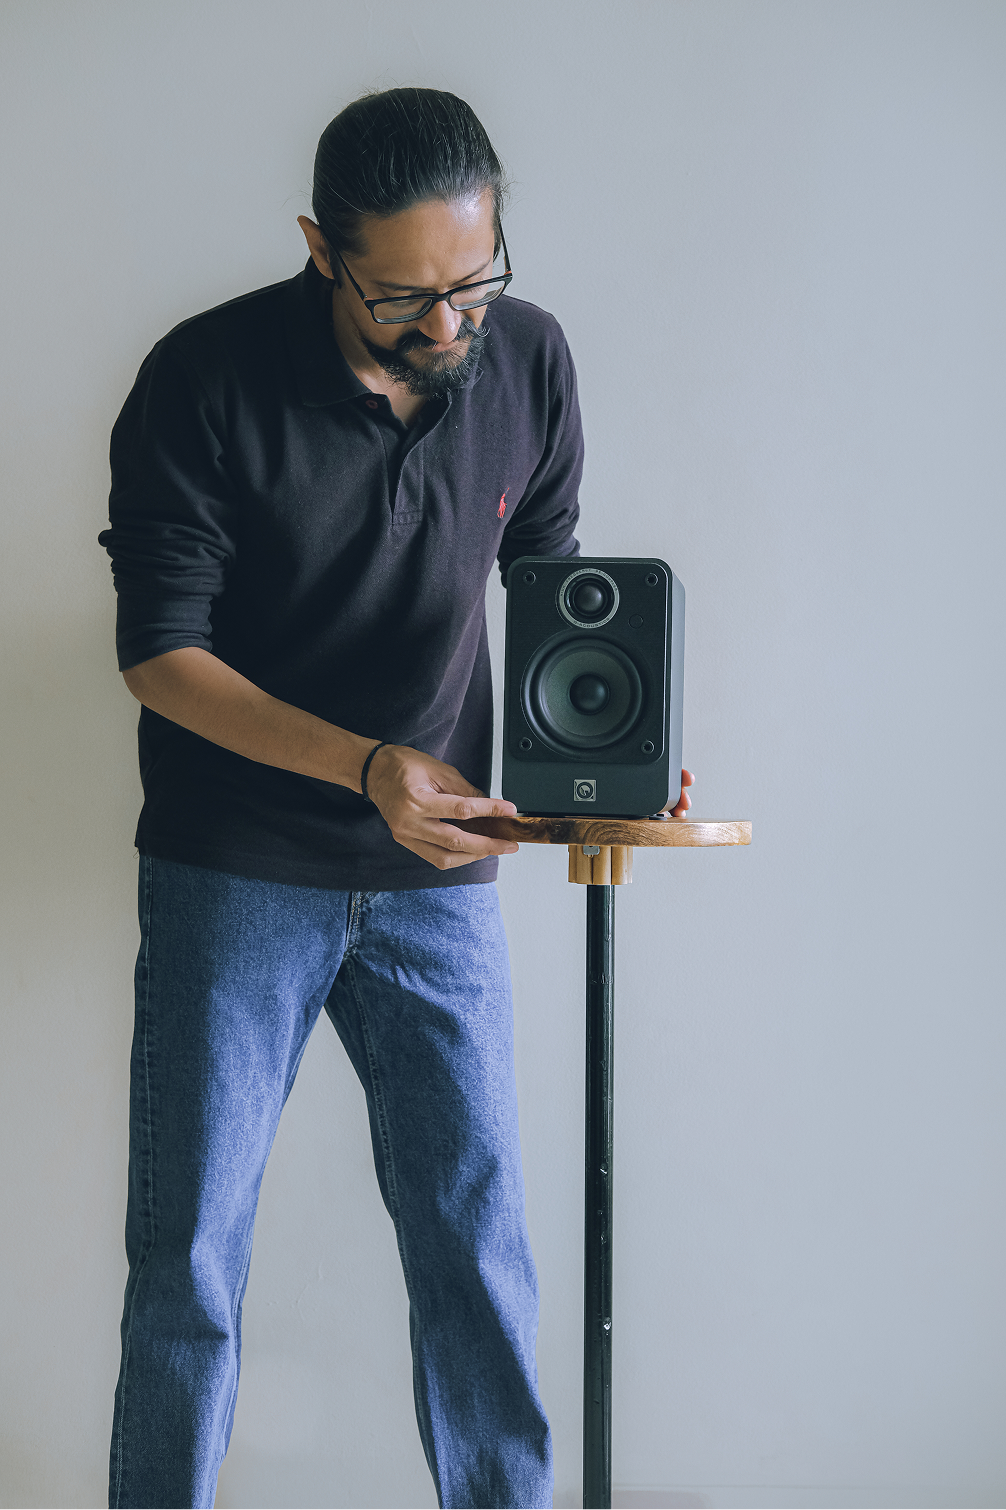
That evening, my happiness overflowed! Tears of joy, literally, seeing & admiring the whole piece standing like an art work. My wife hyping me up and cheering as I placed the speaker onto the top! This was it— the concept was a reality now!
I tested it for 5 days straight, checking any signs of weakness, loosing screws, or tilt—it was big success!

The Second Pedestal: Lessons Applied
As soon as the first wave of emotion settled, reality struck: I have to make another one or else this would be pointless!
Damn! But before that thought could overwhelm me, I sat down, donned my manager hat and drew a proper gantt chart! Since all the processes were already figured out, materials were ready, it shouldn’t take more than 6-9 days of effort to put the second pieces together.
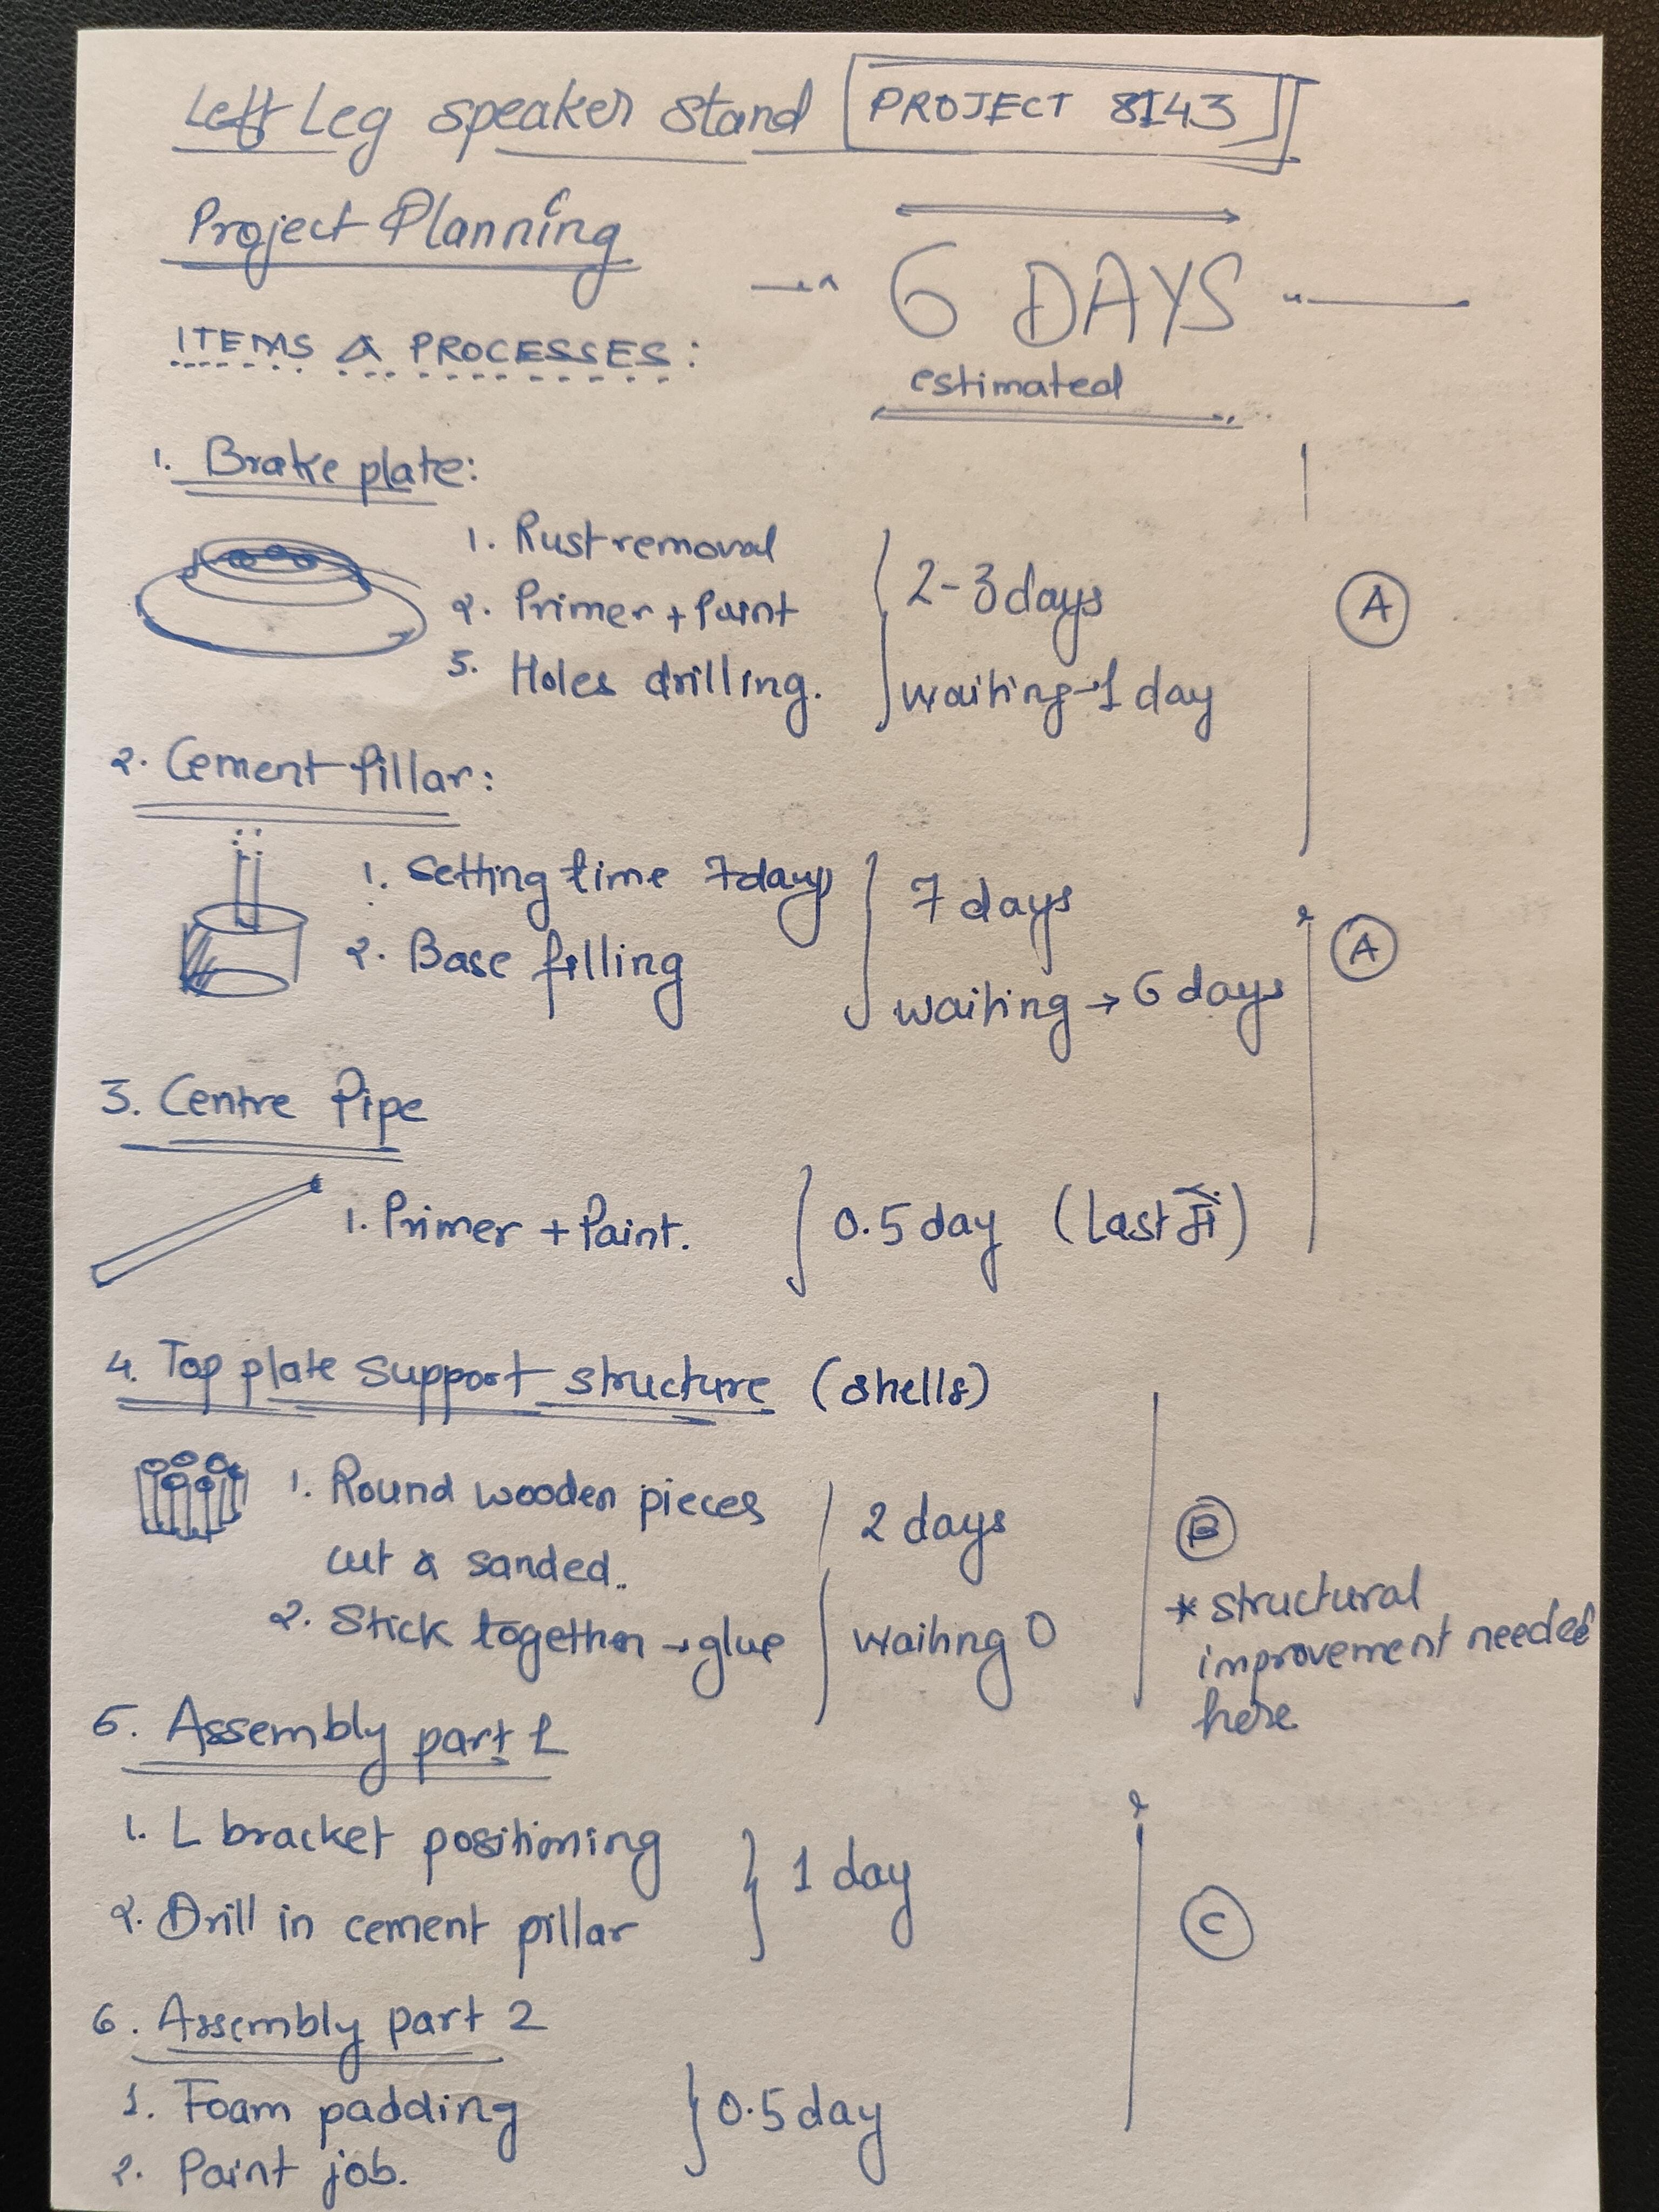
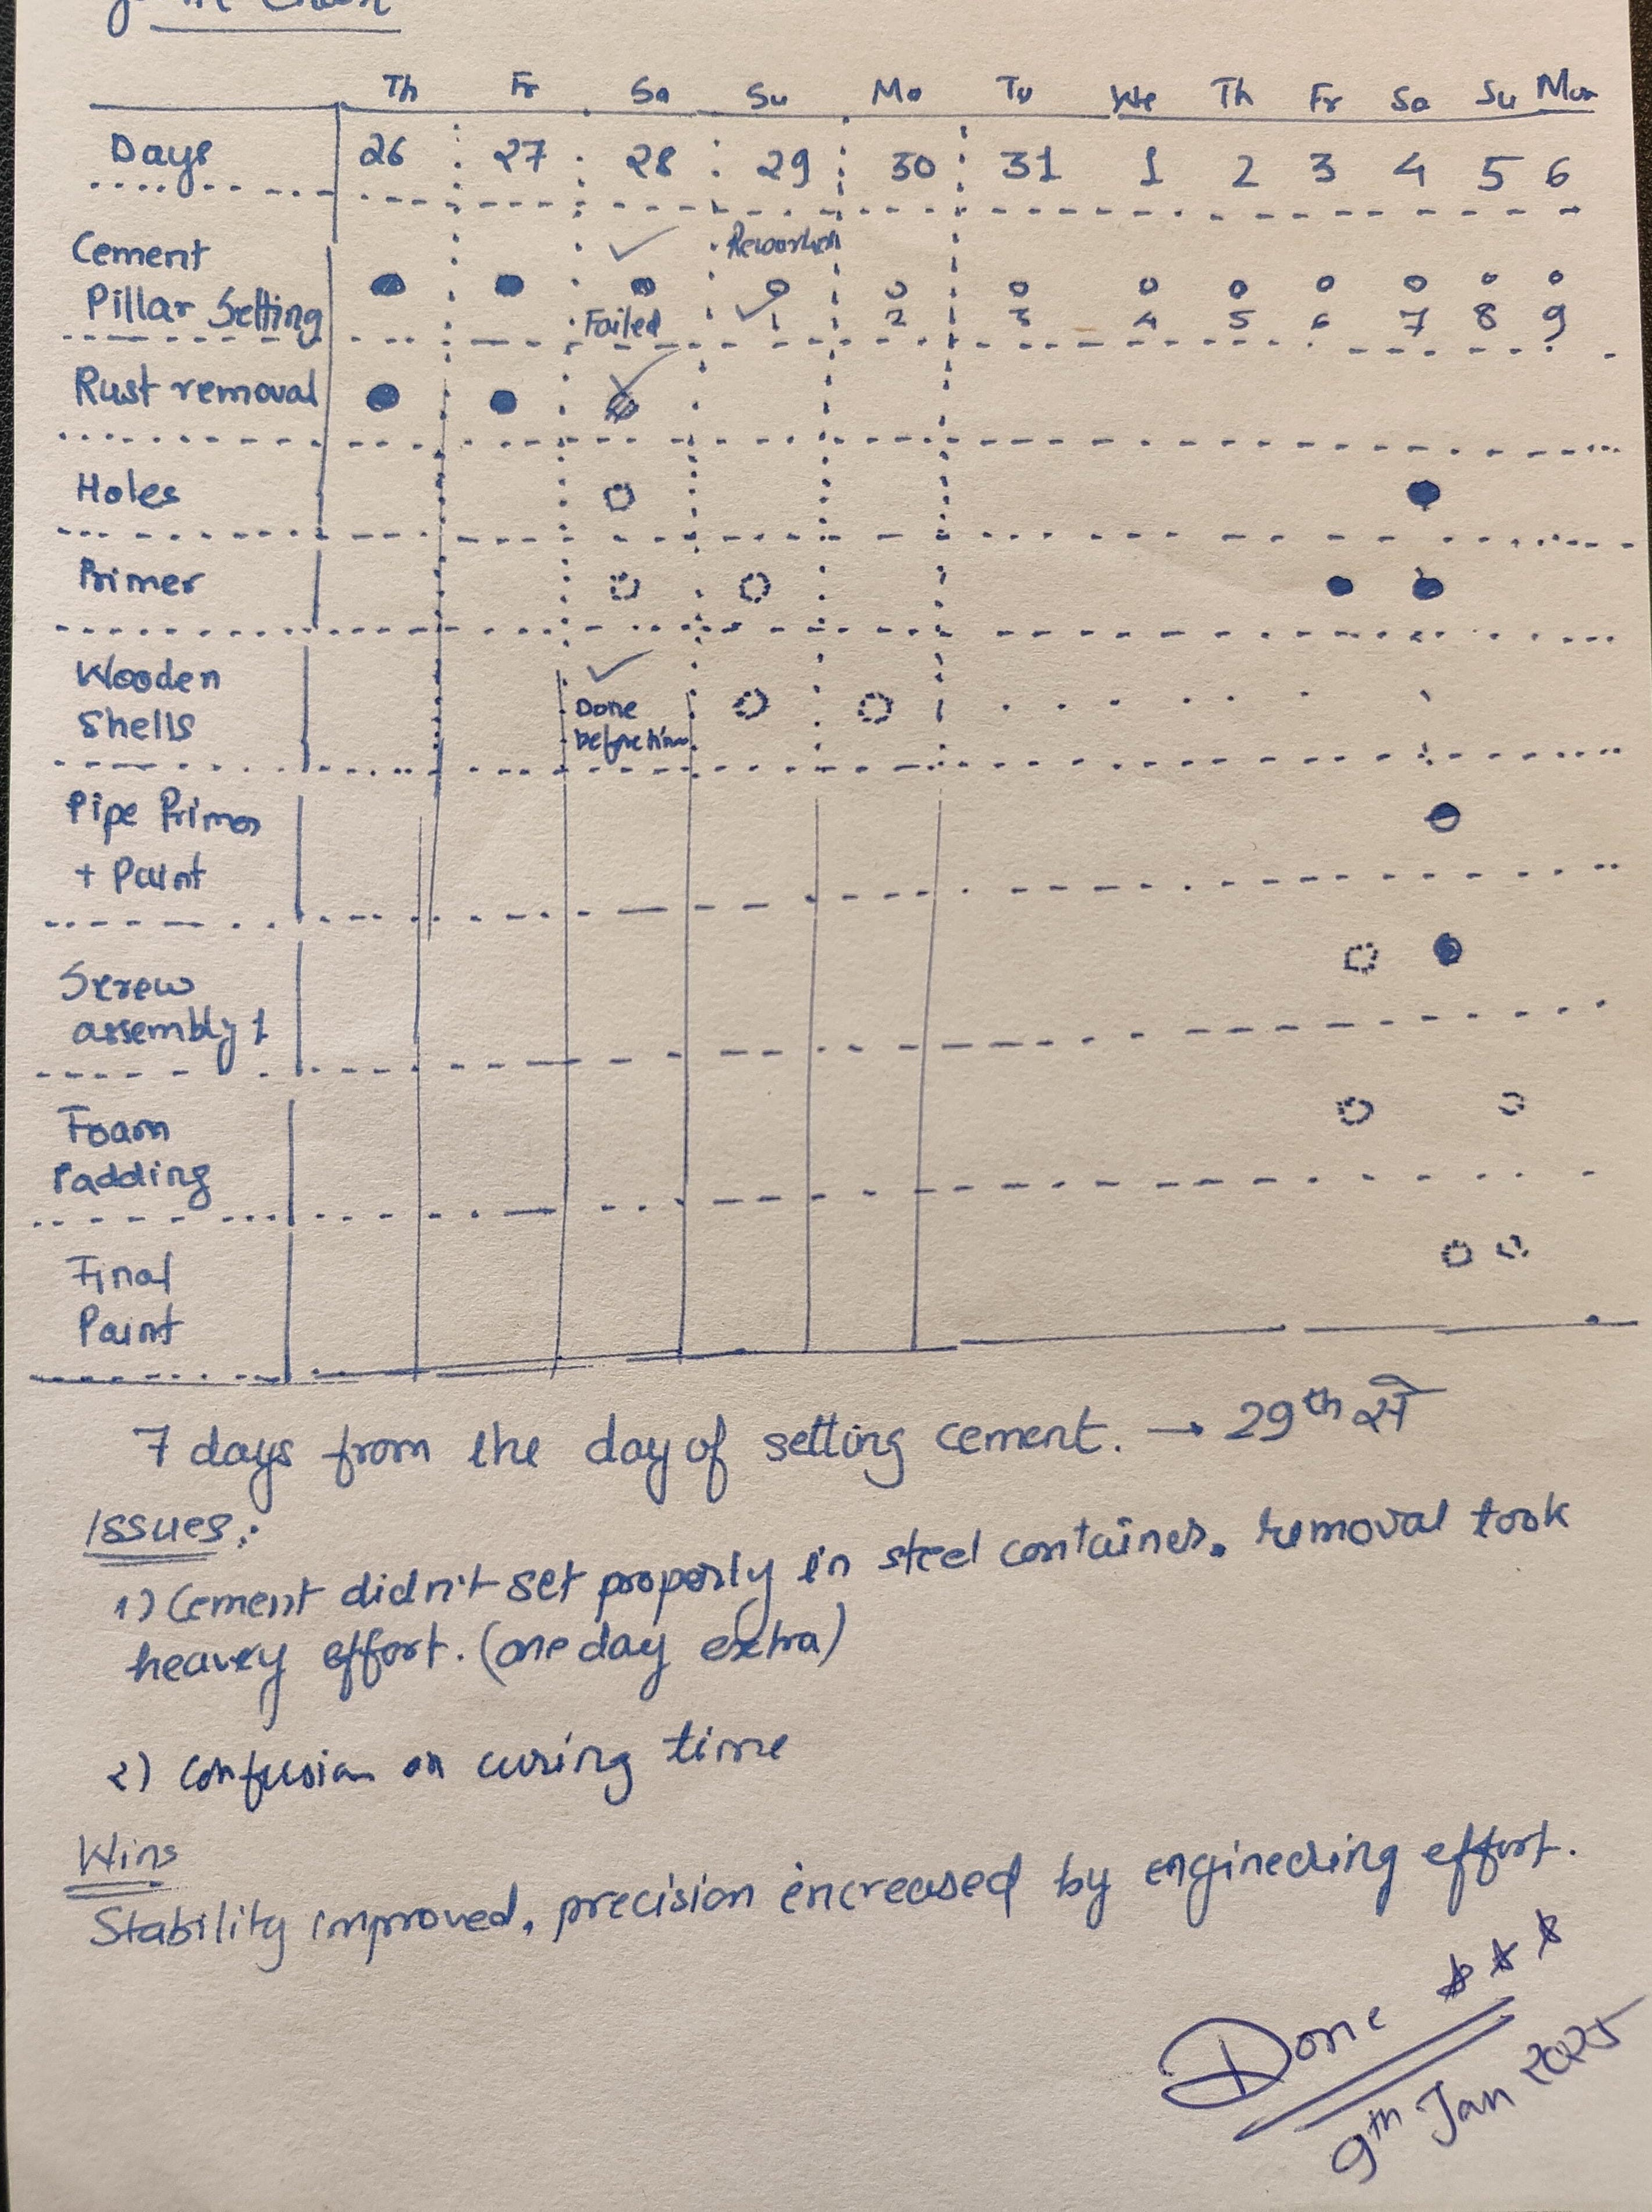
The second build was not only smooth in execution but the final product has 2x the sturdiness and sharper precision. With just a minor hiccup along the way (that cement shit screwed up again, couldn’t believe I made the same mistake again), it was all put together in a record time! Since I have already walked you through the process above, here are some images from the second build —
Woodworking
Cement Shenanigans
Positioning & Drilling
Precision Check
Final Assembly
Some touch-ups and the final product!

Final Thoughts
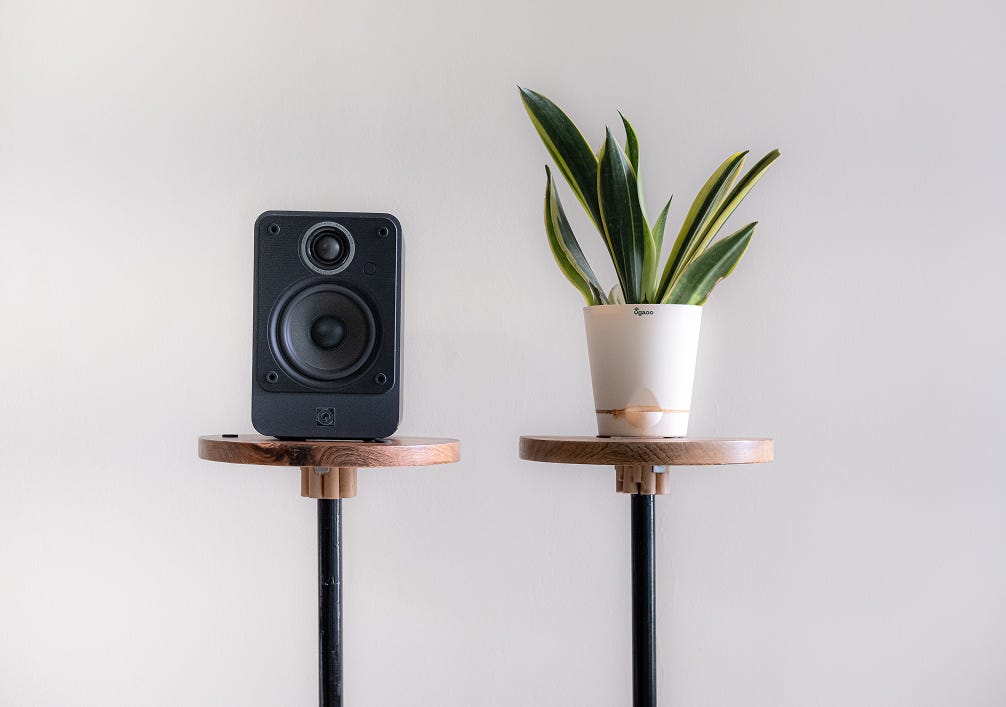
There is a deeper satisfaction in building things by hand, without a compulsion, repurposing scrap into something beautiful. It has been over two months since these two pedestals started elevating the decor of my living room, and I can’t get over how damn good they turned out!🕺🏻. The excitement, satisfaction and peacefulness that comes with crafting something yourself— that’s the best perk of being a designer.
One of the biggest lessons this project hammered home is that you got to build something to truly understand what it takes. A designer can never be theoretical, you gotta dive in, get your hands dirty, and wrestle with the mess. That’s where the real learning happens!
Did it sound better or the same?
Oh, absolutely, yes! Now I have freedom to set the distance between two speakers, and convergence angle which wasn’t possible earlier. All in all, totally worth every ounce effort.
Why it is called Project 8143?
Well, that’s the number of my beloved car VW Polo TDI, whose some parts will now live on with us, etched into these pedestals, even after it is retired.
Special thanks to my super talented friends at Ather Energy, Ashwin Raghunath, Senior Design Engineer and Suraj V., Head of Battery Engineering for their invaluable support, and expertise—without them it wouldn’t have been possible. And to my wife, who patiently put up with all the mess spread over these months and cheered me on through out the process! Beyond grateful!
Here’s to building!🍺 One piece at a time!

-Anurag Bartarey
www.abartarey.com | Buy my photo book here | More writings here
Footnote: In my city, the construction is rampant but now I ‘ve started wondering how underrated structural engineering and construction really are. How do they keep these pillars so precise? Why aren’t the walls of our huge apartments buildings even the slightest bit tilted? How is my floor so flawlessly flat? I am genuinely amazed!
Hey!
Such a detailed and fun articulation of this journey!